Provisioning Azure App Service Managed Certificates with PowerShell
March 17, 2021 by Anuraj
Azure AppService PowerShell
This article will discuss about provisioning Azure App service managed certificates with PowerShell and Azure Functions.
In November 2019, Microsoft Azure introduced a feature in Azure App services - no cost with App Service Managed Certificates (preview) - which helps developers to use Azure App services custom domains with free SSL certificate from Azure. The advantages of this feature is - Azure manages the certificate renewal and it FREE. You can checkout this blog post on how to configure it. As a developer the API was missing for this. There are some alternatives using ARM templates - webapp: Support the new appservice Managed certificates (preview). And this year, it came as part of Azure PS cmdlets. In this post, you will learn how to map a custom domain to an app service, then provision and bind a free app service managed SSL certificate to the domain name. It is implemented using Azure Functions with PowerShell. This implementation can be used for SAAS provisioning, if you want users to customize their instances with custom domain name with SSL certificates.
Firstly you need to create an Azure Function with PowerShell. You can use VS Code or Azure Function Core tools for creating the function project. Once you created the function, you will be able to see a structure like this.
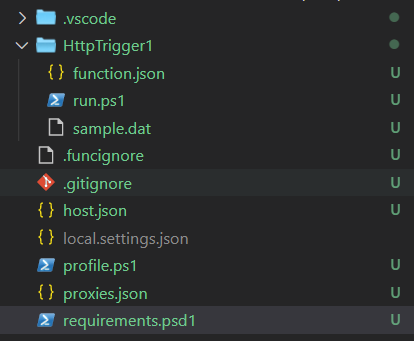
In this the requirements.psd1 as the name implies manages the modules required for the Azure Function. Inside the HttpTrigger1 folder the run.ps1 file is the Azure function code. Once you created it, you need to modify the requirements.psd1 file and un comment like to use Az module in the function.
@{
    'Az' = '5.*'
}
Now you can run the Az powershell commands in the function. To access an app service you need to connect to the Azure Account. You can do this using Connect-AzAccount command. Instead of using your portal credentials, it is recommended to create a service principal and use that in the code. You can find more details about creating service principal and associating roles here - How to: Use the portal to create an Azure AD application and service principal that can access resources.
Next you need to map the custom domain using Set-AzWebApp command. Once it is done, you need to use the New-AzWebAppCertificate command to provision the certificate and add binding to the web app.
Here is the complete implementation.
using namespace System.Net
using namespace System.Management.Automation

param($Request, $TriggerMetadata)
Write-Host "PowerShell HTTP trigger function processed a request."

$webappname = "YOUR-WEB-APP-NAME"
$resourcegroup = "YOUR-RESOURCE-GROUP-NAME"
$fqdn = "CUSTOM-DOMAIN-NAME-YOU-NEED-TO-MAP"
$azureAccountName ="AZURE-AD-APPLICATION-ID"
$azurePassword = ConvertTo-SecureString "AZURE-AD-APPLICATION-SECRET" -AsPlainText -Force
$azureTenant = "YOUR-SUBSCRIPTION-TENANT-ID"

$azureCredentials = New-Object PSCredential($azureAccountName, $azurePassword)

Disable-AzContextAutosave

$azureProfile = Connect-AzAccount -ServicePrincipal `
    -Credential $azureCredentials `
    -Tenant $azureTenant

Set-AzWebApp -Name $webappname `
    -ResourceGroupName $resourcegroup `
    -HostNames @($fqdn,"$webappname.azurewebsites.net") `
    -DefaultProfile $azureProfile

New-AzWebAppCertificate -Name $webappname `
    -ResourceGroupName $resourcegroup `
    -WebAppName $webappname `
    -HostName $fqdn `
    -AddBinding -SslState 'SniEnabled' `
    -DefaultProfile $azureProfile

$body = "Custom domain mapped and SSL certificate binding completed."

Push-OutputBinding -Name Response -Value ([HttpResponseContext]@{
    StatusCode = [HttpStatusCode]::OK
    Body = $body
})
In the code, first PSCredential object is created with the Azure AD Application - Application Id and Secret. The Disable-AzContextAutosave method turn off autosaving Azure credentials - otherwise when you execute the Connect-AzAccount command, PowerShell will store the secret information to a file and store it in the application user location. Connect-AzAccount command, connects to the Tenant with the credentials. The Set-AzWebApp command will map the custom domain to the app service. If you’re not configured the DNS provider and didn’t mapped the domain name to Azure app service, this command will throw error. So you need to make sure you’re configuring the CNAME changes in the DNS settings. And the New-AzWebAppCertificate command will provision the SSL certificate and bind it to the app service TLS/SSL settings.
To deploy the function to Azure, you can connect to Azure Subscription and Upload using VS Code.
You can use this as API endpoint and invoke it from your SAAS instance provisioning service. Or instead of using HTTP Trigger, you can use Azure Cosmos DB trigger or event grid trigger, so that when an entry is added in Cosmos DB or based on an event in Event grid, you can provision the instance. And instead of hard coding the values, you can configure it in Azure Function configuration and you can read it with the help of environment variables.
Reference Links
- No cost with App Service Managed Certificates (preview)
- How to: Use the portal to create an Azure AD application and service principal that can access resources
- Quickstart: Create a PowerShell function in Azure using Visual Studio Code
Happy Programming :)
Copyright © 2024 Anuraj. Blog content licensed under the Creative Commons CC BY 2.5 | Unless otherwise stated or granted, code samples licensed under the MIT license. This is a personal blog. The opinions expressed here represent my own and not those of my employer. Powered by Jekyll. Hosted with ❤ by GitHub