Build and run Angular application in a Docker container
November 22, 2022 by Anuraj
Angular Docker Container
This post is about building and running an Angular application in a Docker container. In this post I will be using nginx as a web server to host and run the angular application.
First I am creating an Angular application using ng new --skip-tests command. Next I am creating a file in the root folder with name Dockerfile. Next I am adding the following code.
FROM nginx:1.23.2-alpine
COPY ./nginx.conf /etc/nginx/nginx.conf
COPY ./dist/helloworld /usr/share/nginx/html
It is simple, first I am a container image from nginx - alpine - which is a small linux machine. Next I am copying the nginx.conf to the /etc/nginx directory and finally I am copying the angular CLI generated files to /usr/share/nginx/html folder. Before building the image, we need to create one more file nginx.conf which helps to serve the static html files. Here is the nginx.conf file.
events{}
http {
    include /etc/nginx/mime.types;
    server {
        listen 80;
        server_name localhost;
        root /usr/share/nginx/html;
        index index.html;
        location / {
            try_files $uri $uri/ /index.html;
        }
    }
}
Most of the configuration I copied from nginx docs to serve static files. The listen element is the port where nginx listens. The root is the web root location. And the index element configures the default file - in this case index.html file. The location element configures the fallback code - for routing purposes. The nginx.conf file should be in the root directory as well. Now build the image using docker build . -t anuraj/helloworld:1.0.0 command. As my docker hub id is anuraj I am using that to tag the container image. Also make sure, you’re build the angular application using ng build otherwise the docker build command might fail.
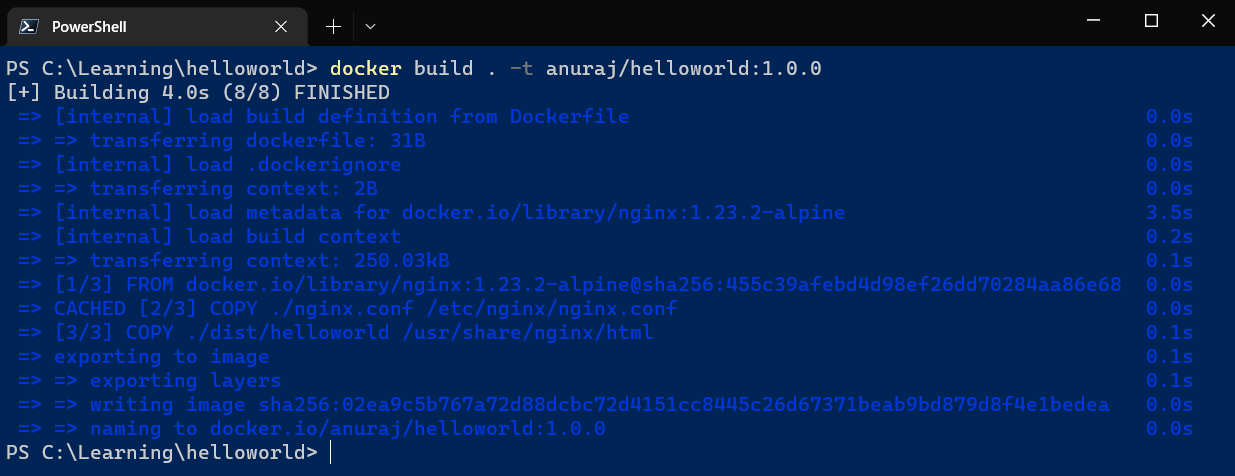
Next we can run the application using docker run command like this - docker run -d -p 8081:80 anuraj/helloworld:1.0.0. Now we can browse the app with the URL http://localhost:8081/
In this approach we are building the angular app in the developer machine. It is better if we are able to build the angular app in the container instead of building it in the developer machine. Docker offers multistage containers which helps to build and run the app in the container. So lets modify the docker file with angular build step.
FROM node:19-alpine AS build
WORKDIR /usr/src/app
COPY package.json package-lock.json ./
RUN npm install
COPY . .
RUN npm run build

FROM nginx:1.23.2-alpine
COPY ./nginx.conf /etc/nginx/nginx.conf
COPY --from=build /usr/src/app/dist/helloworld /usr/share/nginx/html
Here is the explanation of the multi stage build file. First we are creating a container image - build with node:19-alpine image. Then we are copying the package.json and package-lock.json to the /usr/src/app location - it is to execute the npm install in the container image. Once the install the angular dependencies, we are copying the source directory to the target directory and execute the npm run build which will compile the angular project. And in the second container build we are using the files / output from the build image like this - COPY --from=build /usr/src/app/dist/helloworld /usr/share/nginx/html
If we look into the logs, it is taking some time to build the container image. It is because while building the container image, docker will copy all the files from the source directory to the container image directory - which is not required. So we can create another file - .dockerignore - which is similar to the .gitignore which ignore all the files and folders inside the file. Here is the contents of the .dockerignore file.
dist
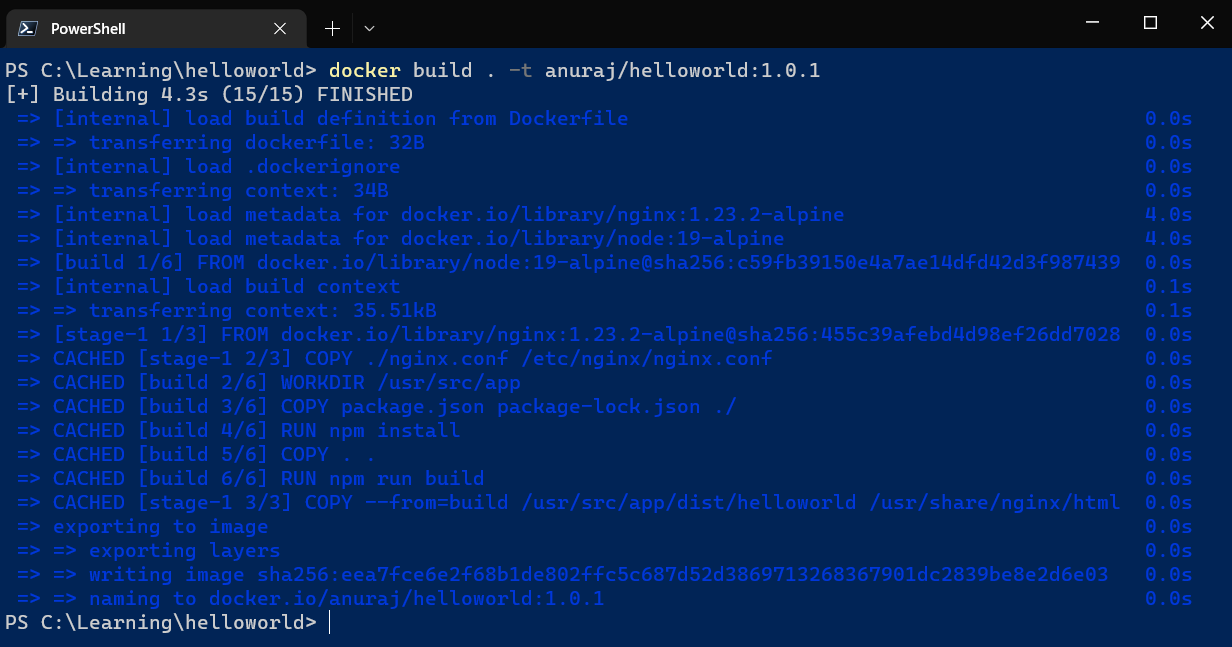
node_modulesAnd finally build the container image with the command - docker build . -t anuraj/helloworld:1.0.1 which will build the container image like this.
And we can run the docker container like this - ` docker run -d -p 8081:80 anuraj/helloworld:1.0.1`. Now we can browse the application using http://localhost:8081.
This way we can containerize angular applications. We can also use some other server instead of nginx.
Happy Programming.
Copyright © 2024 Anuraj. Blog content licensed under the Creative Commons CC BY 2.5 | Unless otherwise stated or granted, code samples licensed under the MIT license. This is a personal blog. The opinions expressed here represent my own and not those of my employer. Powered by Jekyll. Hosted with ❤ by GitHub