Create a build pipeline for Angular and ASP.NET Core apps with Visual Studio Team Services
August 05, 2018 by Anuraj
ASP.NET Core Angular
This post is about creating a build pipeline for your Angular and ASP.NET Core apps with Visual Studio Team Services. If you don’t have a VSTS account, you need to create a VSTS account, then a project, you can use default values. In this post I am using GitHub as my source control. And I am using VSTS only for creating a build. Once you create a project, click on Build and Release menu. And click on the New definition button.
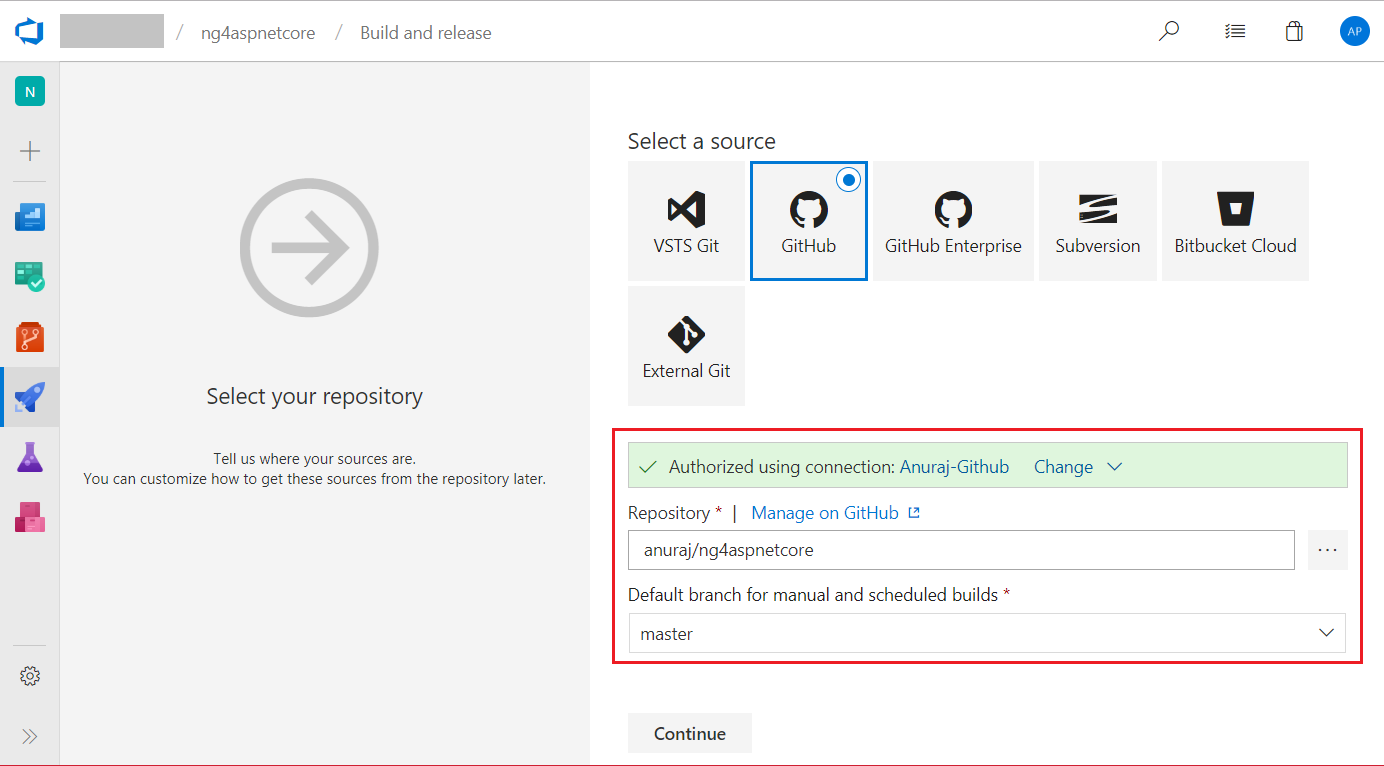
Next you need to choose your repository, select GitHub and if you are connecting first time, you need authorize GitHub. Once GitHub is authorized, you can select the repository and select branch you want to build, in this case I am using master branch.
Next you need to select the template, if you are using ASP.NET MVC, you can choose that. Since I am using ASP.NET Core, I am choosing the ASP.NET Core template, it will be available under Others section.
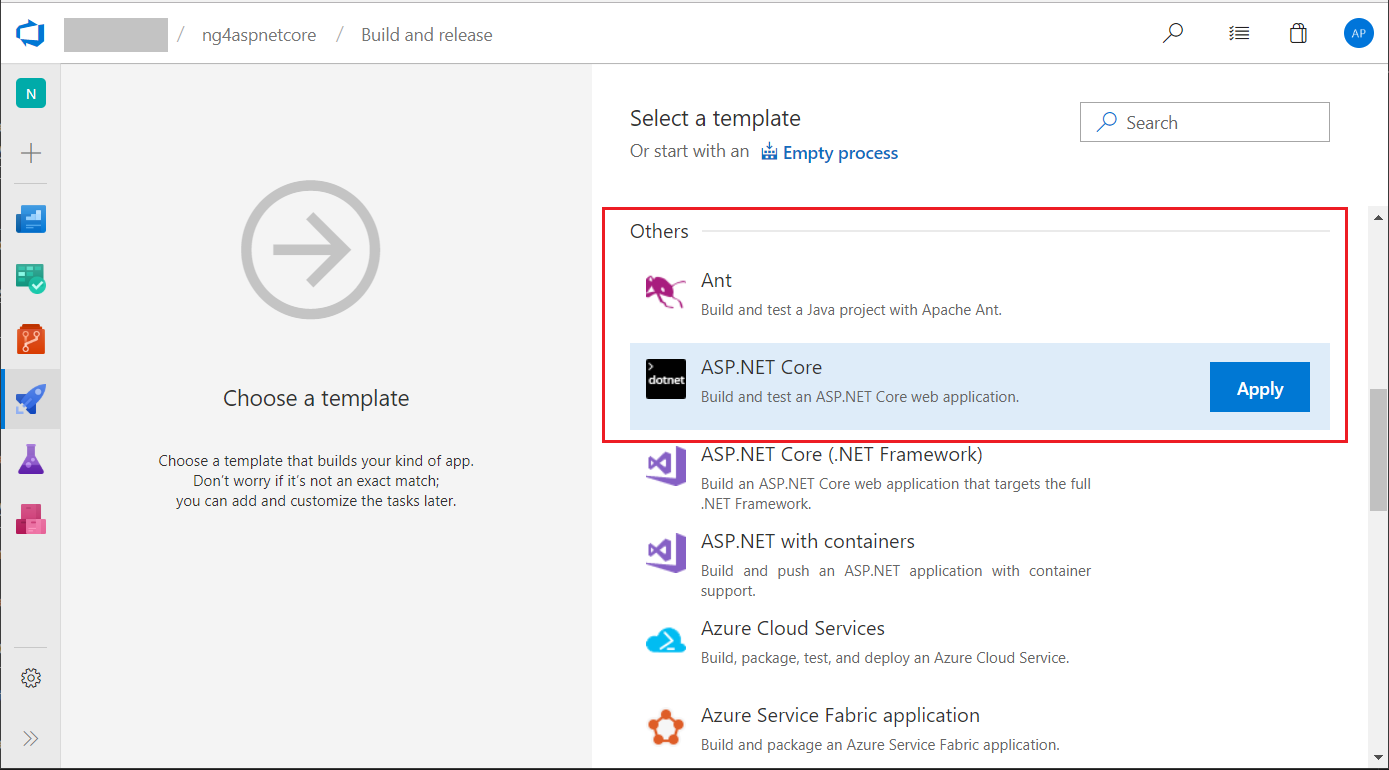
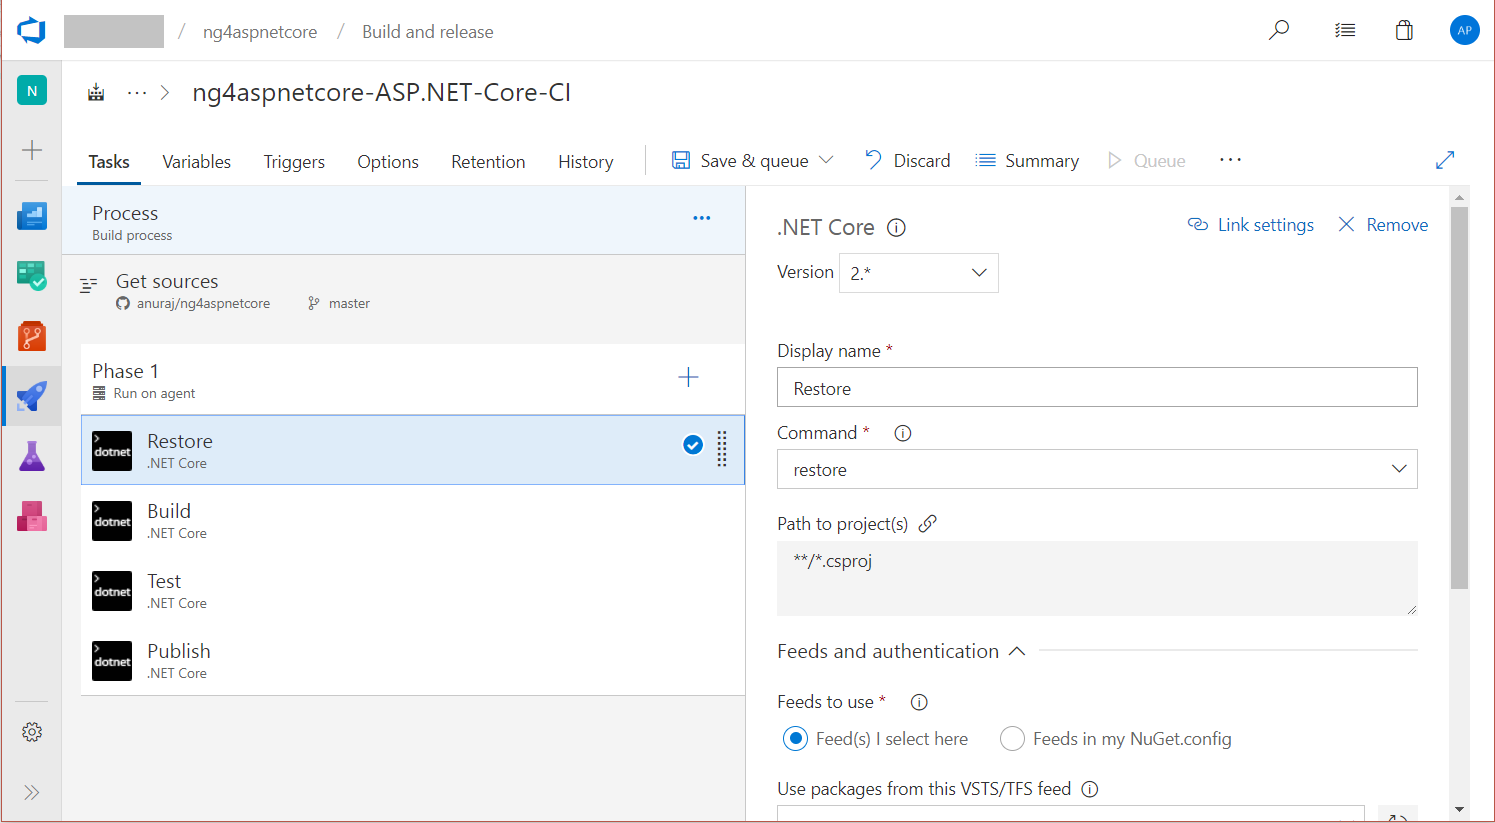
Click on the Apply button, which will redirect you to the build steps page. In the steps page, you can choose the Agent machine, and configure any custom build steps. By default the steps commands will be dotnet restore, dotnet build, dotnet test and finally dotnet publish.
For building Angular along with ASP.NET Core, you need to add build steps. For building Angular, first you need to install the dependencies using npm install command, next you need to build the application, you can use ng build command and if you want to run some code analysis you can run ng lint command. You can click on the plus (+) button on the Phase 1 item and from the list in right side, search for npm and select the first one.
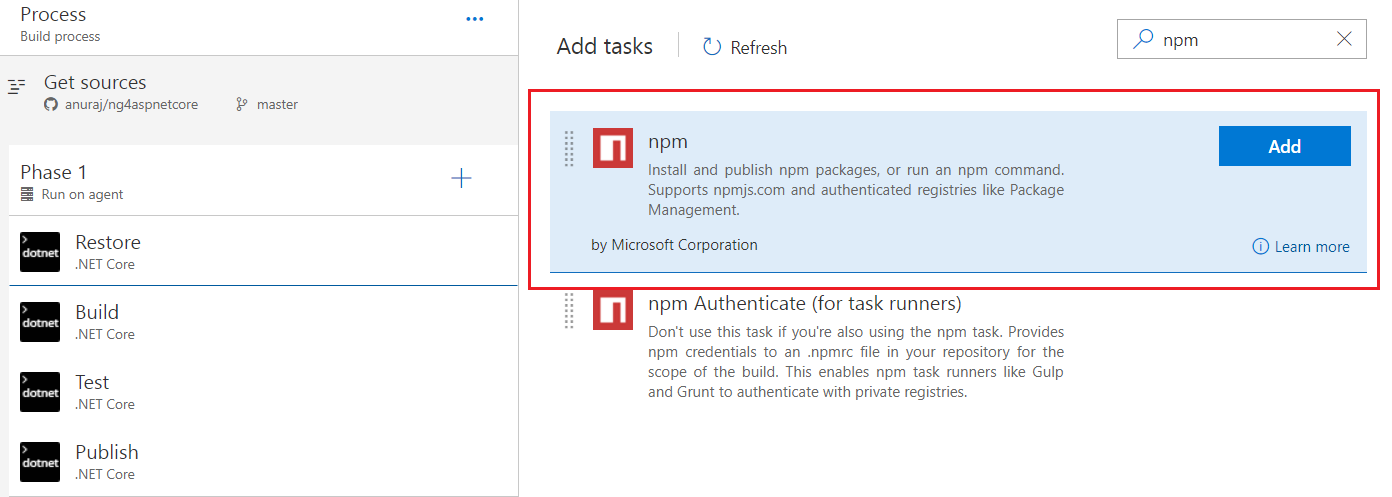
Click on Add, the first one will be by default npm install. You can change the position of the build step if required, in this post, I am building the angular app before building the ASP.NET Core app. And from the options you need to choose the package.json file location.
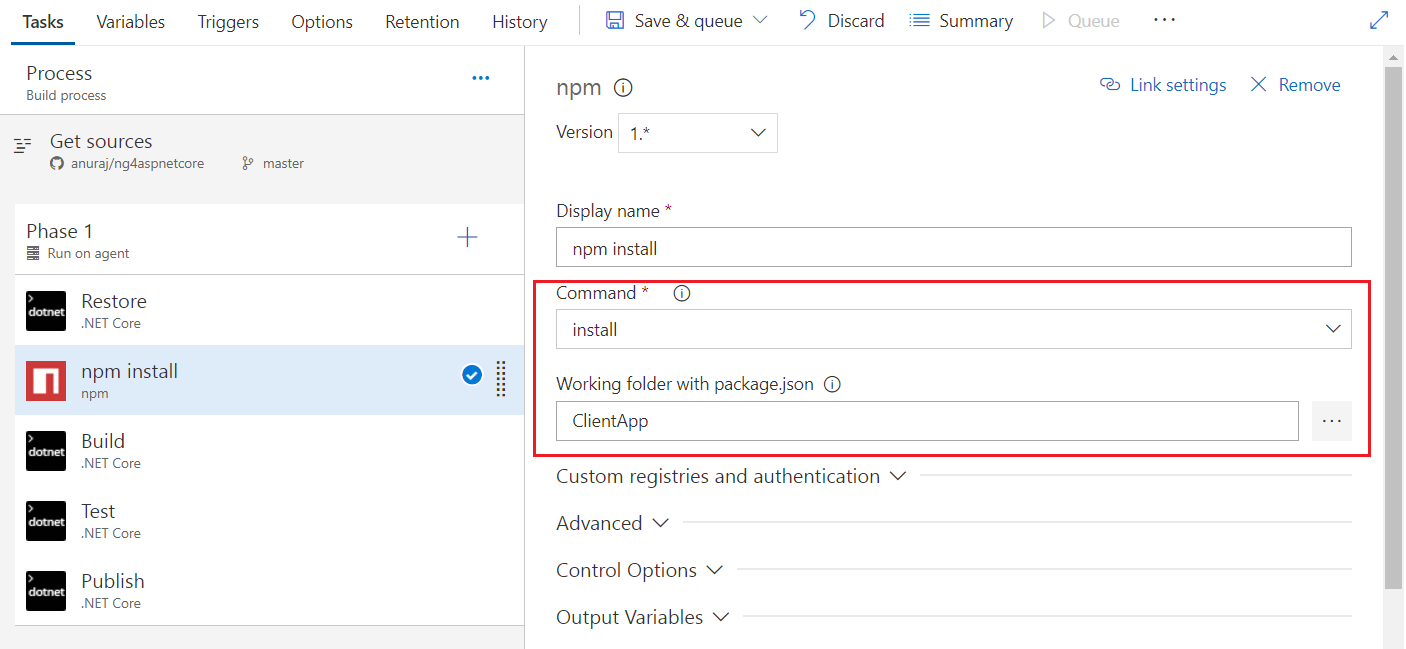
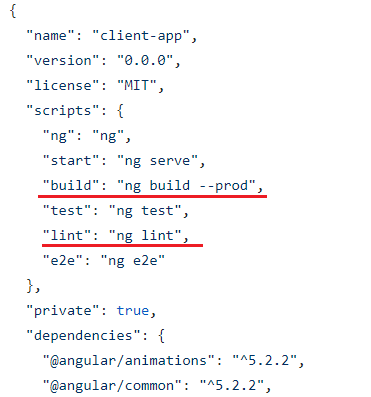
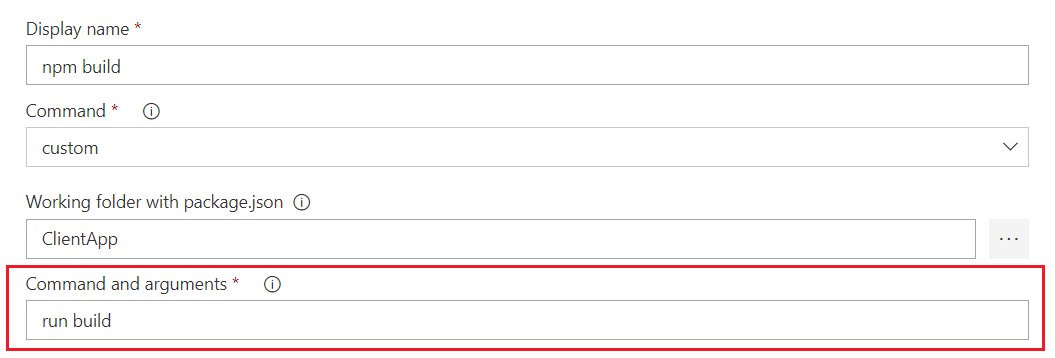
In this case my package.json exists in the ClientApp folder, and I choose that. Now while running the build, after restoring the nuget packages, VSTS will run the npm install command and install the node dependencies. Once the dependencies are installed, you need to run the build command. For that, you can again add a NPM task, and instead of install command, select Custom option. Choose the package.json file location. In the Command and arguments option, you need to give the command to build the angular project. If you try to use ng build command, it may not work. To get the command, first open your package.json, and look for scripts element, there you will be able to see different names and their commands.
You need to provide this command in the Command and arguments option like this run build.
You can do the same steps for running a ng lint command as well.
Here is my complete build setup.

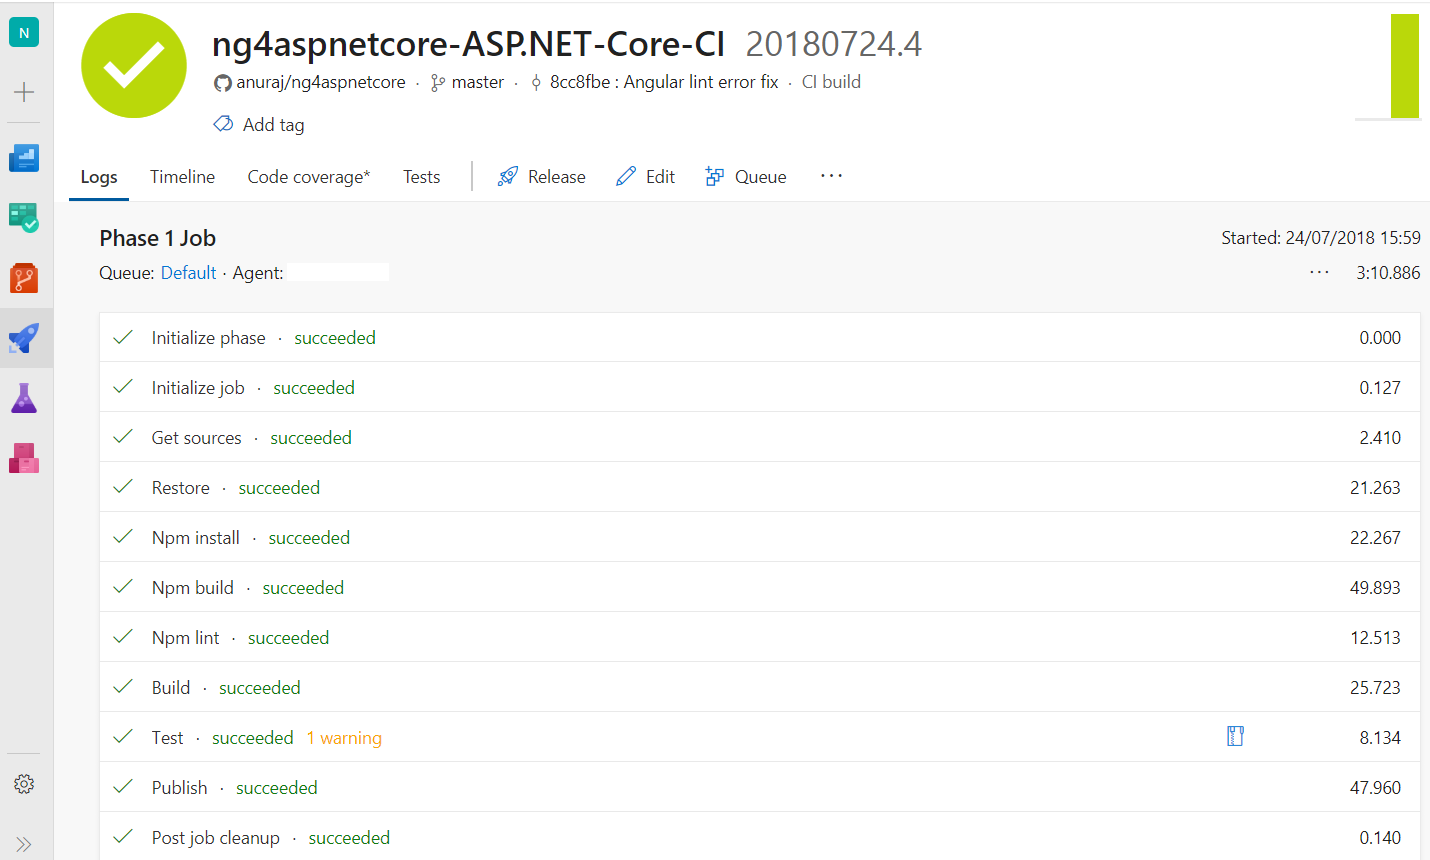
And here is the log after completing the build.
You can configure CI / CD DevOps practices with VSTS very easily. Once you configure the build you can create a Release pipeline to push the changes to Azure Web Apps or to FTP. The extensibility features of VSTS very handy when you want to run custom commands like this.
Happy Programming :)
Copyright © 2024 Anuraj. Blog content licensed under the Creative Commons CC BY 2.5 | Unless otherwise stated or granted, code samples licensed under the MIT license. This is a personal blog. The opinions expressed here represent my own and not those of my employer. Powered by Jekyll. Hosted with ❤ by GitHub