Creating Microsoft Teams Applications with Visual Studio and .NET
November 25, 2023 by Anuraj
DotNet Teams VisualStudio
This post is about creating Microsoft Teams applications with Visual Studio and .NET. For creating Microsoft Teams applications, I am using the Teams Toolkit - which will make teams apps development simple. It is available in VS Code as well. We also require Microsoft 365 Developer account which we can create free.
Installing the Teams Toolkit
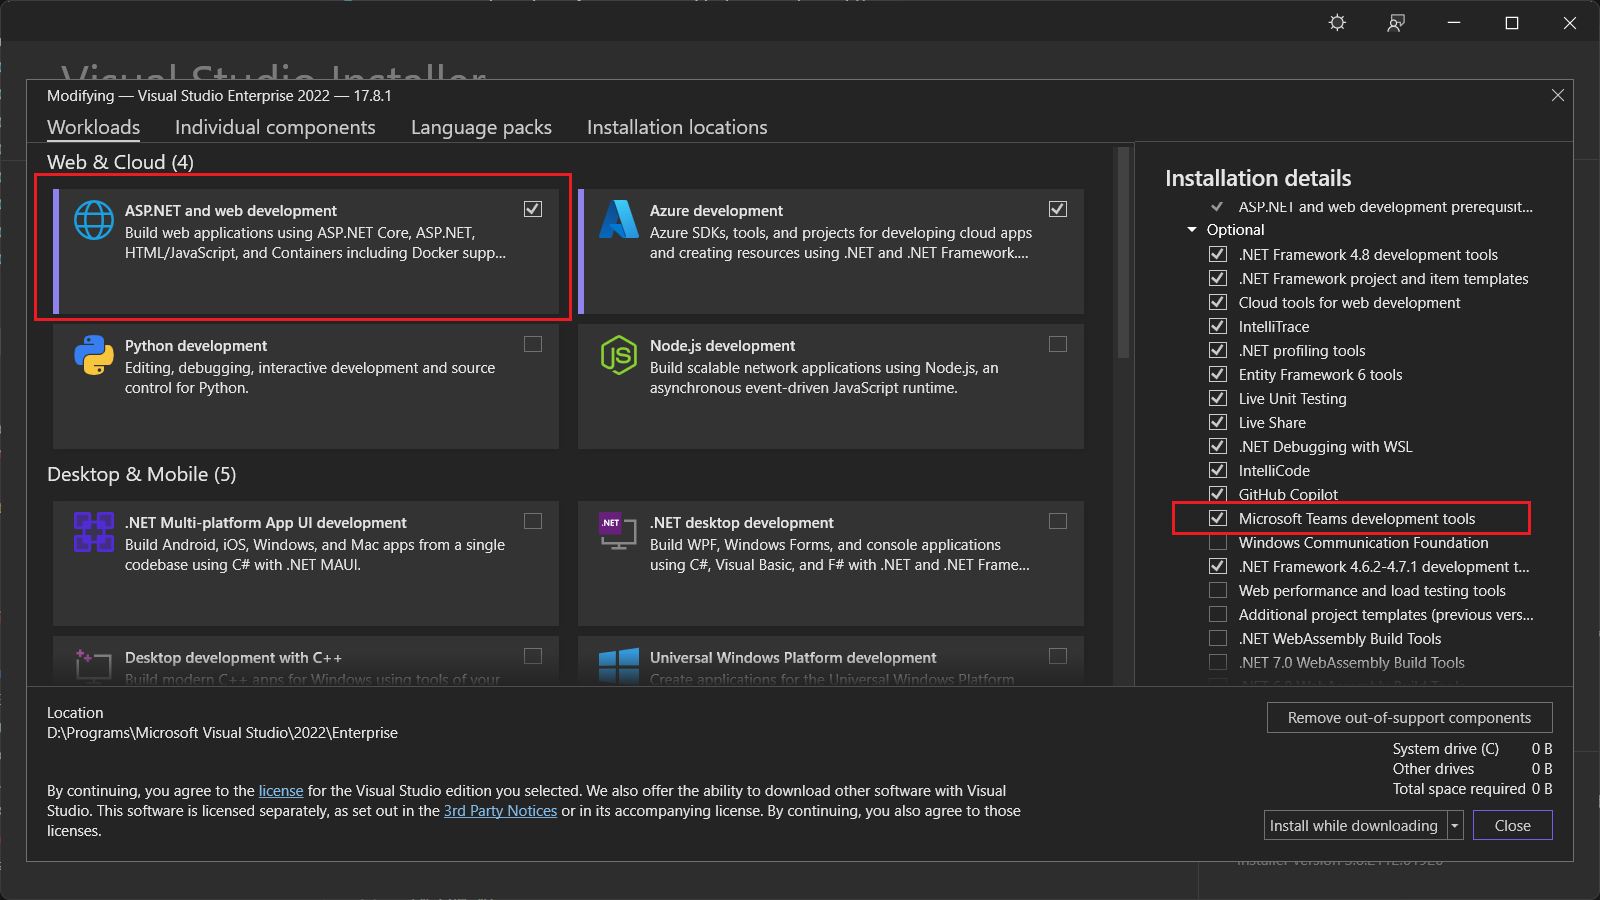
To install Teams Toolkit, open the Visual Studio Installer, and select modify option, under ASP.NET and Web Development workload, select Microsoft Teams development tools. This will install the required project templates and tools for creating and managing Microsoft Teams Apps from Visual Studio.
Creating new Teams application
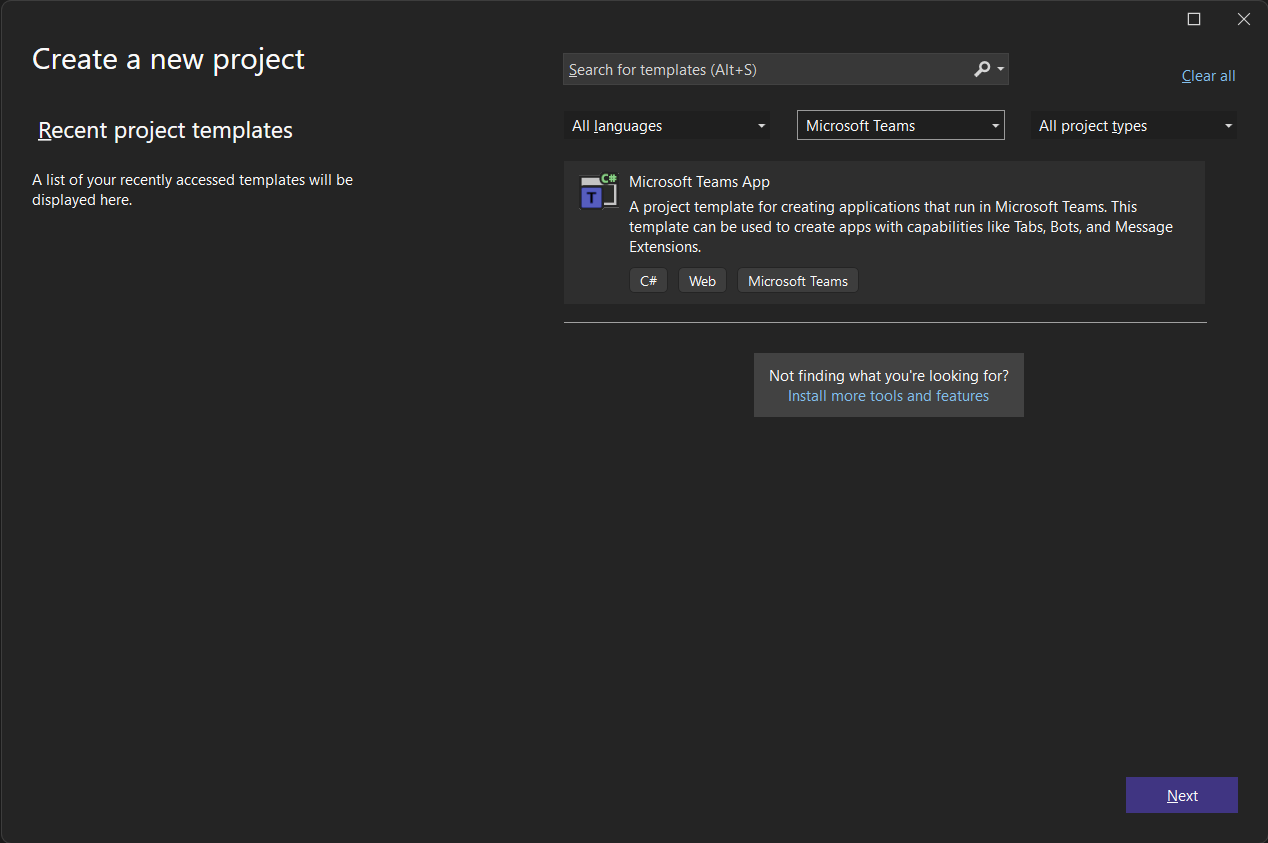
Once Teams Toolkit installed, we can open Visual Studio, and click on the New > Project, from the list of platforms, we can select Microsoft Teams - which will filter the project templates and will display Microsoft Teams App project.
We can click on Next to create new project, in the next screen we can configure the name and location of the application. Then when clicking on the Create button will popup a screen where we can select different types of Teams applications we can create. In this example, I am using Notification Message - which will help us to display notification on Teams.
Here is the details of the other types of applications.
| Template | Description |
|---|---|
| Tab | This project template will help us to display a user interface in Teams. We can use this template to move existing apps to Teams without full rewriting of the application. |
| Echo Bot | This is a simple Bot template which respond with the text we input in the chat window |
| Chat Notification Message | This is also kind of Bot - which will display messages in chat - which can be triggered using Http endpoints and timer trigger. When we select this template, we will be able to configure the trigger. |
| Chat command | This is similar to echo bot - but useful in simple command execution scenarios. |
There are few new templates also available. I am not discussing about them in this blog post. As mentioned earlier we will be looking into the Chat Notification Message template.
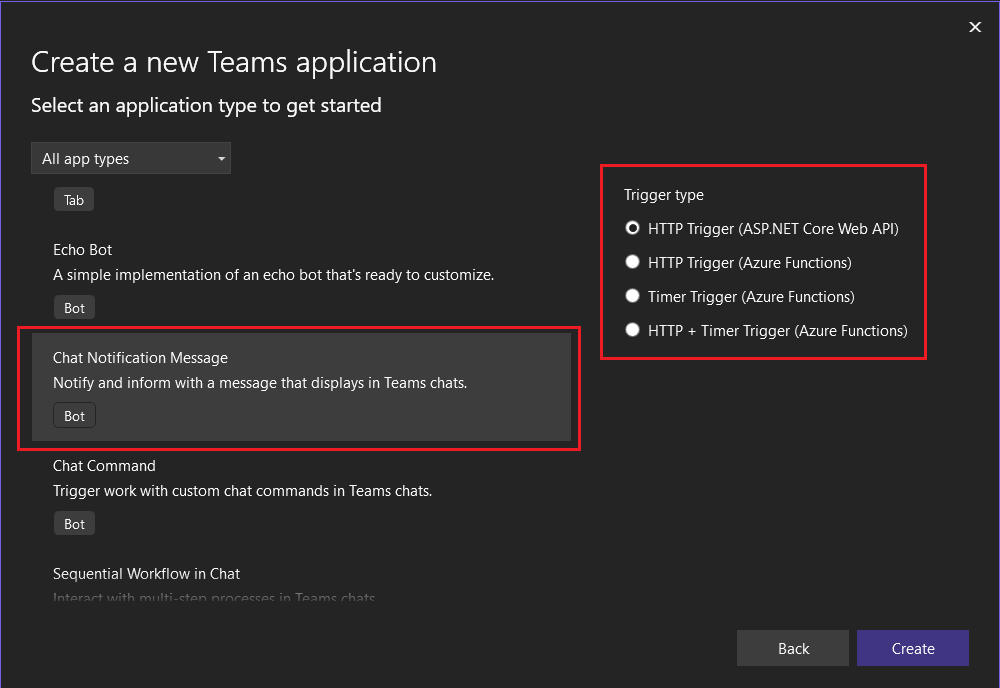
The first Trigger type is HTTP Trigger (ASP.NET Core Web API) which will trigger notification message when we sending a POST request to API endpoint. The other three triggers using Azure Functions, HTTP Trigger, Timer Trigger and HTTP + Timer Trigger - with two Azure functions. I am using ASP.NET Core Web API trigger.
Project structure
The project is an ASP.NET Core Web API application with extra configuration values and extra services.
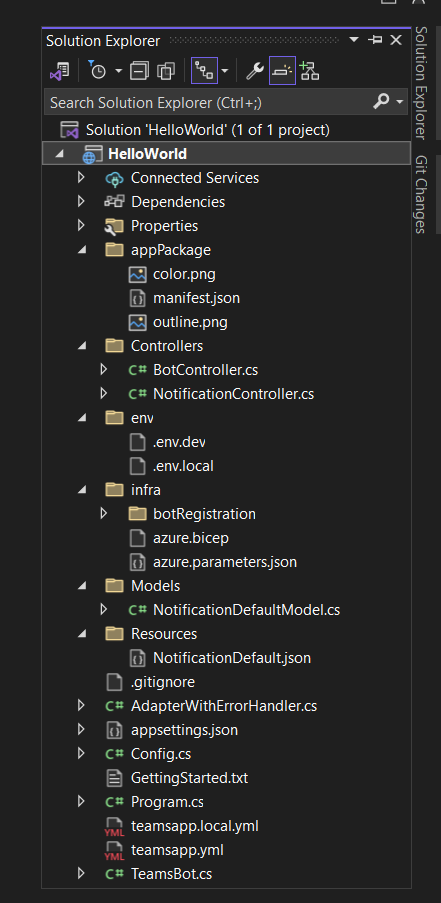
In the project, the teamsapp.local.yml and teamsapp.yml files help us to debug and deploy Bot Application - when we build the application, Teams toolkit will provision various resources using the yml files based on the environment. Output of the yml files generated under the env folder. Resources folder contains the JSON file for Adaptive card. The TeamsBot.cs file is the implementation of TeamsActivityHandler. The infra folder contains various bicep files to deploy the Bot application.
Debugging the application
To debug the project, first we need to configure Dev Tunnel - which will help us to expose the localhost URL to Teams. We can click on the Microsoft Teams (browser), and select Dev Tunnels, and then select Create a Tunnel which will bring a dialog like this.
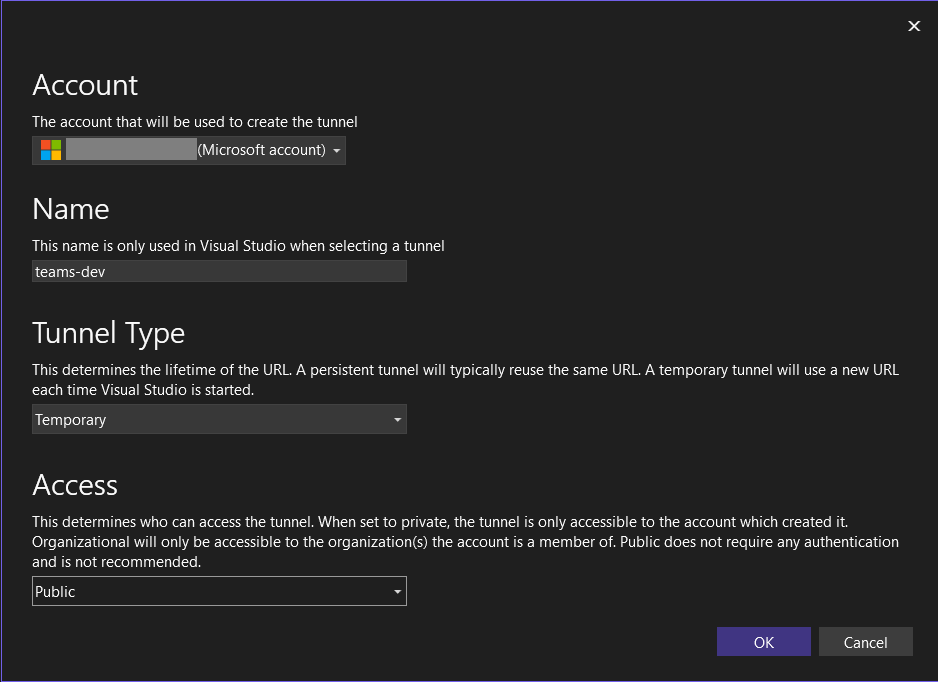
We need to select the Visual Studio / Github subscription, set a name, set the Tunnel type as Temporary, select the access as Public. Once the dev tunnel is created, we can right click on the project, select Teams Toolkit menu and click on the Prepare Teams app dependencies menu.
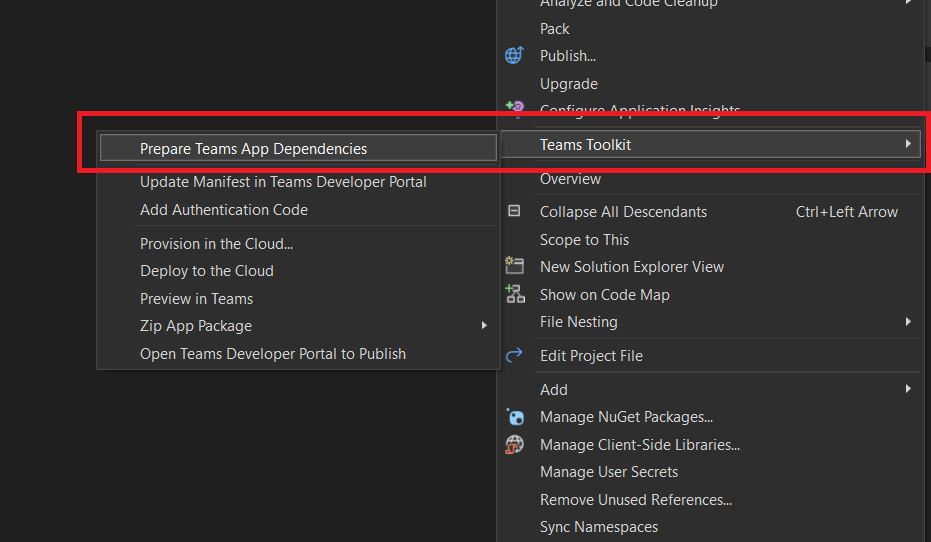
This will prompt to login to our M365 Developer account - this is required because custom teams applications requires side loading permission - which may not be available for us with the live teams tenants. We can select it and then Visual Studio will provision various resources using the yml files. And once it is completed, Visual Studio will show a message.
Next we can run the application using F5 or Debug menu.
Testing the application
Once we start the application, it will open a browser window, and load teams. Please note currently it will not work with Desktop clients. And if you try to use latest version of Teams in browser that may not work. Currently it will only work with classic version. Then it will prompt an installation screen like this.
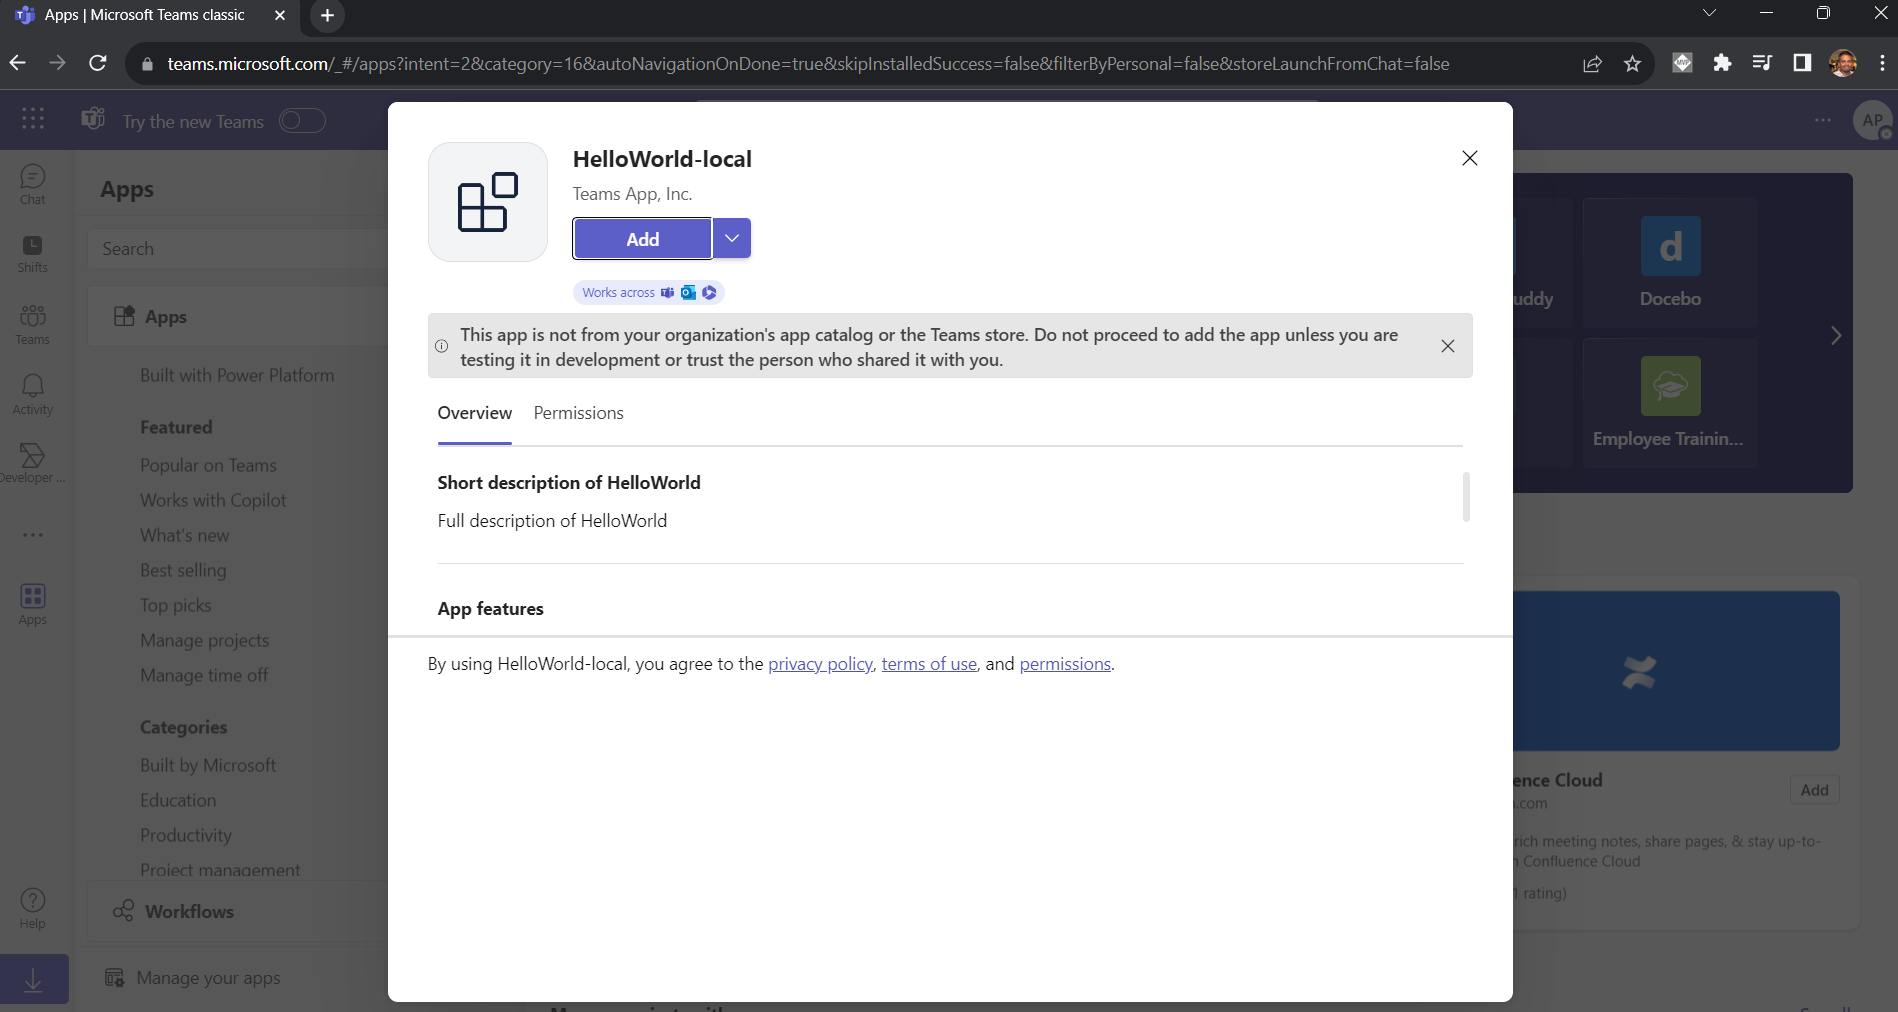
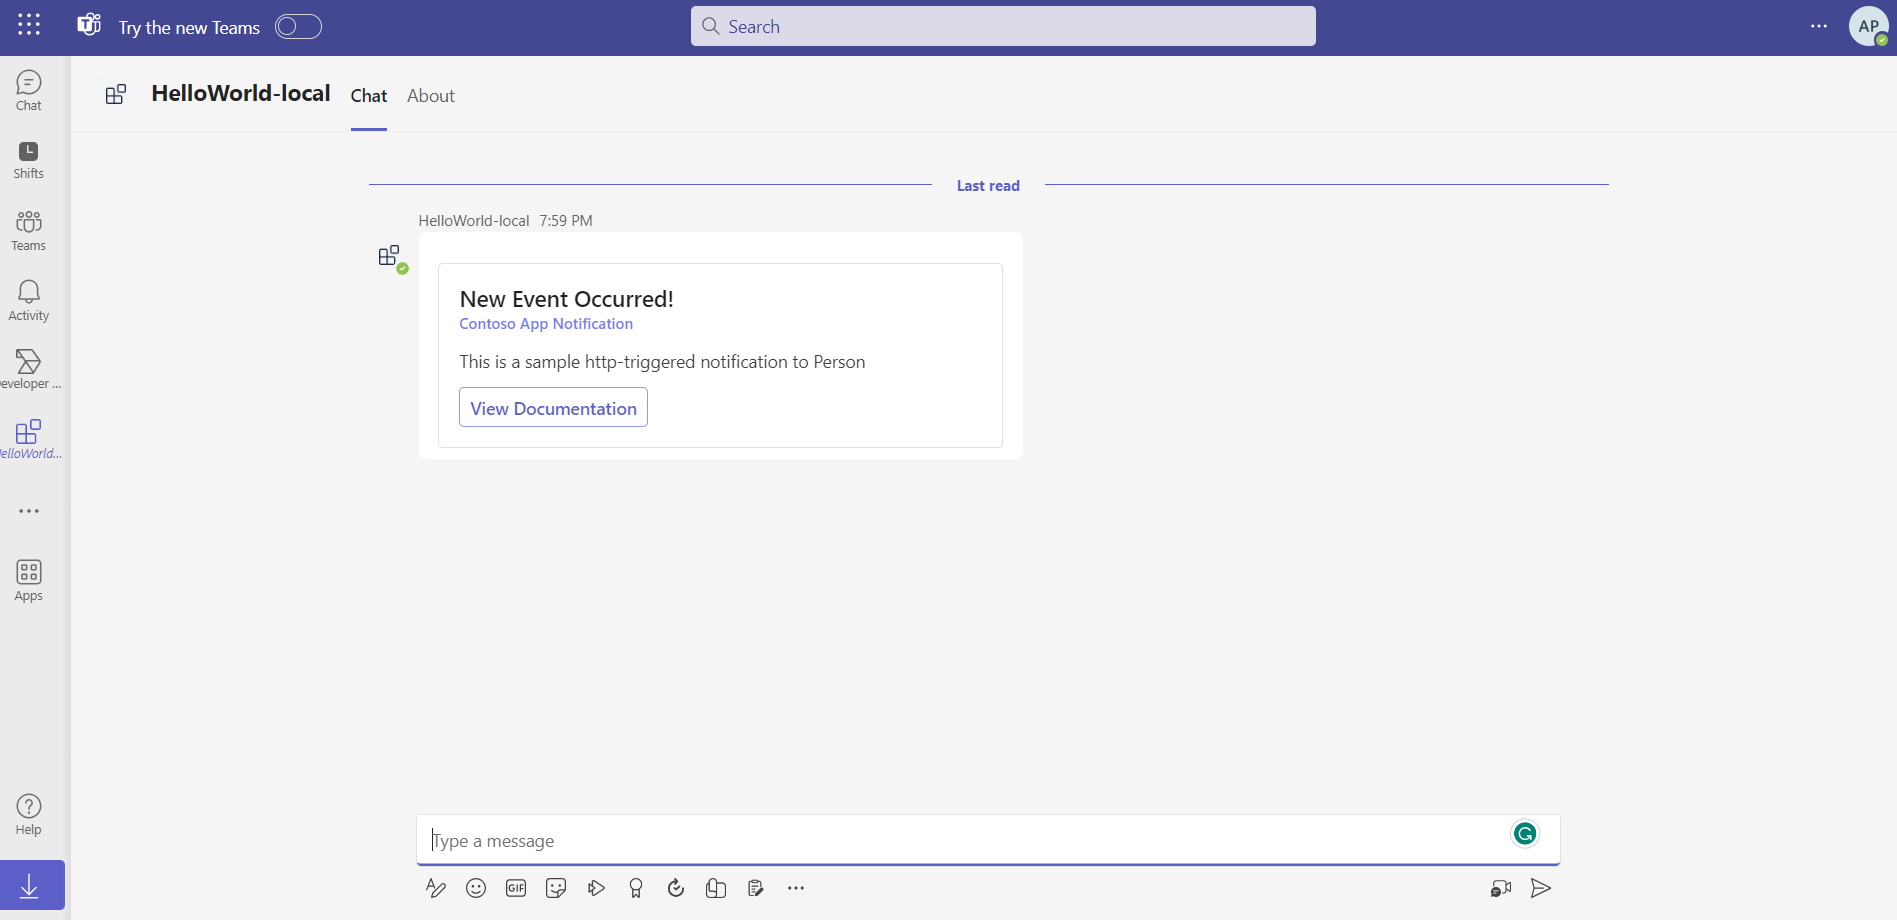
We can click on the Add button and install the app. Next we can open powershell or using Postman we can send empty post request to the URL which will display a message like this. We can use the following command to send a POST request using Powershell - Invoke-WebRequest -Uri "http://localhost:5130/api/notification" -Method Post
The notification contains hard coded values, which will can modify in the NotificationController class, and implement like this.
[HttpPost]
public async Task<ActionResult> PostAsync([FromBody]NotificationDefaultModel notification, CancellationToken cancellationToken = default)
{
// Read adaptive card template
var cardTemplate = await System.IO.File.ReadAllTextAsync(_adaptiveCardFilePath, cancellationToken);
var pageSize = 100;
string continuationToken = null;
do
{
var pagedInstallations = await _conversation.Notification.GetPagedInstallationsAsync(pageSize, continuationToken, cancellationToken);
continuationToken = pagedInstallations.ContinuationToken;
var installations = pagedInstallations.Data;
foreach (var installation in installations)
{
// Build and send adaptive card
var cardContent = new AdaptiveCardTemplate(cardTemplate).Expand
(
notification
);
await installation.SendAdaptiveCard(JsonConvert.DeserializeObject(cardContent), cancellationToken);
}
} while (!string.IsNullOrEmpty(continuationToken));
return Ok();
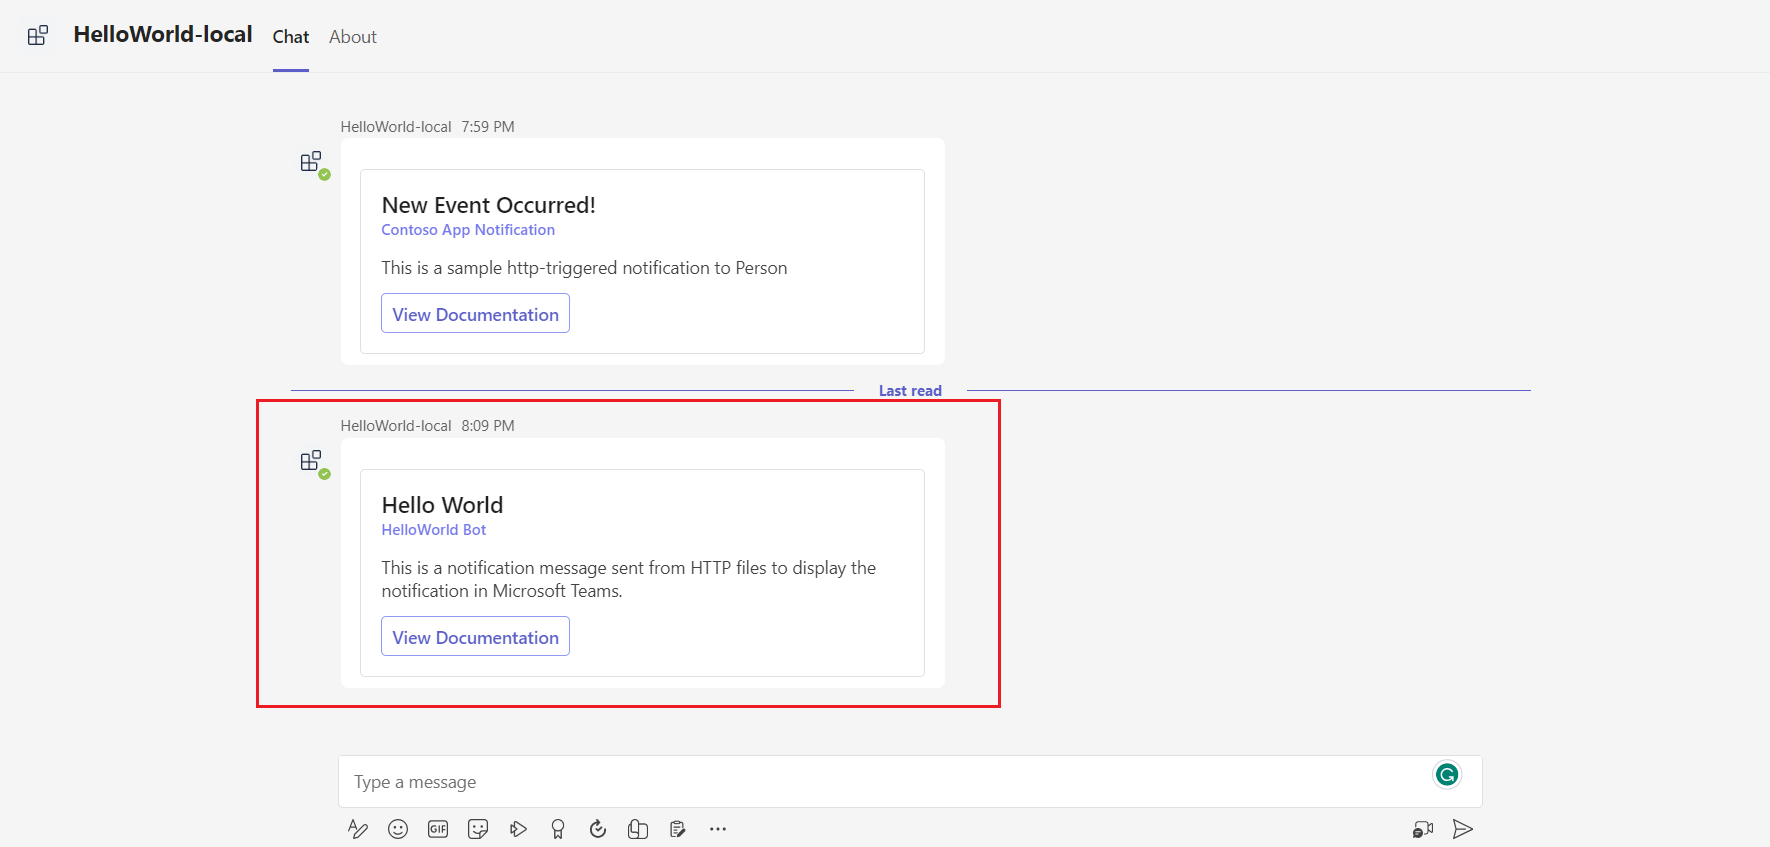
}Next using an HTTP file, we can send a Post request with the notification body, like this.
POST http://localhost:5130/api/notification
Content-Type: application/json

{
  "Title": "Hello World",
  "AppName": "HelloWorld Bot",
  "Description": "This is a notification message sent from HTTP files to display the notification in Microsoft Teams.",
  "NotificationUrl": "https://aka.ms/teamsfx-notification-new"
}
Which will display a notification like this.
We can also modify the card design using Adaptive cards and customize the look of the notification.
Resources
- Sign up for Microsoft 365 Developer Program
- Teams Toolkit Overview
- Adaptive Cards Designer
- Building generative AI powered bots with Teams Toolkit and AI library for .NET - .NET Conf 2023
Happy Programming.
Copyright © 2024 Anuraj. Blog content licensed under the Creative Commons CC BY 2.5 | Unless otherwise stated or granted, code samples licensed under the MIT license. This is a personal blog. The opinions expressed here represent my own and not those of my employer. Powered by Jekyll. Hosted with ❤ by GitHub