Deploy a website with Azure virtual machines - Deploying ASP.NET Core application
June 18, 2023 by Anuraj
Azure IAAS Virtual Machine AspNetCore
This post is about how to deploy an ASP.NET Core web application in Azure Virtual machines. This is part of series where we will be discussing about setting up web server, configuring custom domains, creating and installing SSL certificate in web server and finally configuring CI / CD pipelines to deploy our application to Azure VM from Azure DevOps. In this blog post we will be exploring about deploying the ASP.NET Core application to Azure VM.
We will be using Azure CLI and Powershell for the deployment.
- First we need to login to Azure account using Azure CLI. We can use the
az logincommand to access out Azure account. - We are using Web Deploy application from Microsoft to deploy the ASP.NET Core application. So we have to install a few components and executables. We can use the following command to install Web Management feature -
az vm run-command invoke --resource-group webserver-us --name dotnetthoughts --command-id RunPowerShellScript --scripts "Install-WindowsFeature -name Web-Mgmt-Service" - Next we need to download and install the Web Deploy executable. We can download it from here - https://www.iis.net/downloads/microsoft/web-deploy and we can download it in the VM using the following command -
az vm run-command invoke --resource-group webserver-us --name dotnetthoughts --command-id RunPowerShellScript --scripts "Invoke-WebRequest https://dotnet.microsoft.com/en-us/download/dotnet/thank-you/runtime-aspnetcore-6.0.20-windows-hosting-bundle-installer -OutFile C:\WebDeploy_amd64_en-US.msi" - For installing the Web Deploy application, execute the following command -
az vm run-command invoke --resource-group webserver-us --name dotnetthoughts --command-id RunPowerShellScript --scripts "msiexec /i C:\WebDeploy_amd64_en-US.msi /quiet /qn /norestart ADDLOCAL=ALL" - After the installation, we need to install the hosting bundle for .NET Core. We can download it from the .NET Core downloads page. I am using .NET Core 6.0 for this post. And we can download it using powershell command -
az vm run-command invoke --resource-group webserver-us --name dotnetthoughts --command-id RunPowerShellScript --scripts "Invoke-WebRequest https://download.visualstudio.microsoft.com/download/pr/d7124775-38c9-460f-a269-7bc131b3dfbf/7f60bcc6030e408cf11a935d5451ffa4/dotnet-hosting-6.0.20-win.exe -OutFile C:\dotnet-hosting-6.0.20-win.exe" - And for installing the ASP.NET Core bundle we can execute the following command -
az vm run-command invoke --resource-group webserver-us --name dotnetthoughts --command-id RunPowerShellScript --scripts "C:\dotnet-hosting-6.0.20-win.exe /quiet" - We also need to enable the port 8172, which will be used by the Web Deploy application. We can use the command
az vm open-port --port 8172 --resource-group webserver-us --name dotnetthoughts --priority 1002to expose the port. - Now we completed the installation and configuration. We can restart the server to complete the installation. It is not mandatory, but it will make sure all the services started are running.
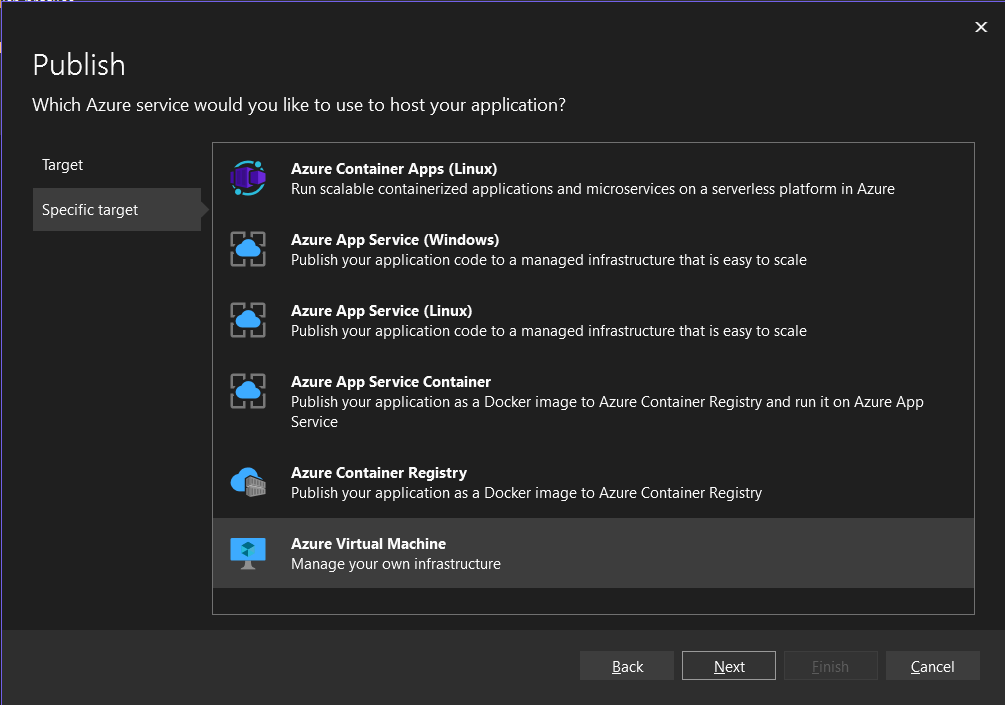
- Once the server is up and running, we can open the project in Visual Studio, select right click on the project and select Publish.

- Select Azure, and click on the Next button. From the next screen, select the Azure Virtual Machines.
- In the next screen, if we can sign in to Azure account and which will display the Azure Virtual machines available in the subscription.
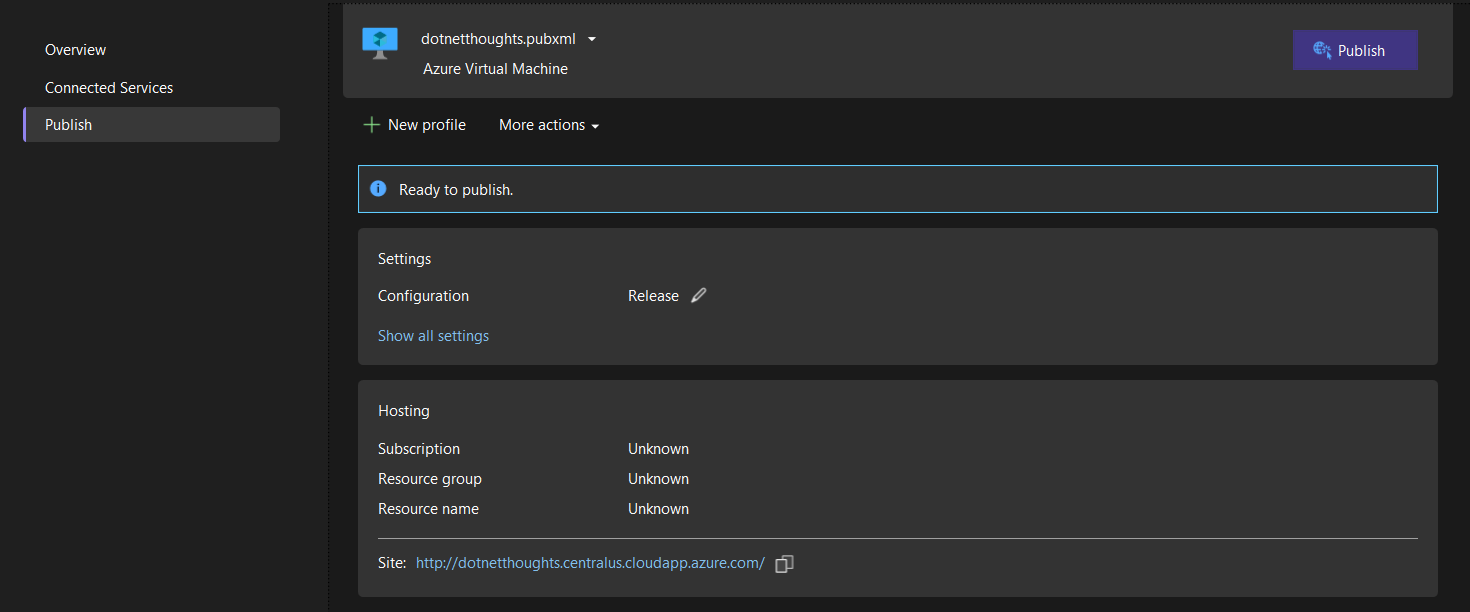
Once we select the Virtual machine, Visual Studio will check Web Deploy and Web Management services are running - which we configured earlier. We can click on Finish, which will create a Publish profile.
- We can click on Publish button and deploy the application to Azure VM.
Once we click Publish, Visual Studio will prompt for the Azure VM password and once we enter, it will deploy the application to the server. We may have to restart the IIS service on the VM after we publish the application or restart the server.
- We can also deploy the app using the dotnet build command. For that either we need to use the existing publish profile file from Visual Studio or create a pubxml file with the following content.
<?xml version="1.0" encoding="utf-8"?>
<!--
This file is used by the publish/package process of your Web project. You can customize the behavior of this process
by editing this MSBuild file. In order to learn more about this please visit https://go.microsoft.com/fwlink/?LinkID=208121.
-->
<Project>
	<PropertyGroup>
		<WebPublishMethod>MSDeploy</WebPublishMethod>
		<PublishProvider>AzureVirtualMachine</PublishProvider>
		<LastUsedBuildConfiguration>Release</LastUsedBuildConfiguration>
		<LastUsedPlatform>Any CPU</LastUsedPlatform>
		<SiteUrlToLaunchAfterPublish>http://dotnetthoughts.centralus.cloudapp.azure.com/</SiteUrlToLaunchAfterPublish>
		<LaunchSiteAfterPublish>true</LaunchSiteAfterPublish>
		<ExcludeApp_Data>false</ExcludeApp_Data>
		<ProjectGuid>7e0b2639-54d5-43d4-9d54-7b3573a3c648</ProjectGuid>
		<MSDeployServiceURL>dotnetthoughts.centralus.cloudapp.azure.com:8172</MSDeployServiceURL>
		<DeployIisAppPath>Default Web Site</DeployIisAppPath>
		<RemoteSitePhysicalPath />
		<SkipExtraFilesOnServer>true</SkipExtraFilesOnServer>
		<MSDeployPublishMethod>WMSVC</MSDeployPublishMethod>
		<EnableMSDeployBackup>true</EnableMSDeployBackup>
		<EnableMsDeployAppOffline>true</EnableMsDeployAppOffline>
		<UserName>azurewebuser</UserName>
		<_SavePWD>false</_SavePWD>
		<AllowUntrustedCertificate>True</AllowUntrustedCertificate>
	</PropertyGroup>
</Project>
I modified the pubxml file and add AllowUntrustedCertificate element - which will help us to work with the virtual machine. Here is the command which will deploy the application with publish profile - dotnet build .\WebApplication1.csproj /p:DeployOnBuild=true /p:PublishProfile=.\dotnetthoughts.pubxml /p:Password=You-Super-Secret-Password.
In the next blog post, we will explore how to create a SSL certificate using LetsEncrypt and configure our domain with HTTPS.
Happy Programming.
Copyright © 2024 Anuraj. Blog content licensed under the Creative Commons CC BY 2.5 | Unless otherwise stated or granted, code samples licensed under the MIT license. This is a personal blog. The opinions expressed here represent my own and not those of my employer. Powered by Jekyll. Hosted with ❤ by GitHub