Deploy a Docker image to an Azure Container Instance
March 02, 2021 by Anuraj
Azure Docker AspNetCore
This article discuss about how to Deploy a Docker image to an Azure Container Instance. Azure Container Instance aka ACI helps you to run your Docker image in Azure. So to deploy the Docker image to Azure, first you need publish your Docker image to a container registry then you can connect the Container Instance to the registry and deploy the image.
Publishing to Docker Hub
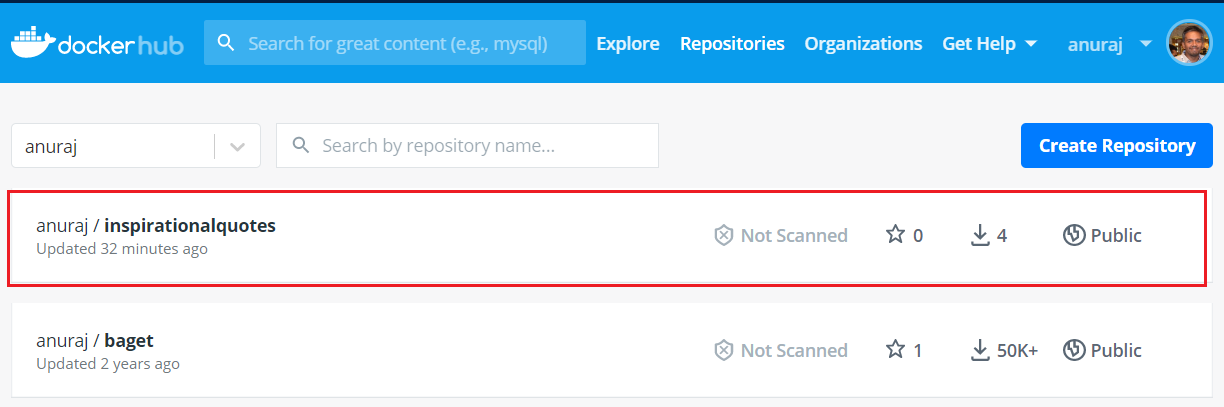
Docker Hub is a free docker registry, you can create 1 private repository and you can have multiple public repositories. First you need to create an account in Docker Hub. Once you created an account, you can use the credentials to login to Docker Hub using the command docker login. It will prompt for username and password. Once you logged in you can run the docker push command to publish the image to Docker Hub. Please note, to upload to Docker Hub you need to tag or build the image with your Docker ID. Once you publish the Docker image, you will be able to see it in the Docker Hub.
In the next section you will learn how to create and publish an image to Azure Container Registry.
Publishing to Azure Container Registry
Unlike Docker Hub, Azure Container Registry a private container registry. So you need to first provision a Azure Container Registry, then upload the image to the container registry and deploy it to Azure Container Instance.
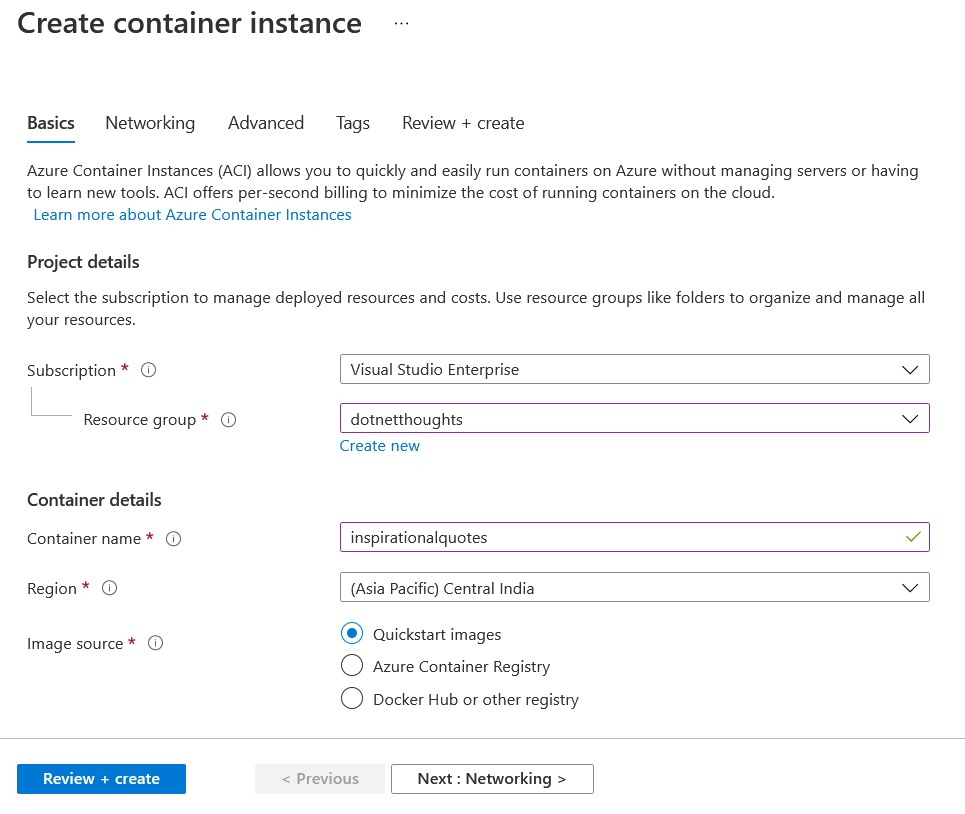
To create the a Container Registry, you can click on the New Resource option, and search for Container Registry. Select from the list and choose Create.

Next you need to provide a unique name, resource group, location and SKU - By default Standard will be selected, you can switch to Basic or Premium.
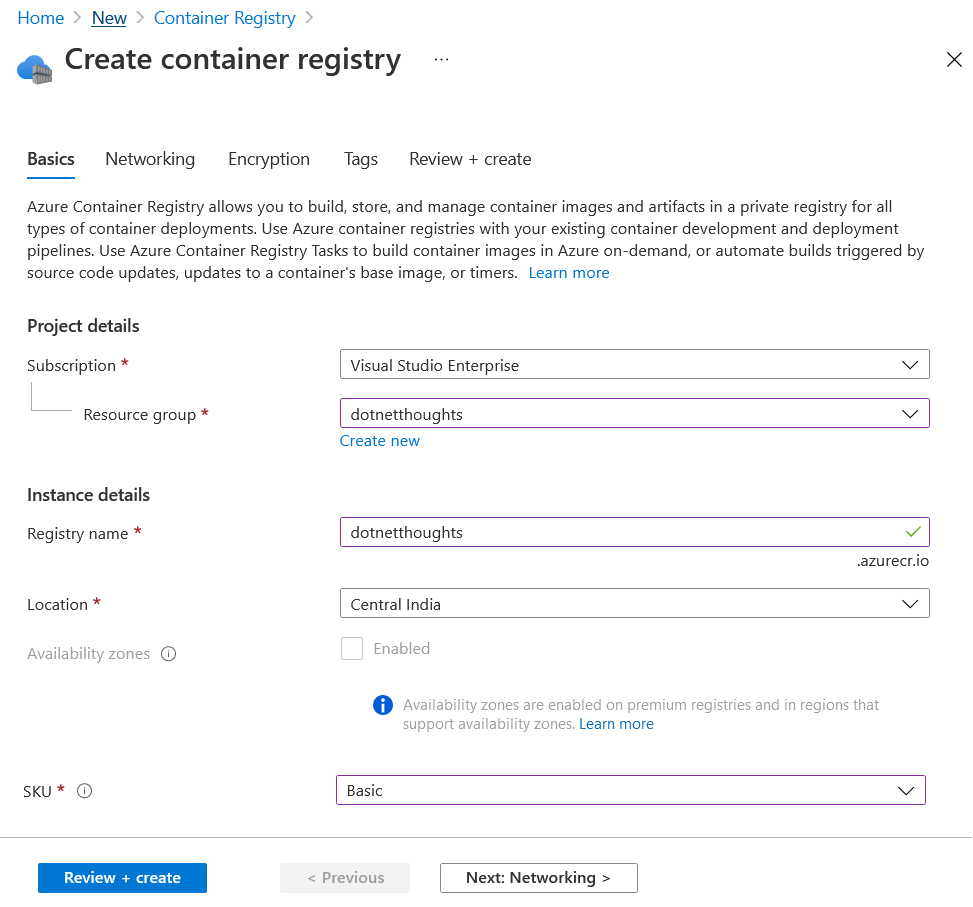
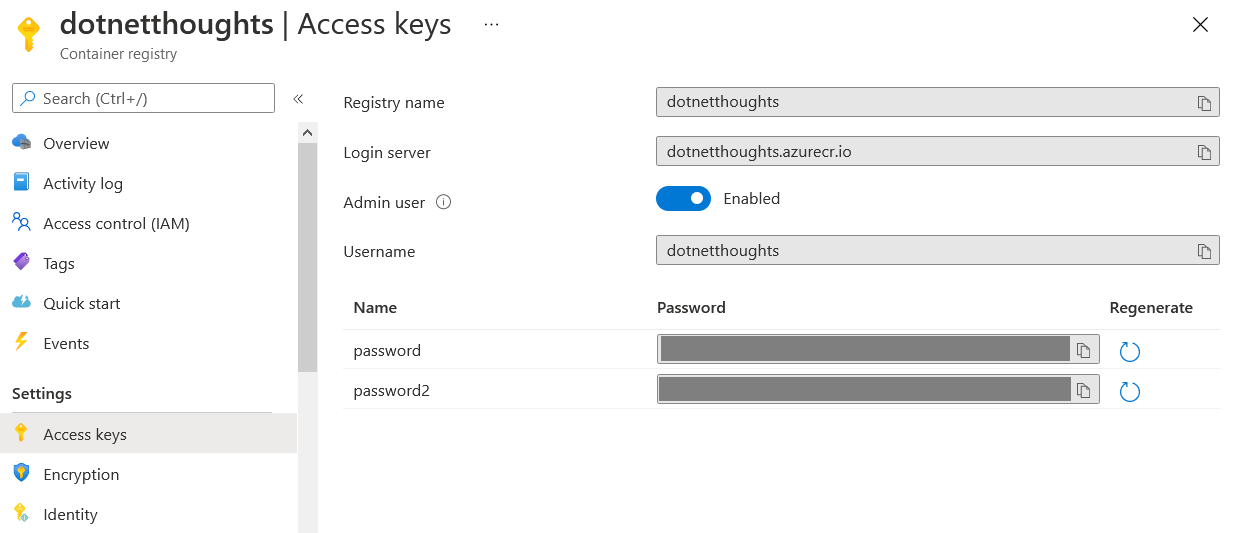
Once you complete it, keep the other options as default and click on the Review and Create button. Review the details and confirm it, Azure will provision the resource. Once it is provisioned, you need to publish the image to the new registry and use the image from this registry. To use this, first you need to enable the Admin user for this registry, you can do this from Access Keys blade. And toggle the Admin User option. Once it is enabled, portal will show you the Admin User name and Password.
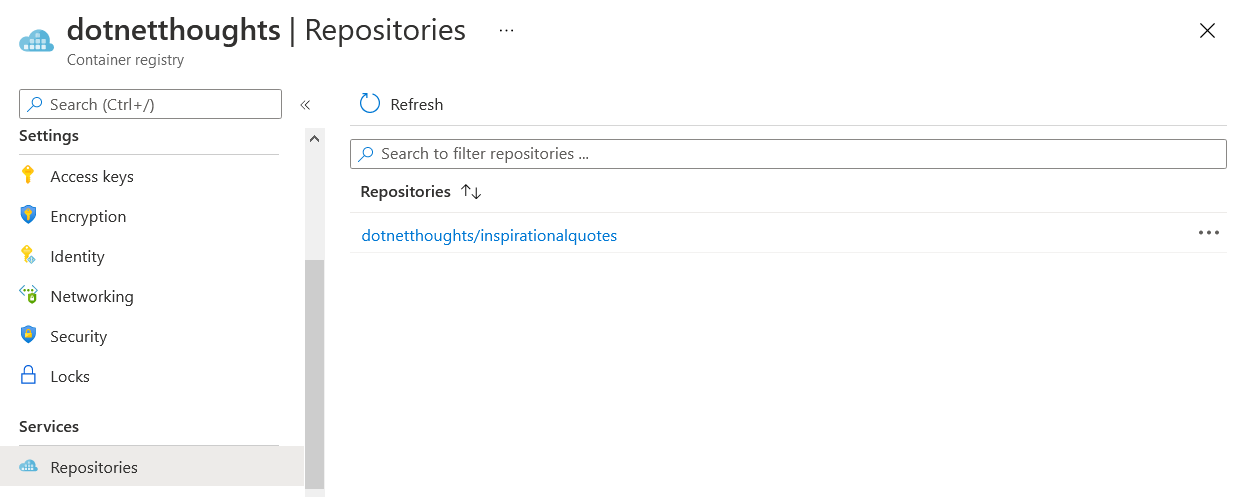
Next you need to open terminal in your development machine and connect to this registry - you can do this with the help of docker login command with the login server as the command line parameter like this - docker login dotnetthoughts.azurecr.io. Similar to Docker Hub, you need to provide the credentials and you will be logged in. To publish the image to this registry, again you need to execute the docker push command. To push the image, you need to tag the image with the fully qualified path to your registry. Like docker tag anuraj/inspirationalquotes dotnetthoughts.azurecr.io/dotnetthoughts/inspirationalquotes. Once you complete the tagging, you can push the image using docker push command. Once docker push command executed successfully, you can view the image under Repositories blade in your Container Registry.
In the next section, you will learn how to deploy your container image from registry to Azure Container Instance.
Deploy the image to Azure Container Instance.
To deploy the image, first you need to create an instance of Azure Container Instance. You can search for Container Instances and click on Create. Similar to most of the resources you need to provide a resource group, location and name.
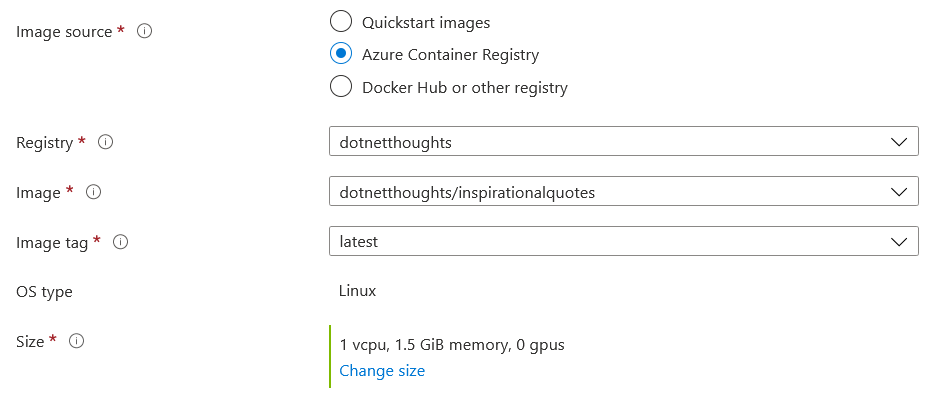
And for Container Instance, you need to configure the Image Source. By default it will select the Quick Start Images, and you have other options like Azure Container Registry or Docker Hub or other registry. If you choose Azure Container Registry radio button, the container registry details will be populated automatically.
And if you choose Docker Hub or other registry option, you will get a different screen.
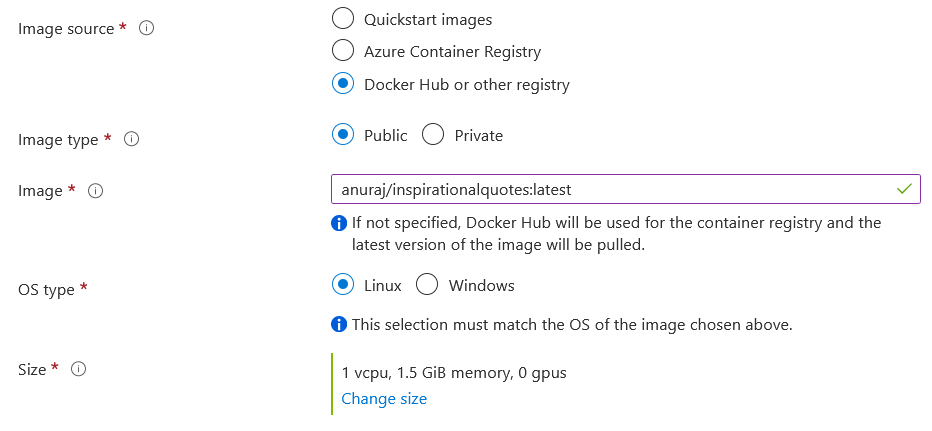
In the screen you need to give your image full address like this one - anuraj/inspirationalquotes:latest. Next you need to click on the Networking tab and choose Networking Type as Public, and provide DNS name label. And you can configure extra ports if required.
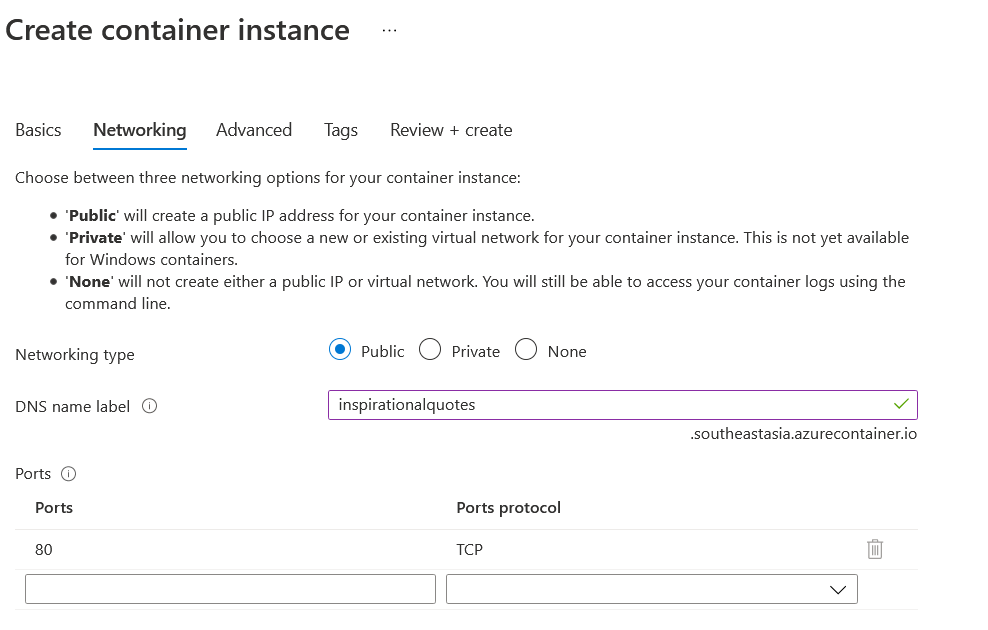
Next you can click on Review + Create and create the container instance. Once it is created you can access your application with FQDN you provided in the Networking tab.
Now you have successfully deployed a Docker image to Azure Container instance. As mentioned you can use Docker Hub or Azure Container Registry as a Image repository. If you’re using your own, you can use that as well.
Reference Links
- Tutorial: Build and deploy container images in the cloud with Azure Container Registry Tasks
- About registries, repositories, and artifacts
- Azure Container Instances documentation
Happy Programming :)
Copyright © 2024 Anuraj. Blog content licensed under the Creative Commons CC BY 2.5 | Unless otherwise stated or granted, code samples licensed under the MIT license. This is a personal blog. The opinions expressed here represent my own and not those of my employer. Powered by Jekyll. Hosted with ❤ by GitHub