Generating Code Coverage Reports in .NET Core
October 19, 2022 by Anuraj
DotNetCore AspNetCore DotNet UnitTesting
This post is about how to enable code coverage for .NET Core and how to get the code coverage report. I already wrote few blog posts related to enabling code coverage in .NET Core and ASP.NET Core. In this blog post I am exploring the dotnet tool dotnet coverage and how to use this tool to collect code coverage and generate code code coverage report using the reportgenerator tool. I will also explains how we can be integrated to GitHub actions.
So first we need to install the dotnet coverage tool - this tool is available from .NET Core 3.1 onwards. I am using it in .NET 7.0 RC version. We can install it using the command dotnet tool install --global dotnet-coverage. Now we are installing it as global tool. But in CI systems it should be installed as local tool. I will explain this process later in this post.
Next we need to install the report generator tool. To do this, we can run the command dotnet tool install --global dotnet-reportgenerator-globaltool. And now we completed the setup. Next open the project / solution folder and run the command dotnet coverage collect dotnet test. This command will execute the tests and collect code coverage into a file. We can customize the output format using --output-format argument. I am using cobertura as the output format. And I am specifying the output file name as well. And here is my final command dotnet coverage collect dotnet test --output .\Tests\CodeCoverage --output-format cobertura for executing the test and generating the output file in cobertura format.
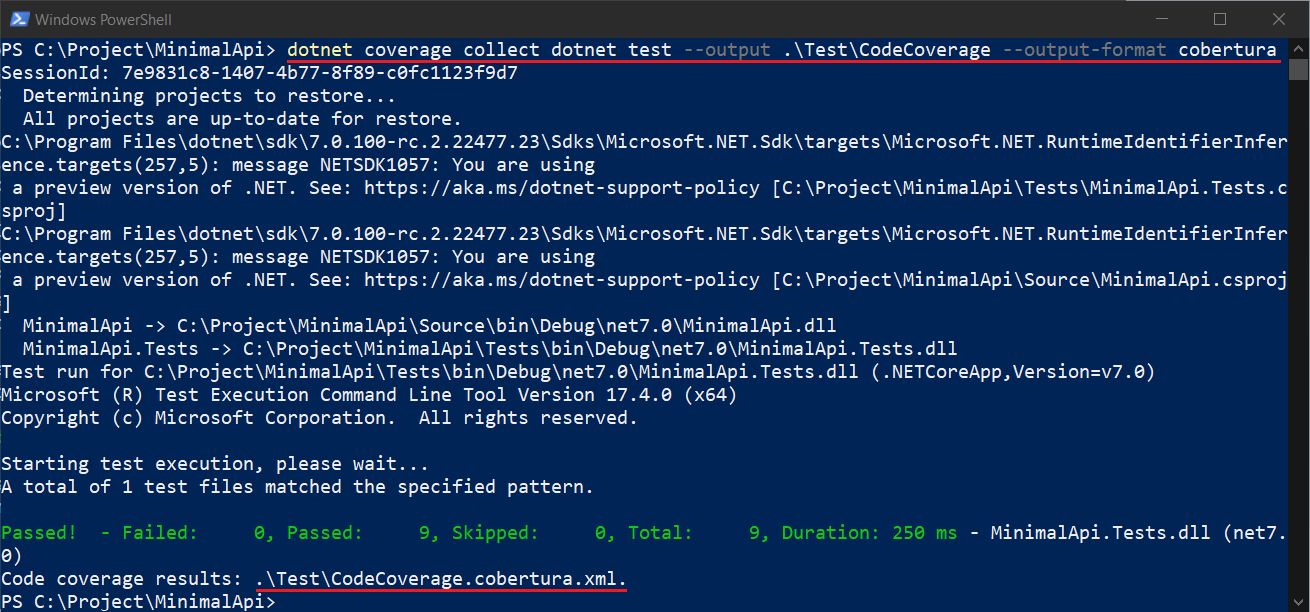
Please note, this command will generate the filename with .cobertura.xml. We need to use the filename in the report generator.
Next to generate the report we can execute the command - reportgenerator -reports:.\Tests\CodeCoverage.cobertura.xml -targetdir:".\Tests\CoverageReport" -reporttypes:Html -assemblyfilters:+MinimalApi. If we are not specifying the assemblyfilters parameter, we will get a lot of results including the ASP.NET Core libraries.
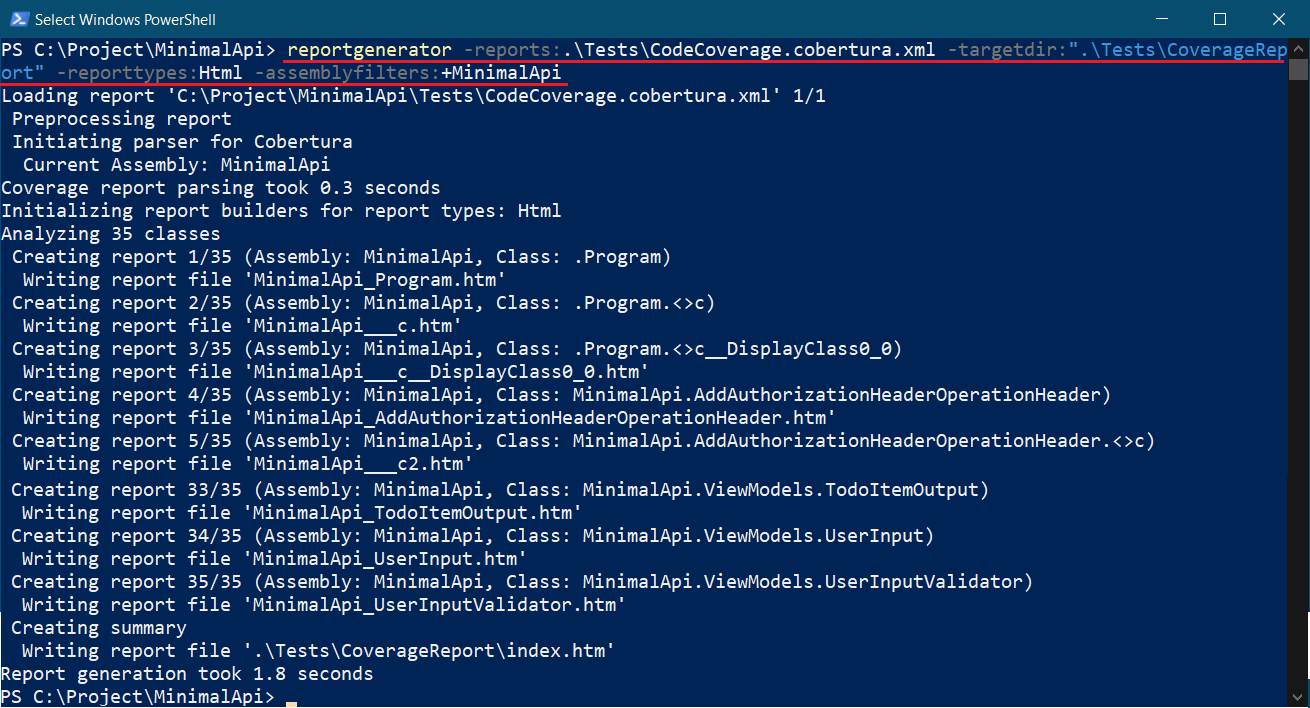
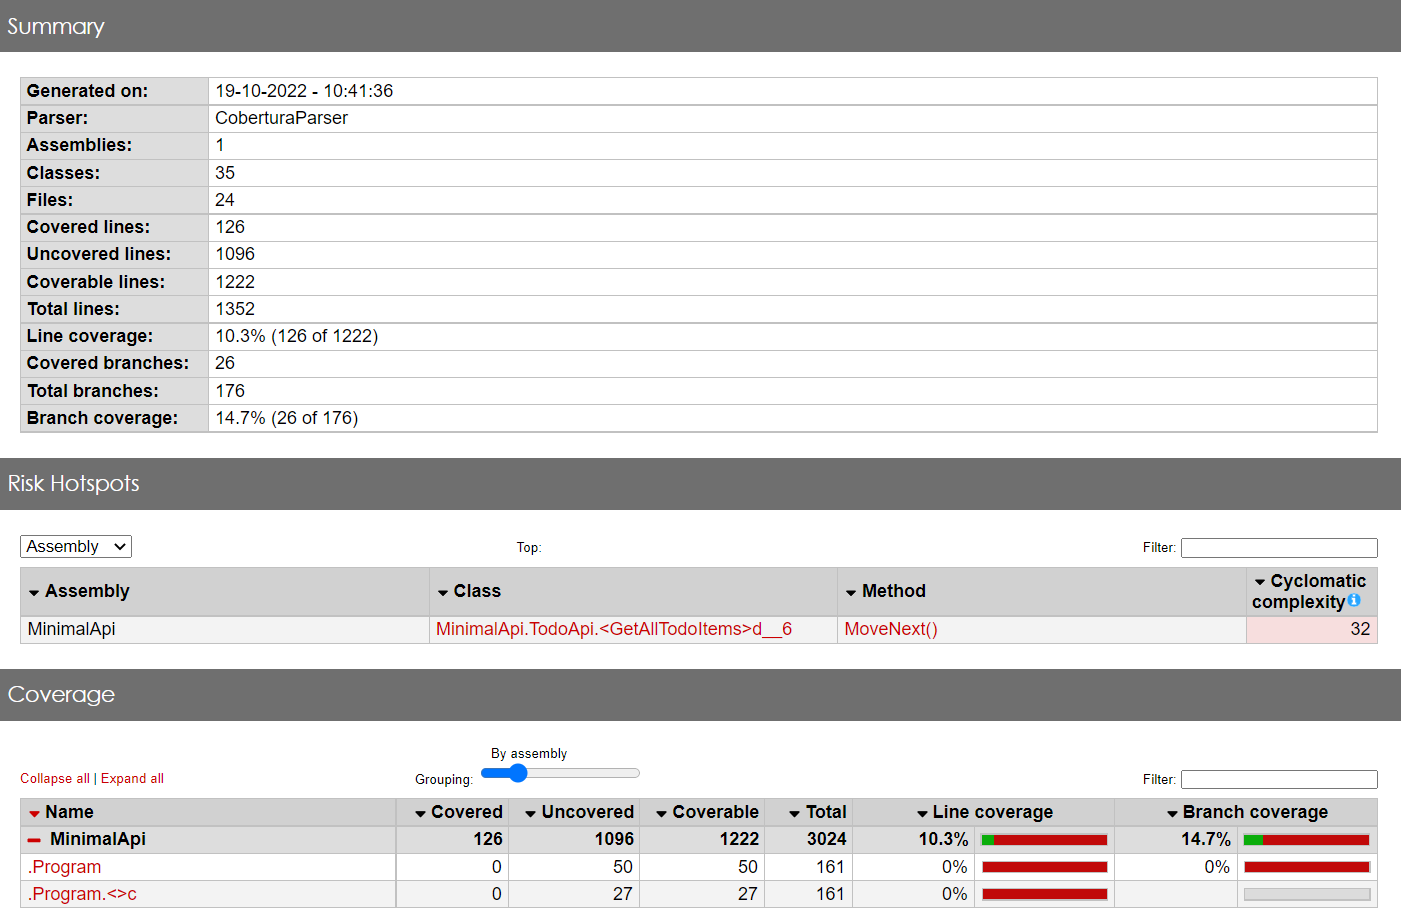
Now we can open the index.htm in the \Tests\CoverageReport folder. We will be able to see the file with details like this.
Next we will be integrating code coverage collection and report generation to GitHub Actions. As I mentioned earlier, first we need to create a manifest file to install the dotnet tools locally. So in the YAML file, first I will be creating the tool manifest. Then I will be installing the tools. Once it is installed, I will executing the commands like earlier. Here is the YAML file snippet.
- name: Install Required Tools
run: |
dotnet new tool-manifest
dotnet tool install dotnet-reportgenerator-globaltool
dotnet tool install dotnet-coverage
- name: Run the unit tests with code coverage
run: dotnet coverage collect dotnet test --output ${{ github.workspace }}/Tests/Coverage --output-format cobertura
- name: Generate Report
run: |
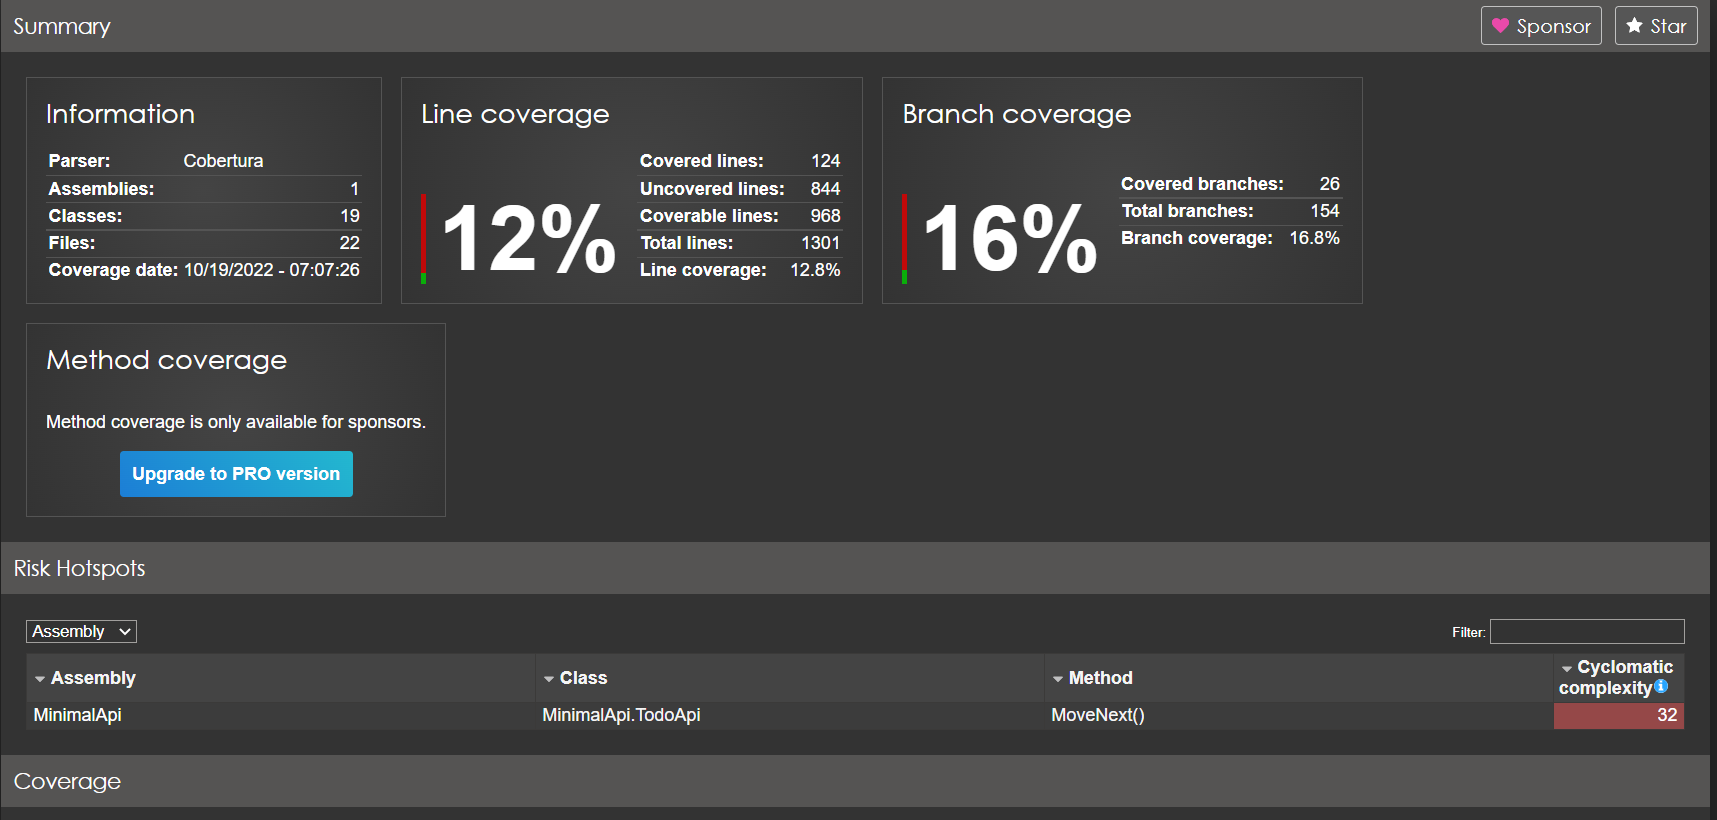
dotnet reportgenerator -reports:${{ github.workspace }}/Tests/Coverage.cobertura.xml -targetdir:"${{ github.workspace }}/Tests/coveragereport" -reporttypes:Html -assemblyfilters:+MinimalApiYou can find the full YAML file here. Once we commit the code, it will collect the code coverage and generate html file. It will be available as artifact. We can download it and view the index.htm file. It will be something like this.
This way we can enable code coverage report in .NET Core and ASP.NET Core applications and it can integrated to Github Actions.
Happy Programming.
Copyright © 2024 Anuraj. Blog content licensed under the Creative Commons CC BY 2.5 | Unless otherwise stated or granted, code samples licensed under the MIT license. This is a personal blog. The opinions expressed here represent my own and not those of my employer. Powered by Jekyll. Hosted with ❤ by GitHub