Getting started with SignalR service in Azure
May 08, 2018 by Anuraj
ASP.NET Core SignalR Azure
This post is about how to work with SignalR service in Azure. In Build 2018, Microsoft introduced SignalR in Azure as a service.
Few days back I wrote a post on how to use SignalR in ASP.NET Core. In this post I am modifying the solution to use SignalR service. So first you need to create a SignalR service. Open Azure Portal. Click on new resource, search for SignalR, and select SignalR service.
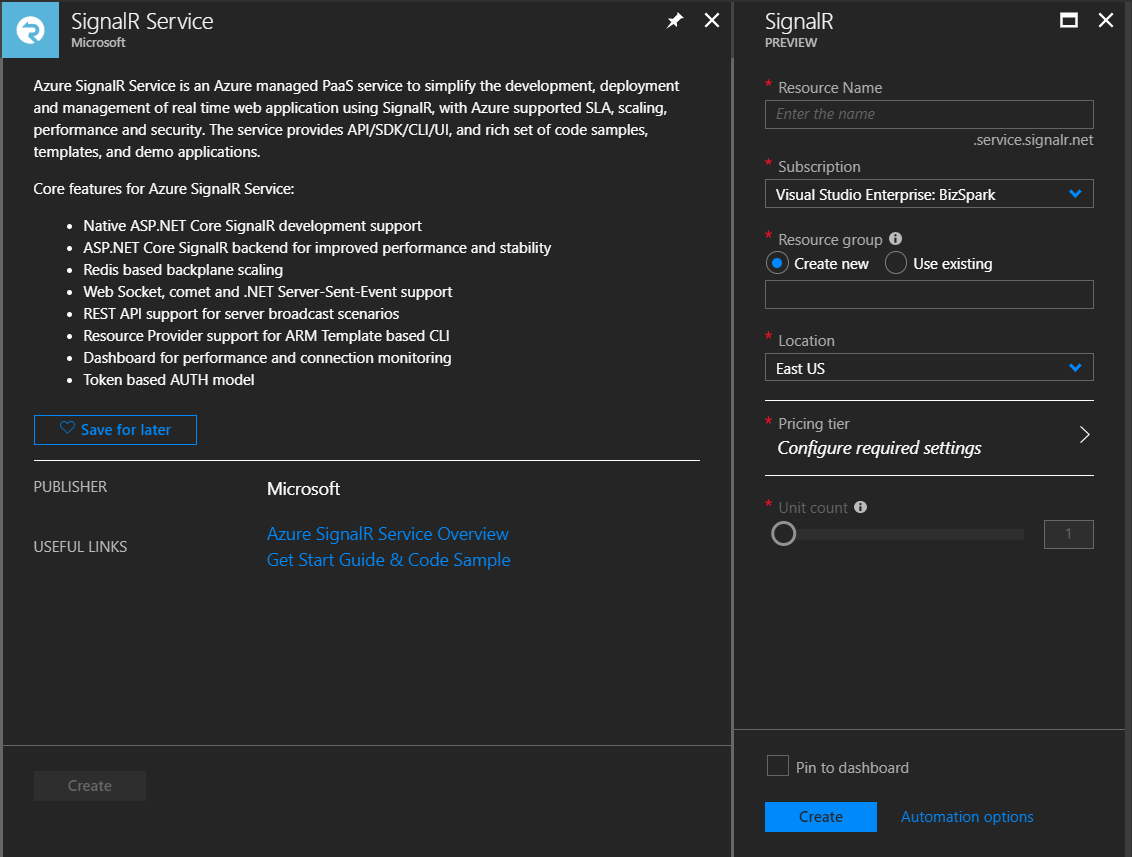
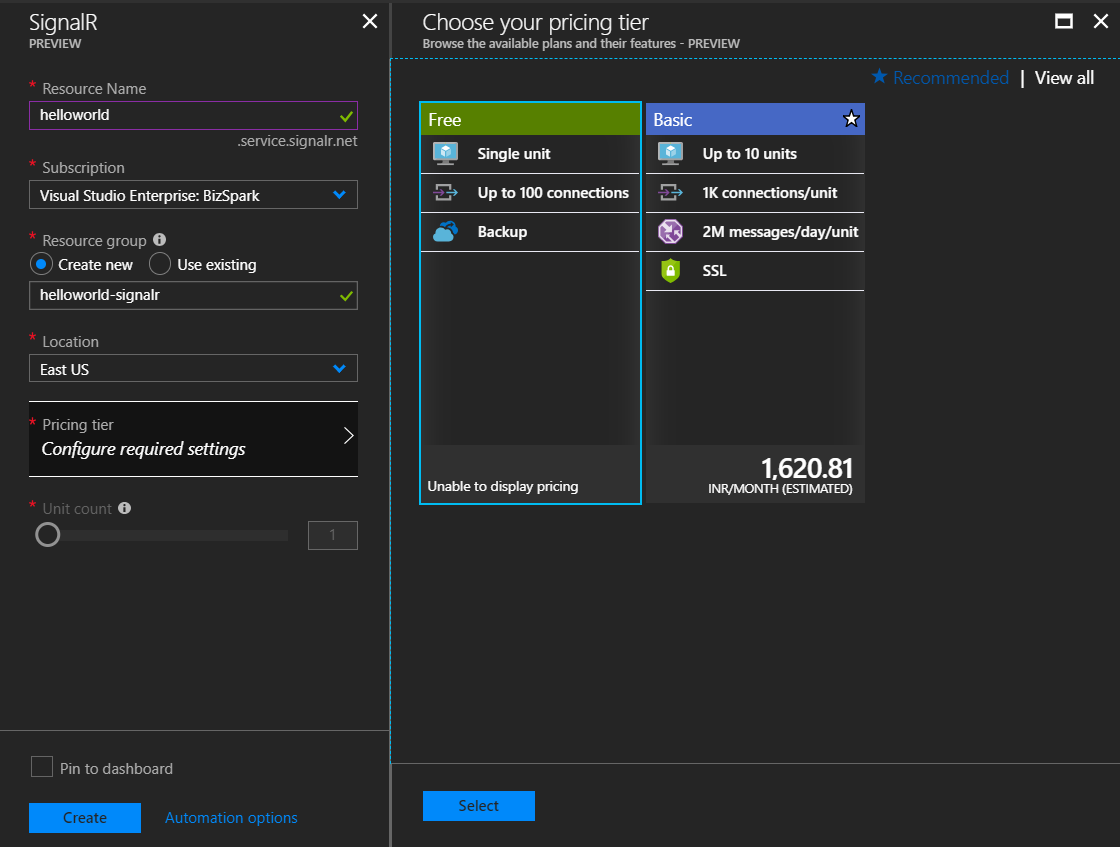
Next provide the required details. There is only two pricing tiers available, since it is for demo, I am choosing the Free tier. Use Location to specify the geographic location in which your SignalR resource is hosted. For the best performance, it is recommend that you create the resource in the same region as other components of your application. I am choosing East Us as the location.
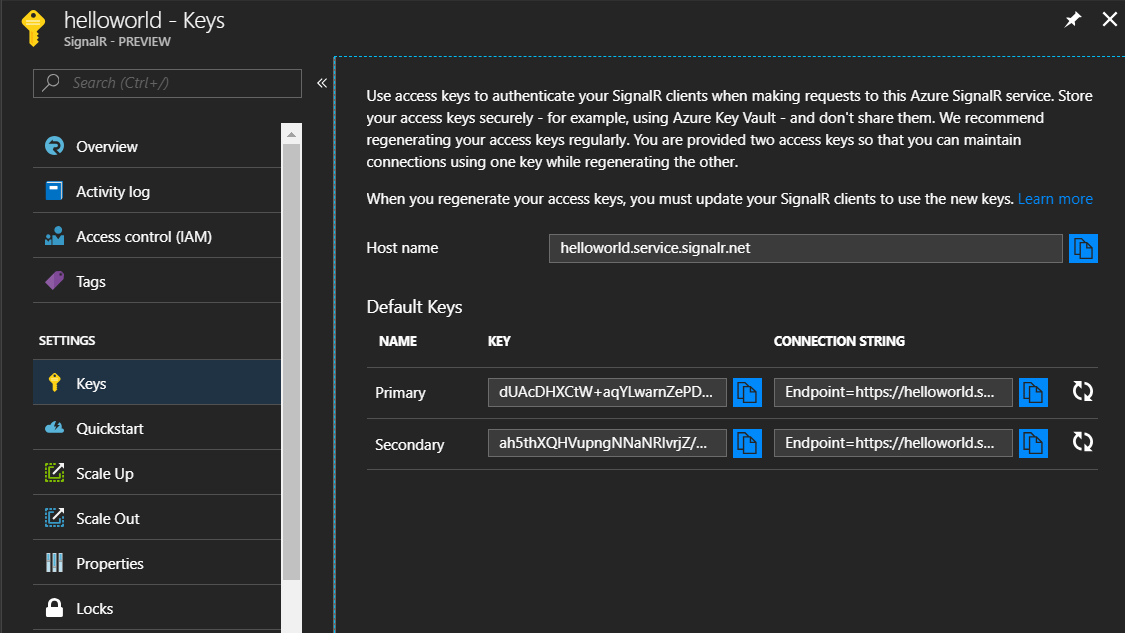
Next click on create. Once you created, go to the resource and look for Keys under Settings, here you will be able to see the Connection string. You need to copy the primary connection string, which is required to configure the ASP.NET Core application.
Next you need to create the ASP.NET Core application. I am using the HelloSignalR project. You can remove the ASP.NET Core SignalR package reference from this project and you need to add the SignalR service package reference, you can do this using dotnet add package Microsoft.Azure.SignalR -v 1.0.0-preview1-10009 command. Once it is done, open your startup.cs file, and modify ConfigureServices and Configure methods like this.
public void ConfigureServices(IServiceCollection services)
{
    services.AddSignalR().AddAzureSignalR();
}
public void Configure(IApplicationBuilder app, IHostingEnvironment env)
{
    app.UseStaticFiles();
    app.UseAzureSignalR(routes =>
    {
        routes.MapHub<Chat>("/chat");
    });
}
Next you need to modify the chat.cs, which is the SignalR Hub file. This is required because in this project I was using an earlier version of ASP.NET Core. I was using InvokeAsync method, which is changed to SendAsync.
public class Chat : Hub
{
    public Task Send(string message)
    {
        if (message == string.Empty)
        {
            return Clients.All.SendAsync("Welcome");
        }

        return Clients.All.SendAsync("Send", message);
    }
}
Next you need to create an AppSettings.json file and add the SignalR connection in that. SignalR middleware is expecting something like this - Azure:SignalR:ConnectionString.
{
    "Azure": {
        "SignalR": {
            "ConnectionString": "Endpoint=https://helloworld.service.signalr.net;AccessKey=ABCD;"
        }
    }
}
Now your completed all the setup, now run the application using dotnet run command. And browse for http://localhost:5000/index.html, you will be able to see something like this in the developer console.

SignalR service in Azure is fully-managed service allows you to use ASP.NET Core SignalR to build real-time experiences such as chat, stock tickers, live dashboards, and more, all without worrying about capacity provisioning, scaling, or persistent connections.
Happy Programming :)
Copyright © 2024 Anuraj. Blog content licensed under the Creative Commons CC BY 2.5 | Unless otherwise stated or granted, code samples licensed under the MIT license. This is a personal blog. The opinions expressed here represent my own and not those of my employer. Powered by Jekyll. Hosted with ❤ by GitHub