How to configure Postman API tests in Azure DevOps
December 19, 2020 by Anuraj
Azure Postman API Testing
This post is configuring Postman API tests in Azure DevOps. Postman makes API development easy. Postman platform offers the tools to simplify each step of the API building process and streamlines collaboration so you can create better APIs faster. In this post I am discussing about configuring Postman API testing in Azure DevOps and GitHub actions.
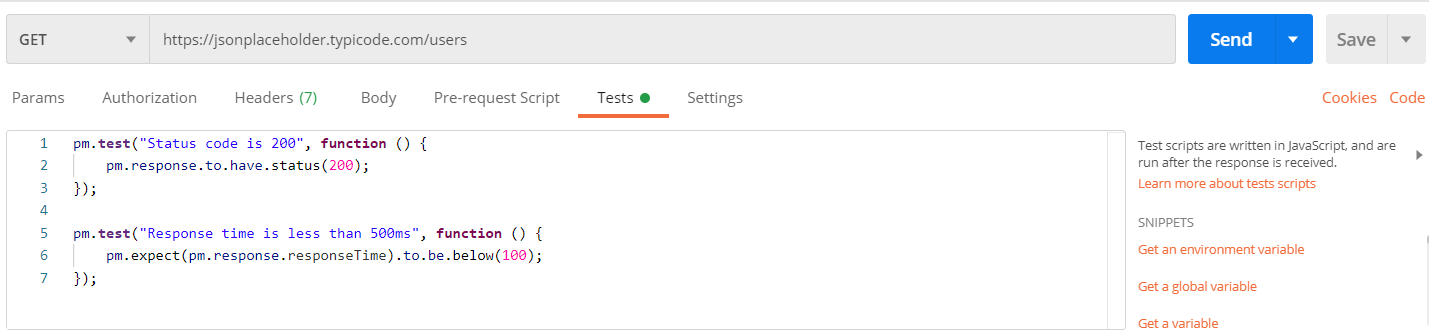
First I created a collection in Postman, then I am using some API endpoint for this post. Along with that, I am adding few test cases. Here is one request with test.
Once it is executed and working as expected, click on the collection and export it.
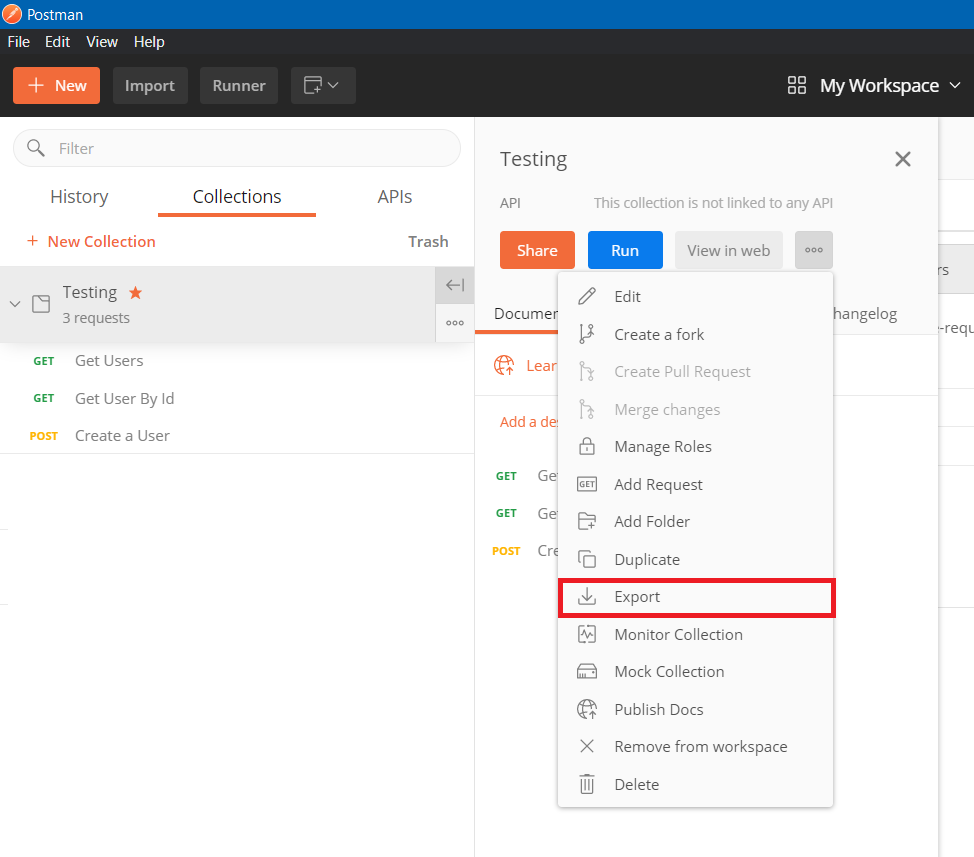
From the Export collection dialog, choose the Collection v2.1 (recommended), and save the JSON file. For demo purposes I am not using any environment variables. If you’re using any tokens or variables, you can using Postman environments, and you need to export that as well.
To run the Postman collection in DevOps pipelines you need to use newman CLI tool - which is from postman helps you to run the Postman collection files, this can be installed using npm command - npm install -g newman. And you can run the tests using the command - newman run TestAPICollection.json - this command will execute the test cases and print the output in the console.
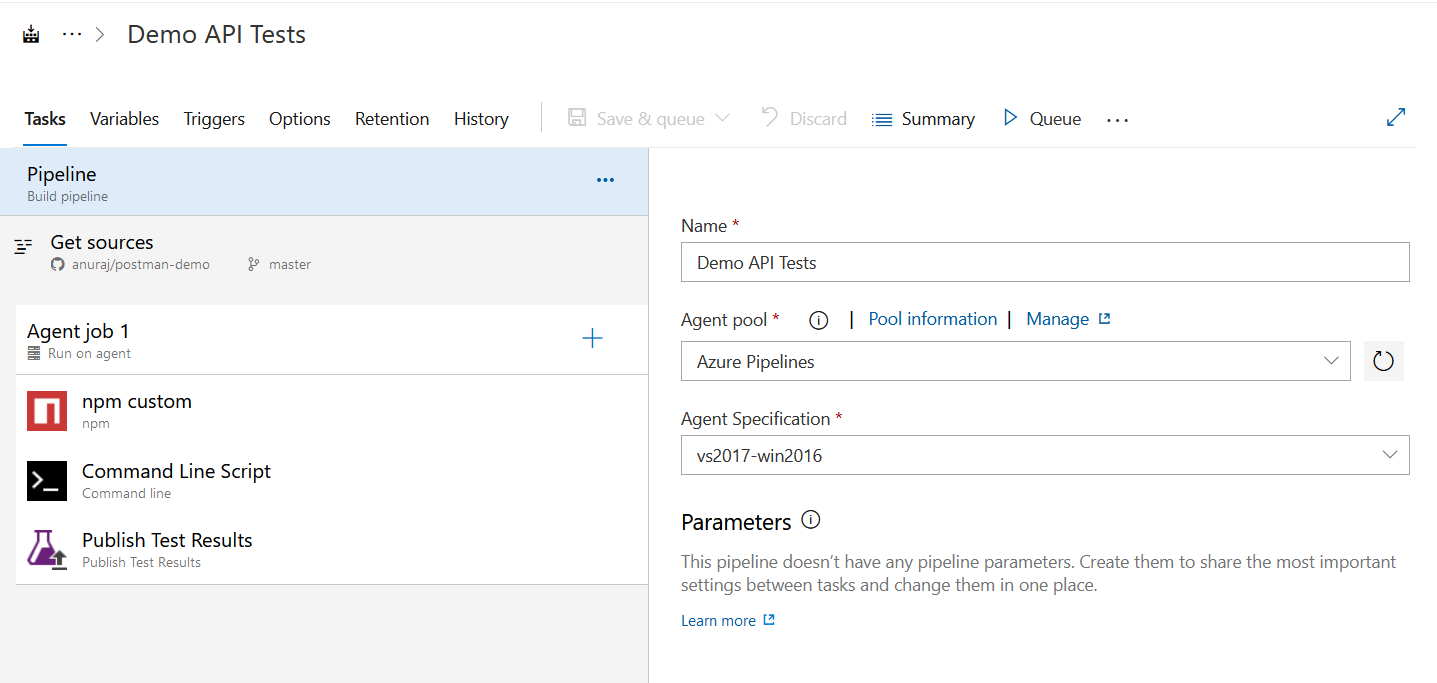
Next I committed the JSON file to source control, I am using GitHub. Once you commit the JSON file we can start creating the Azure DevOps pipeline. I am creating a Azure DevOps Build pipeline, I am using Class Editor option, not YAML option. Next I am adding few build steps - first build step in a npm task will be installing the newman. Next step is a command line script - which will be running the newman with the file. And final step is Publish Test Results - this step will publish the test results from the previous step. We may need to provide one more parameter which will export the results in JUnit XML.
Here is the YAML file.
resources:
  repositories:
  - repository: self
    type: git
    ref: master
jobs:
- job: Job_1
  displayName: Agent job 1
  pool:
    vmImage: vs2017-win2016
  steps:
  - checkout: self
  - task: Npm@1
    displayName: npm custom
    inputs:
      command: custom
      verbose: false
      customCommand: install -g newman
  - task: CmdLine@2
    displayName: Command Line Script
    inputs:
      script: newman run $(Build.SourcesDirectory)\Testing.postman_collection.json -x -r junit --reporter-junit-export $(build.artifactstagingdirectory)\Results\JunitResults.xml
  - task: PublishTestResults@2
    displayName: Publish Test Results
    inputs:
      testResultsFiles: '**\*.xml'
      searchFolder: $(build.artifactstagingdirectory)
And here is the Build pipeline.
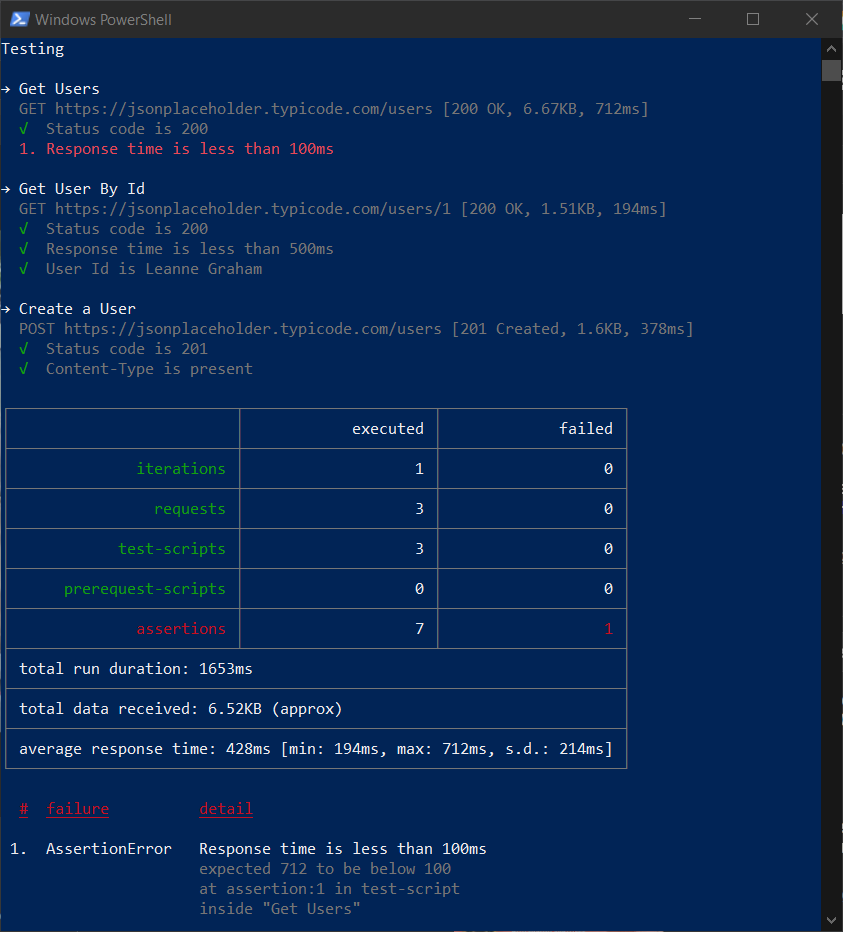
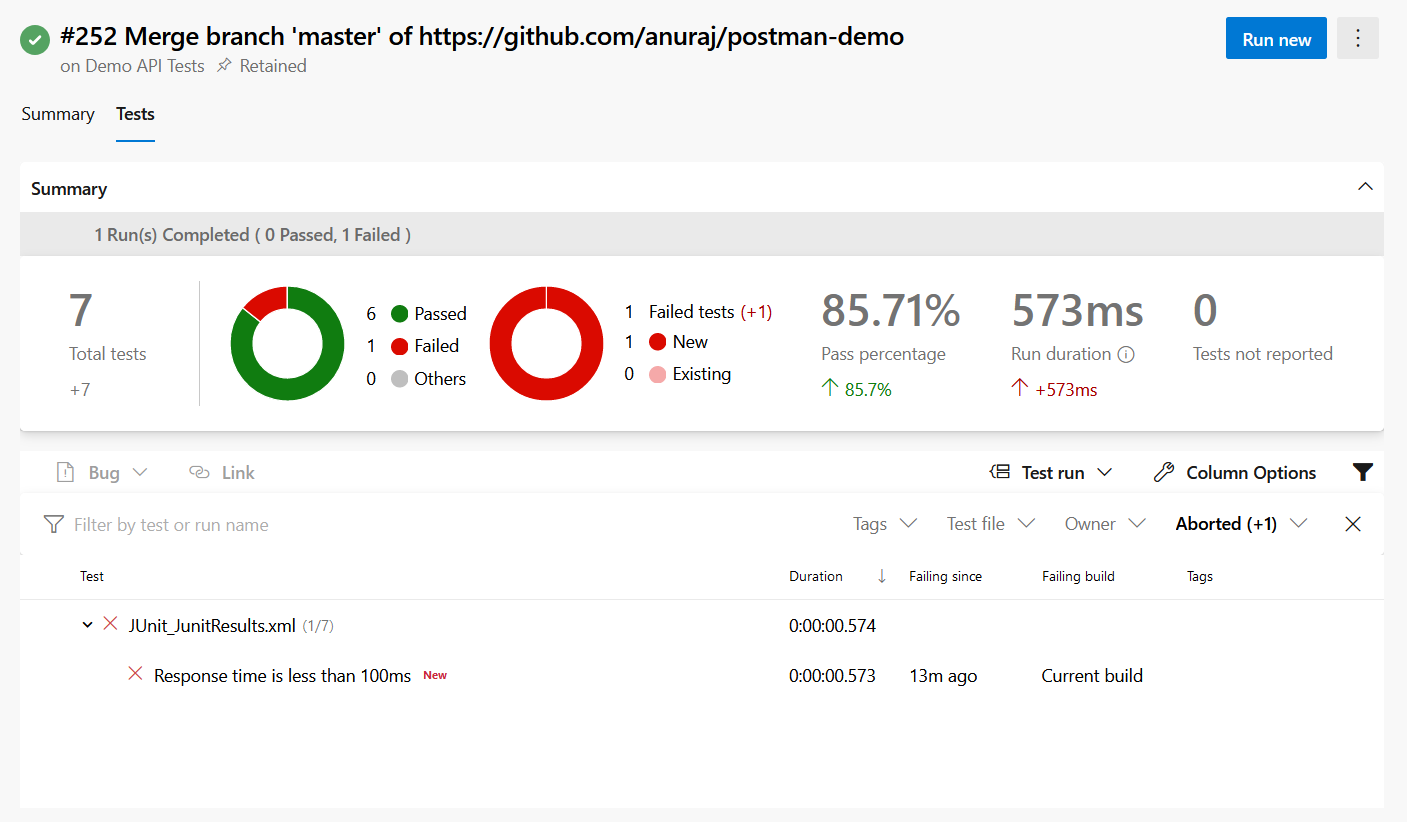
If you notice the newman run command comes with few more parameters which helps to publish the results as JUnit XML file. The -x flag will ignore the exit code and continue the build steps, if you want to stop the build execution if any of the tests fails, you need to remove it. In this post I build a pipeline only specific for monitoring purposes, that is why I added an ignore exit code parameter. Here is the results after running the pipeline.
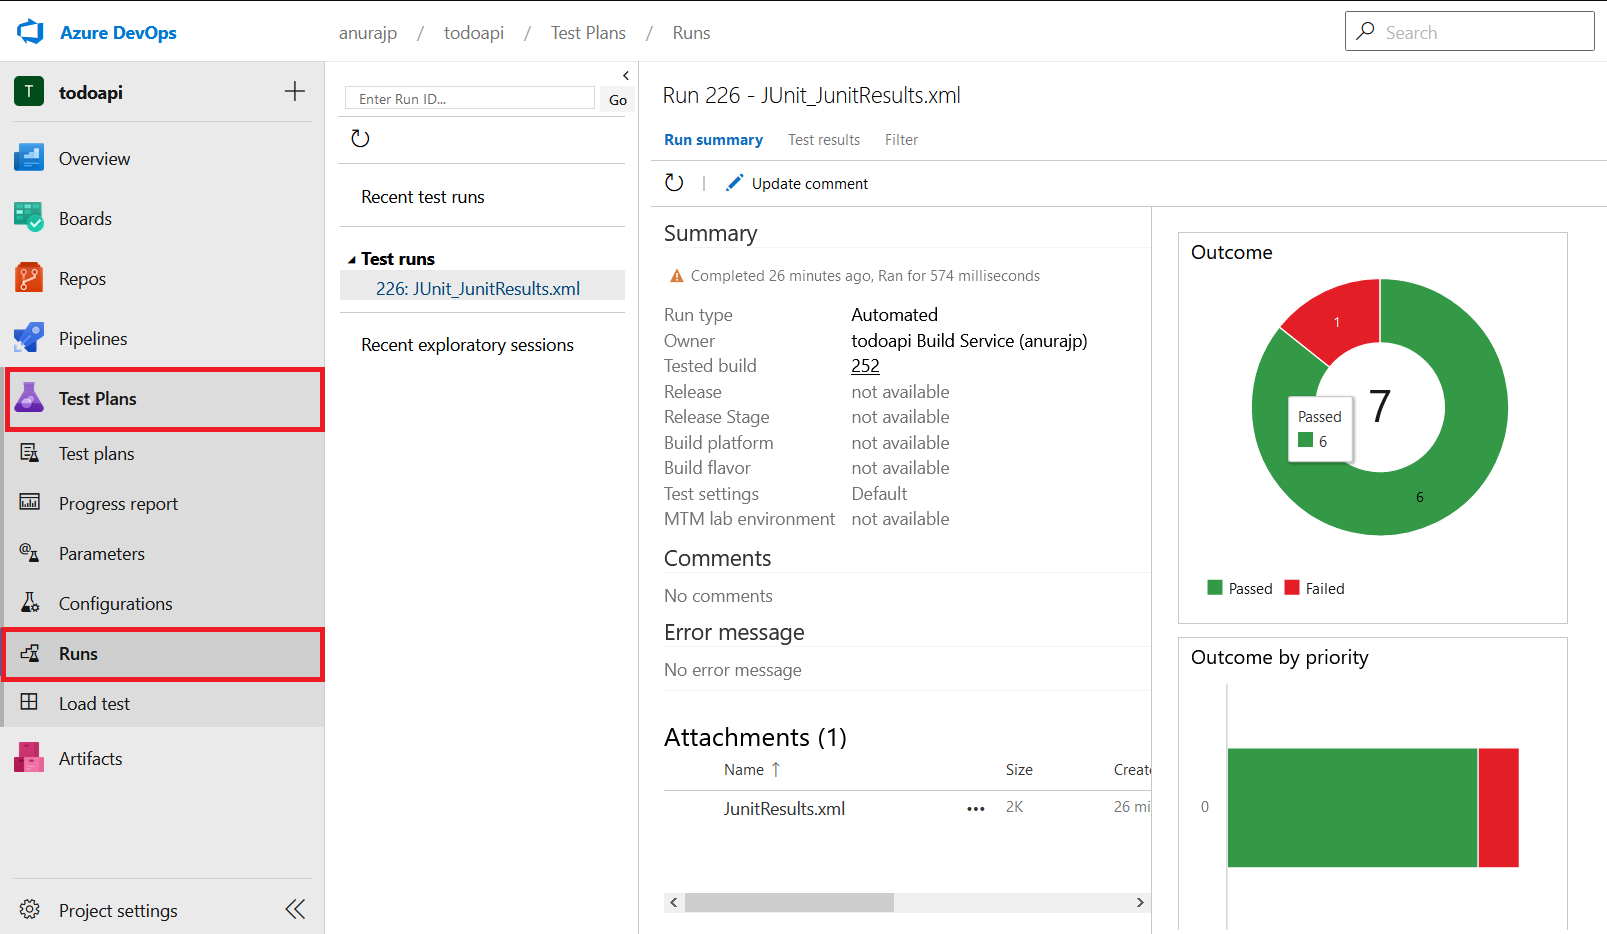
You can find more details about the test run in the Test Plans > Runs. You can find more details like Test Runs and details about Tests.
You can configure the it to be run it with scheduled trigger or as a continuous delivery option, so that this API tests can validate your app and show the results. You can use similar script and execute the same test cases in GitHub actions as well.
Happy Programming :)
Copyright © 2024 Anuraj. Blog content licensed under the Creative Commons CC BY 2.5 | Unless otherwise stated or granted, code samples licensed under the MIT license. This is a personal blog. The opinions expressed here represent my own and not those of my employer. Powered by Jekyll. Hosted with ❤ by GitHub