How to create social media posts from long form content using Python
February 24, 2021 by Anuraj
Python Docker Azure
This article discuss about generating social media posts from long form written content using Python. Most of the companies create technical blogs, white papers, articles as part of their marketing initiative. And they will push these content to social media with a summary, which helps them to bring customers to their websites. And most of the articles or blogs repurposed. This solution will help you to create such social media posts from the blog posts or articles. In this post you will learn how to implement a solution using Python and Flask, and hosting it on Azure App Service. You will also learn to use Azure Cognitive Services instead of using nltk package.
How it works?
The algorithm is very simple. First you will parse the URL and extract the keywords from the content using NLP. Next you will find the sentences from the content with most of the keywords and display it.
Following packages are used in this example.
| Package Name | Description |
|---|---|
| Flask | For user interface and user interactions |
| Newspaper | For getting the content from URLs or website |
| Nltk | For extracting keywords from Text and splitting content into multiple sentences |
So you need to install the above packages. Here is the requirements.txt file.
Flask==1.1.2
newspaper3k==0.2.8
nltk==3.5
You can run the pip install -r requirements.txt in your virtual environment. Once you install all the requirements, you can create the app.py file. You can find the app.py file in the implementation section. You can use VS Code for development purposes, with Docker and Azure extensions.
Implementation
You can use the Flask framework to show the user interface and interact with user inputs. The newspaper package is for converting the URL into readable format and extracting the keywords from the content using Nltk package.
from flask import Flask, render_template, request
import newspaper
import nltk
from nltk.tokenize import sent_tokenize

app = Flask(__name__)

@app.route('/', methods=['GET'])
def index():
    return render_template('index.html')


@app.route('/', methods=['POST'])
def index_post():
    url = request.form['UrlInput']
    if(len(url.strip()) >= 1):
        article = newspaper.Article(url)
        article.download()
        article.parse()
        article.nlp()
        sentences = sent_tokenize(article.text)
        keywords = article.keywords
        results = []
        frequency = 3
        for sentence in sentences:
            numberOfWords = sum(
                1 for word in keywords if word in sentence)
            if (numberOfWords > frequency):
                results.append(sentence.replace("\n", "").strip())
        return render_template('result.html', url=url, results=results, keywords=keywords)
    else:
        return render_template('result.html', url=url, error='Please provide a valid URL to continue.')

if __name__ == '__main__':
    app.run(host='0.0.0.0', port=5000)
This implementation got one route with different HTTP methods. When a user browse the URL, the HTTP GET method is invoked and it returns a index.html file. And when a user fill the UrlInput field and submits the form, the HTTP POST route is invoked. In backend, you will get the value of the UrlInput form field. Using the Newspaper package, the URL is downloaded, parsed and running nlp on the content with the help of nltk which helps to extract the keywords. Next using sent_tokenize the text is split into multiple sentences. And finally, based on the number of keywords in a sentence, add the sentence into a array and render the result.html file with the array. And the app is exposing port 5000. You can run / debug the application using VS Code.
In the next section, you will publish the solution to Azure.
Publishing to Azure
To publish the solution to Azure, let’s convert the solution into a docker image and publish it. To do this you can use VSCode Docker extension and add the Dockerfile. Once you add the Dockerfile, you will get a requirements.txt file with flask and gunicorn packages. You need to add the packages you installed to this. Modify the requirements.txt file like the following.
Flask==1.1.2
gunicorn==20.0.4
newspaper3k==0.2.8
nltk==3.5
And here is the Dockerfile generated by VS Code.
FROM python:3.8-slim-buster

EXPOSE 5000

ENV PYTHONDONTWRITEBYTECODE=1

ENV PYTHONUNBUFFERED=1

COPY requirements.txt .
RUN python -m pip install -r requirements.txt

WORKDIR /app
COPY . /app

RUN useradd appuser && chown -R appuser /app
USER appuser

CMD ["gunicorn", "--bind", "0.0.0.0:5000", "app:app"]
Once it is done, run the docker build image command - docker image build --tag anuraj/postgenerator ., you need to use your docker hub or container registry id instead of anuraj. And once it is build, run the container with the command docker run -d -p 5000:5000 anuraj/postgenerator and open browser and check whether our application is running. You can browse http://127.0.0.1:5000/. It will be showing the UI. Once you submit a URL, it will throw an Internal Server Error. You can check the docker logs and it will show something like this.
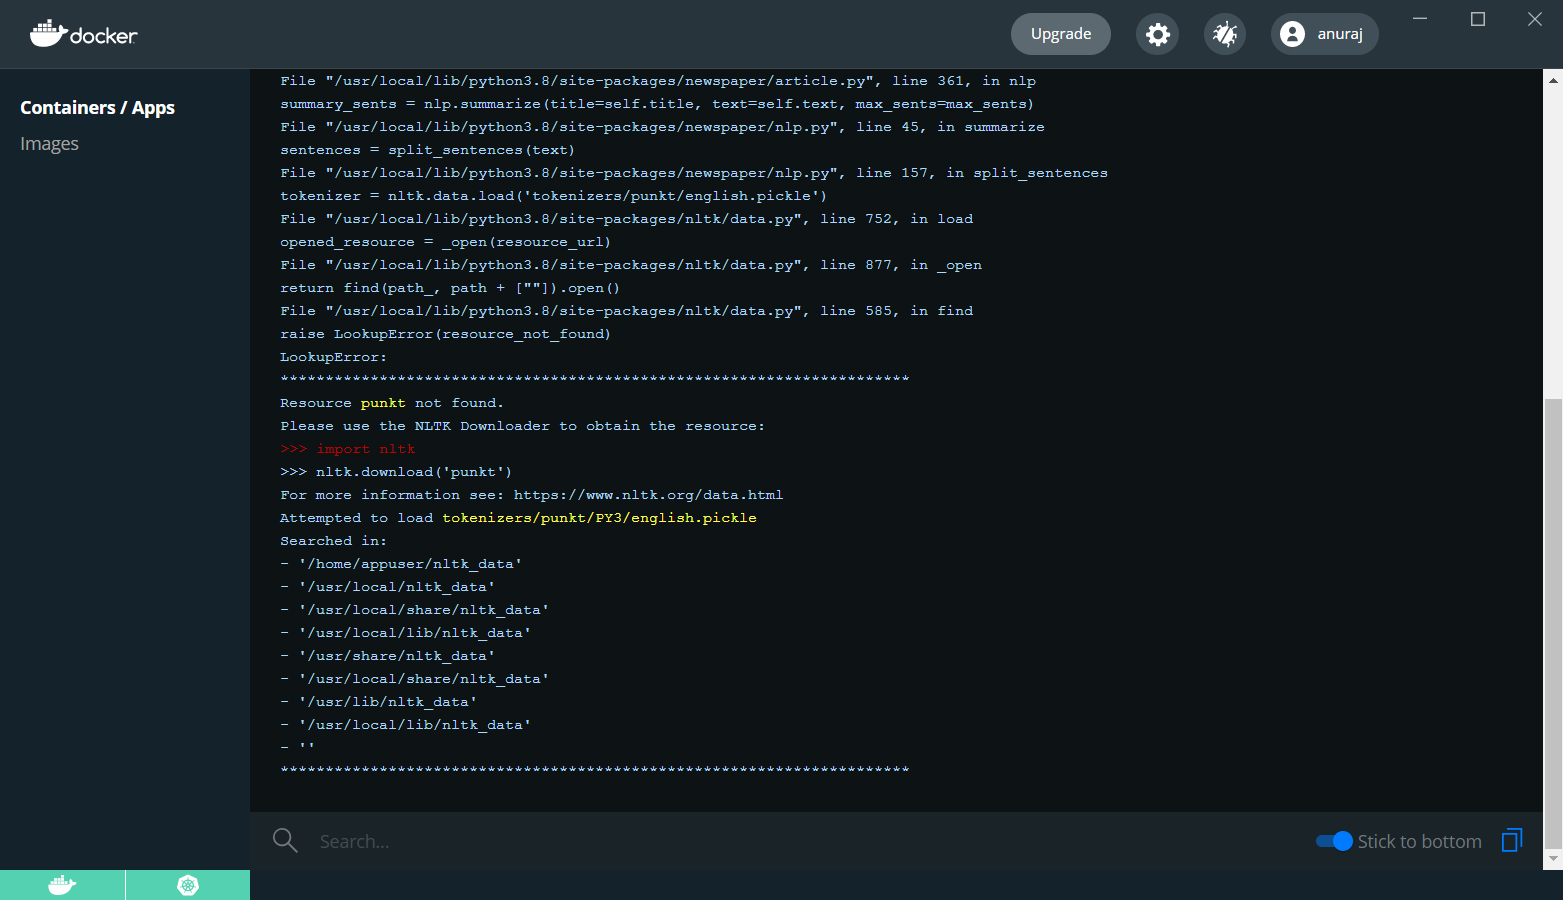
To fix this issue, you need to download the punkt resource. You can do it in the Dockerfile like this.
FROM python:3.8-slim-buster
EXPOSE 5000
ENV PYTHONDONTWRITEBYTECODE=1
ENV PYTHONUNBUFFERED=1
COPY requirements.txt .
RUN python -m pip install -r requirements.txt
WORKDIR /app
COPY . /app
RUN [ "python", "-c", "import nltk; nltk.download('punkt', download_dir='/app/nltk')" ]
ENV NLTK_DATA /app/nltk/
RUN useradd appuser && chown -R appuser /app
USER appuser
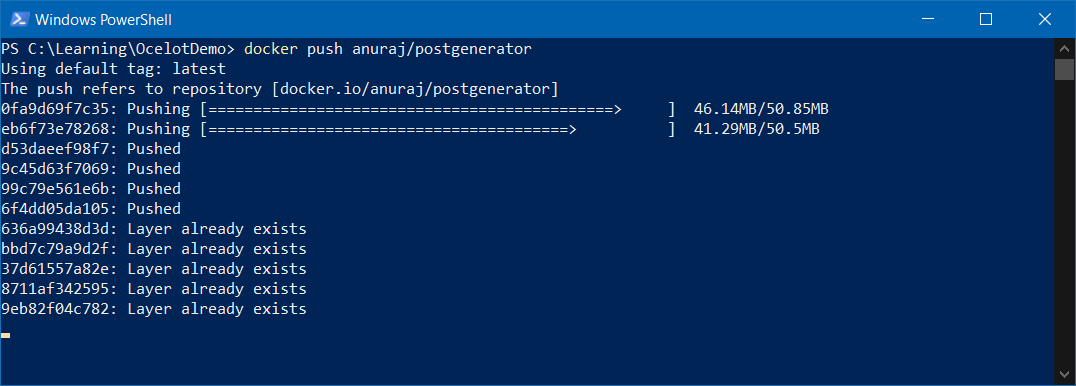
CMD ["gunicorn", "--bind", "0.0.0.0:5000", "app:app"]In the Dockerfile you’re downloading the punkt resource to the /app/nltk directory and configuring the NLTK_DATA environment variable to the downloaded directory. Now build the image and run it. It should work properly. Now you build a docker image. Next you need to publish the image to any docker registry. For this example, Docker Hub is used. And the image is tagged based on the Docker Hub account. If you’re not following the convention, you need to tag the image with your id. If you’re using VS Code, you can deploy it from there with the help of Docker extension, or you can use the docker push command like this - docker push anuraj/postgenerator, it may take some time based on your internet bandwidth.
Once it is completed, you can check the Docker Hub and verify it is available. To deploy the image to App Service, you can use the VS Code Docker extension. You can right click on the image tag and choose the Deploy Image to Azure App Service option.
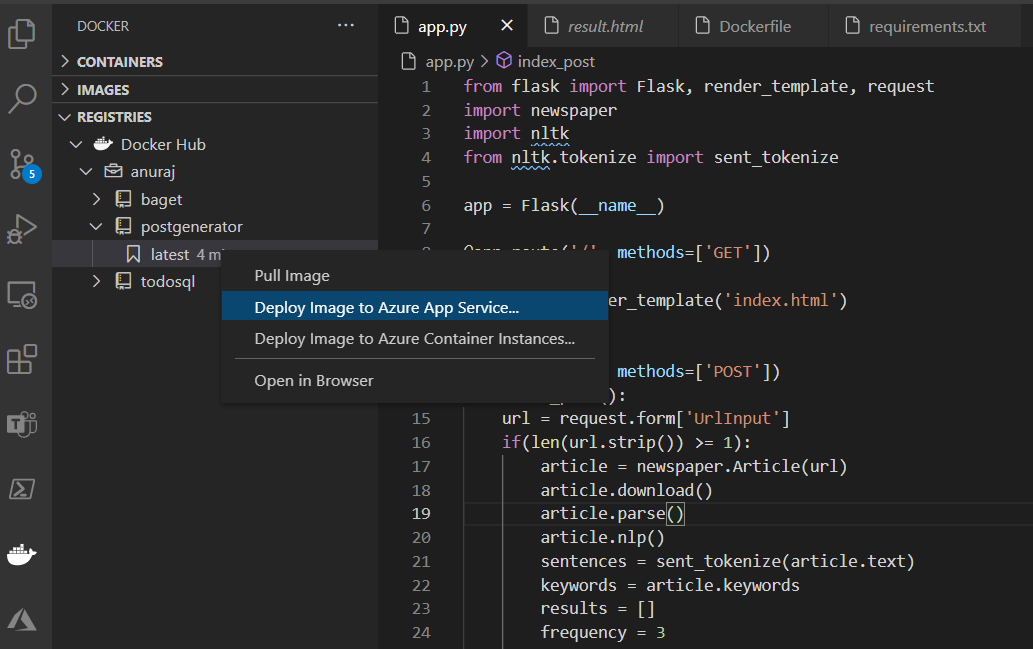
It will prompt for the some configuration values - similar to what you configure when creating an Azure App Service. Once it is done, VS Code will provision the app service and deploy the container image to Azure app service.
Improvements
You can extend the implementation using Azure Cognitive Services - Text Analytics. So instead of using nltk package to extract the keywords you can use Azure Text Analytics service and extract the keywords. Here is the code for getting the keywords using Text Analytics from docs.microsoft.com.
from azure.core.credentials import AzureKeyCredential
from azure.ai.textanalytics import TextAnalyticsClient

credential = AzureKeyCredential("<api_key>")
endpoint="https://<region>.api.cognitive.microsoft.com/"

text_analytics_client = TextAnalyticsClient(endpoint, credential)

documents = [
    "Redmond is a city in King County, Washington, United States, located 15 miles east of Seattle.",
    "I need to take my cat to the veterinarian.",
    "I will travel to South America in the summer."
]

response = text_analytics_client.extract_key_phrases(documents, language="en")
result = [doc for doc in response if not doc.is_error]

for doc in result:
    print(doc.key_phrases)
Please note that Text Analytics got request data limits - Maximum number of characters for a document is 5120 and maximum number of documents is 10. So if you’re planning to get extract keywords from long documents, you may need to split the document and join the results.
Now you have implemented a minimal python AI application and deployed to Azure. You can find more details about App Service Deployment, configuring CI/CD pipelines for Python applications, Using Azure Cognitive services in Python etc in the Reference Links section.
Reference Links
- Tutorial: Deploy Docker containers to Azure App Service with Visual Studio Code
- Configure a Linux Python app for Azure App Service
- Quickstart: Create a Python app in Azure App Service on Linux
- Use CI/CD to deploy a Python web app to Azure App Service on Linux
- Build an AI web app by using Python and Flask
- Azure Text Analytics client library for Python - Version 5.0.0
Happy Programming :)
Copyright © 2024 Anuraj. Blog content licensed under the Creative Commons CC BY 2.5 | Unless otherwise stated or granted, code samples licensed under the MIT license. This is a personal blog. The opinions expressed here represent my own and not those of my employer. Powered by Jekyll. Hosted with ❤ by GitHub