How to use Angular 4 with ASP.NET MVC 5
November 25, 2017 by Anuraj
ASP.NET MVC Angular
This post is about how to use Angular 4 with ASP.NET MVC5. In one of my existing projects we were using Angular 1.x, due to some plugin compatibility issues, we had to migrate to latest version of Angular. We couldn’t find any good article which talks about development and deployment aspects of Angular 4 with ASP.NET MVC.
The pre-requisites are
- npm (Node Package Manager) - I am using npm version 5.5.1
- Angular CLI - I am using angular cli version 1.5.3
- Visual Studio 2017 / 2015 - For developing ASP.NET MVC project.
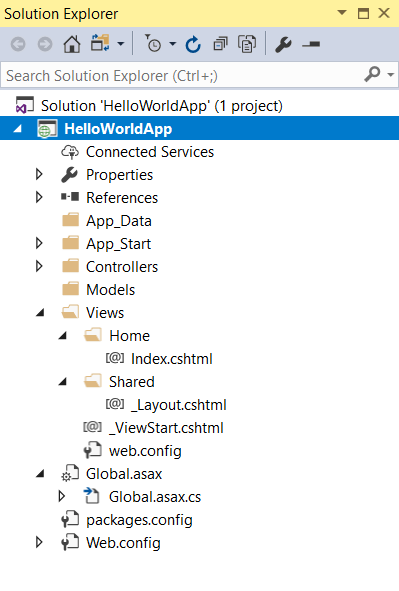
First you need to create ASP.NET MVC project.
Once you created the project, using Angular CLI you need to create Angular project. You need to do it in the root folder. And you need to execute following commands to create an Angular project.
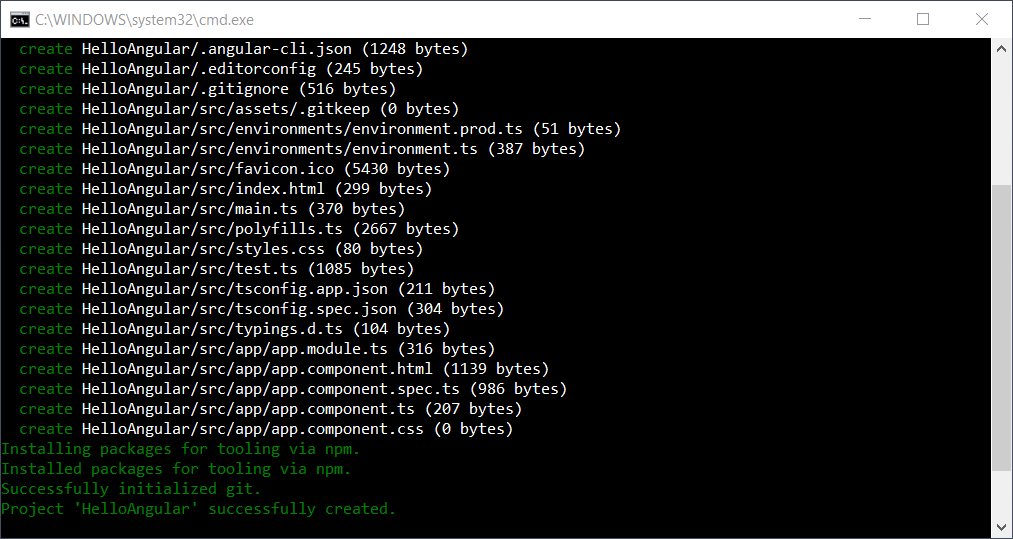
ng new HelloAngularThis will create a folder with name HelloAngular. And it contains all the required files for Angular project. Here is the folder structure after creating the angular project.
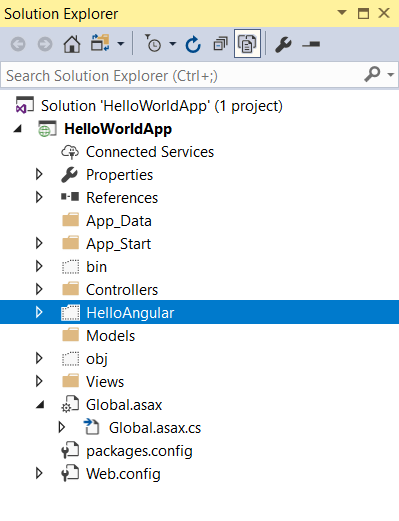
Here is the updated folder structure after creating the Angular project.
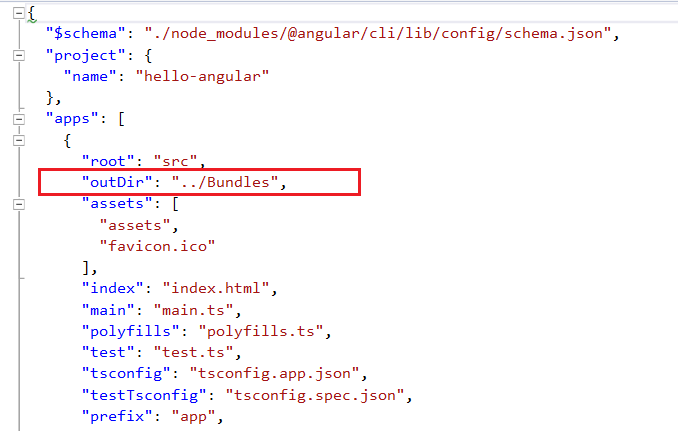
Unlike earlier versions of Angular, you need to reference the generated files with Angular CLI. You can generate the build files using ng build command. Before executing the ng build command, you need to configure your output folder, the scripts will be generated to the configured folder, by default it will be dist. I am configuring it to ../Bundles folder.
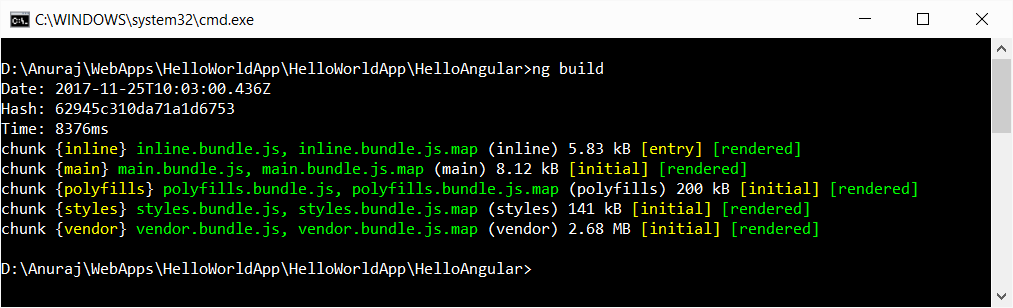
Next you need to run ng build command. Once you run the command, it will generate required files to the bundles folder.

Next you need to open index.html under bundles folder, you need to copy the script and style references from the file and add it to the _layout.cshtml file. I am using the ASP.NET MVC bundling and minification framework for this. Here is the code snippet for that.
public class BundleConfig
{
    public static void RegisterBundles(BundleCollection bundles)
    {
        bundles.Add(new ScriptBundle("~/Script/Bundles")
                .Include(
                "~/bundles/inline.*",
                "~/bundles/polyfills.*",
                "~/bundles/scripts.*",
                "~/bundles/vendor.*",
                "~/bundles/main.*"));
    }
}
And here is my _layout.cshtml file.
<!DOCTYPE html>
<html>
<head>
    <meta charset="utf-8" />
    <meta name="viewport" content="width=device-width, initial-scale=1.0">
    <title>Hello World - ASP.NET MVC</title>
</head>
<body>
    @RenderBody()
    @Scripts.Render("~/Script/Bundles")
</body>
</html>
Now you have completed the initial infrastructure.
If you notice, I have removed the Bootstrap reference from _layout file. You can add it via .angular-cli.json file. First you need to install JQuery, Popper JS and Bootstrap 4 via npm install command.
npm install jquery --save
npm install popper.js --save
npm install bootstrap --save
Once you installed it, you can modify the file like this.
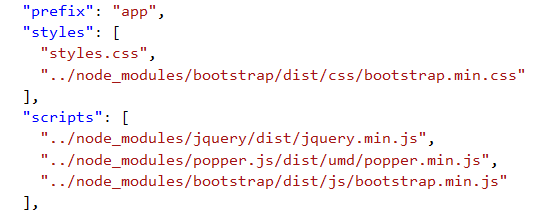
Again you can run the ng build command, which ideally should bundles the scripts and styles we configured in the .angular-cli.json file.
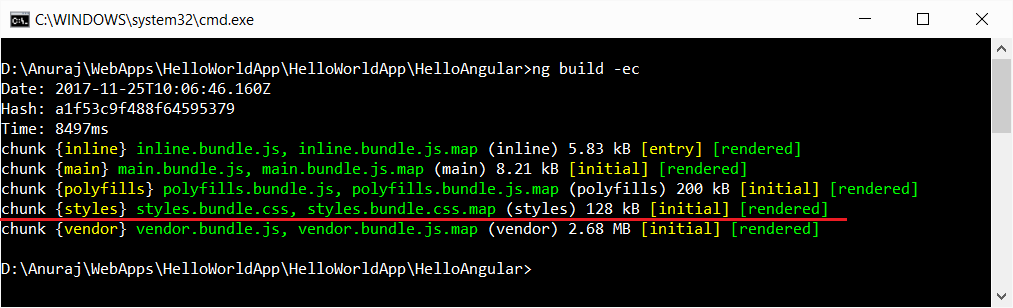
If notice, even though we added the style reference, ng build command didn’t generated any css files. You need to provide -ec command line parameter to ng build command. This will generate the styles.
Now you can modify your bundleconfig file like this, including the style reference.
bundles.Add(new StyleBundle("~/Content/Styles")
    .Include("~/bundles/styles.*"));
And _layout file like this.
<!DOCTYPE html>
<html>
<head>
    <meta charset="utf-8" />
    <meta name="viewport" content="width=device-width, initial-scale=1.0">
    <title>Hello World - ASP.NET MVC</title>
    @Styles.Render("~/Content/Styles")
</head>
<body>
    <main role="main" class="container">
        @RenderBody()
    </main>
    @Scripts.Render("~/Script/Bundles")
</body>
</html>
Also you need to copy Angular app-root element to the Index.cshtml file, like this.
@{
    ViewBag.Title = "Index";
}

<app-root></app-root>
Now you can run the ASP.NET MVC application to view the results.
You can run the ng build --prod command to make your script file minified, which is required to deploy the application in server. You don’t need -ec parameter to generate the styles. Also the --prod parameter will reduce the file size as well.
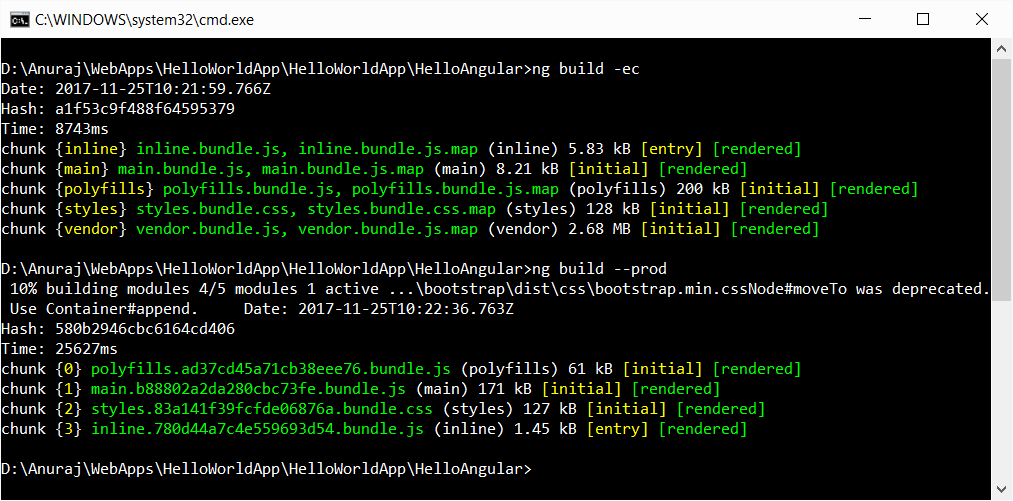
You can find the difference of file sizes.
Next you can modify the project file to automate the deployment. You need to edit your project file. For that first you need to unload the project by right clicking on the project node and select Unload Project option. Then select the Edit HelloWorldApp.csproj. Next add the following code inside the project element.
<Target Name="NgDebug" BeforeTargets="Build" Condition="'$(Configuration)' == 'Debug'">
  <Exec WorkingDirectory="$(ProjectDir)HelloAngular" Command="ng build -ec" />
</Target>
<Target Name="NgRelease" BeforeTargets="Build" Condition="'$(Configuration)' == 'Release'">
  <Exec WorkingDirectory="$(ProjectDir)HelloAngular" Command="ng build --prod" />
</Target>
The above code will execute ng build -ec and ng build --prod commands based on the Visual Studio configuration. If the configuration is Debug, I will be executing the ng build -ec command and for Release configuration I am executing the ng build --prod command.
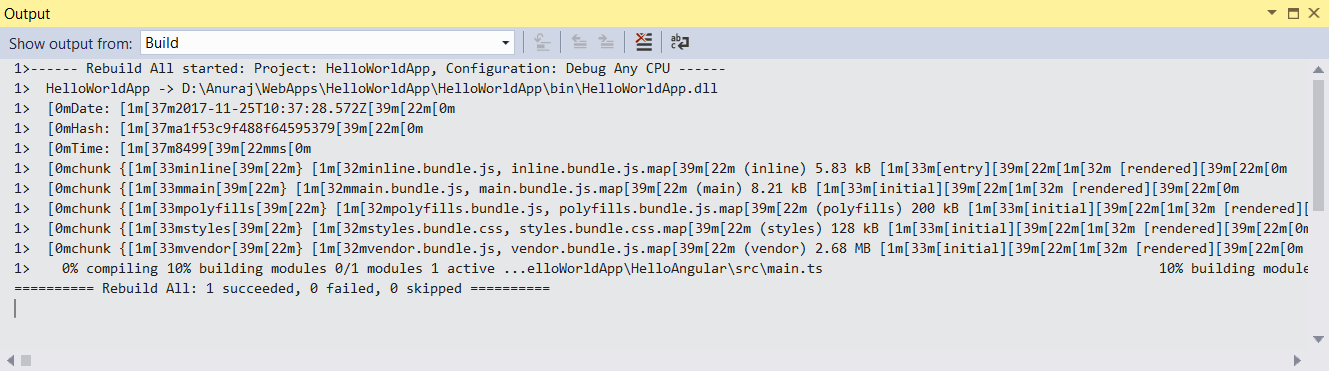
Next reload the project and build it. You will be able to see the ng build command output in the output window of Visual Studio.
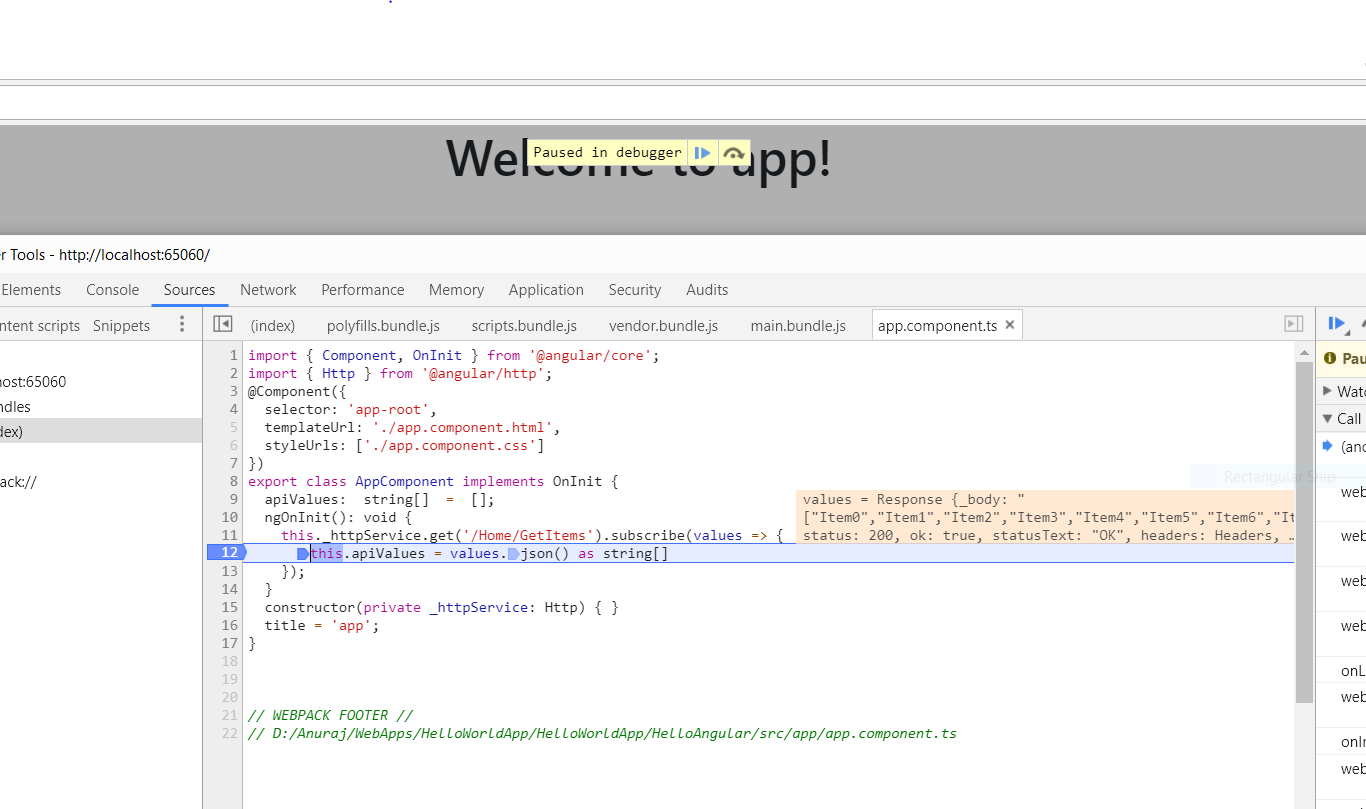
That’s it. Now you can add modules and components to angular application and you can debug it with chrome developer tools.
Here is the source code on Github - This is a CRUD example using ASP.NET MVC Web API and Angular.
Happy Programming :)
Copyright © 2024 Anuraj. Blog content licensed under the Creative Commons CC BY 2.5 | Unless otherwise stated or granted, code samples licensed under the MIT license. This is a personal blog. The opinions expressed here represent my own and not those of my employer. Powered by Jekyll. Hosted with ❤ by GitHub