How to use FastReport Open Source in ASP.NET Core
January 28, 2021 by Anuraj
AspNetCore Reporting FastReport
If you’re coming from VB6 / Winforms world, one of the challenge in ASP.NET Core is lack of reporting tools. In VB6, Crystal reports was there. And if I am not wrong it was part of some Visual Studio versions. I was exploring a free reporting tool for one of old companies as they were planning to move their VB6 app to ASP.NET Core and Cloud. So lets explore Fast Report Open Source.
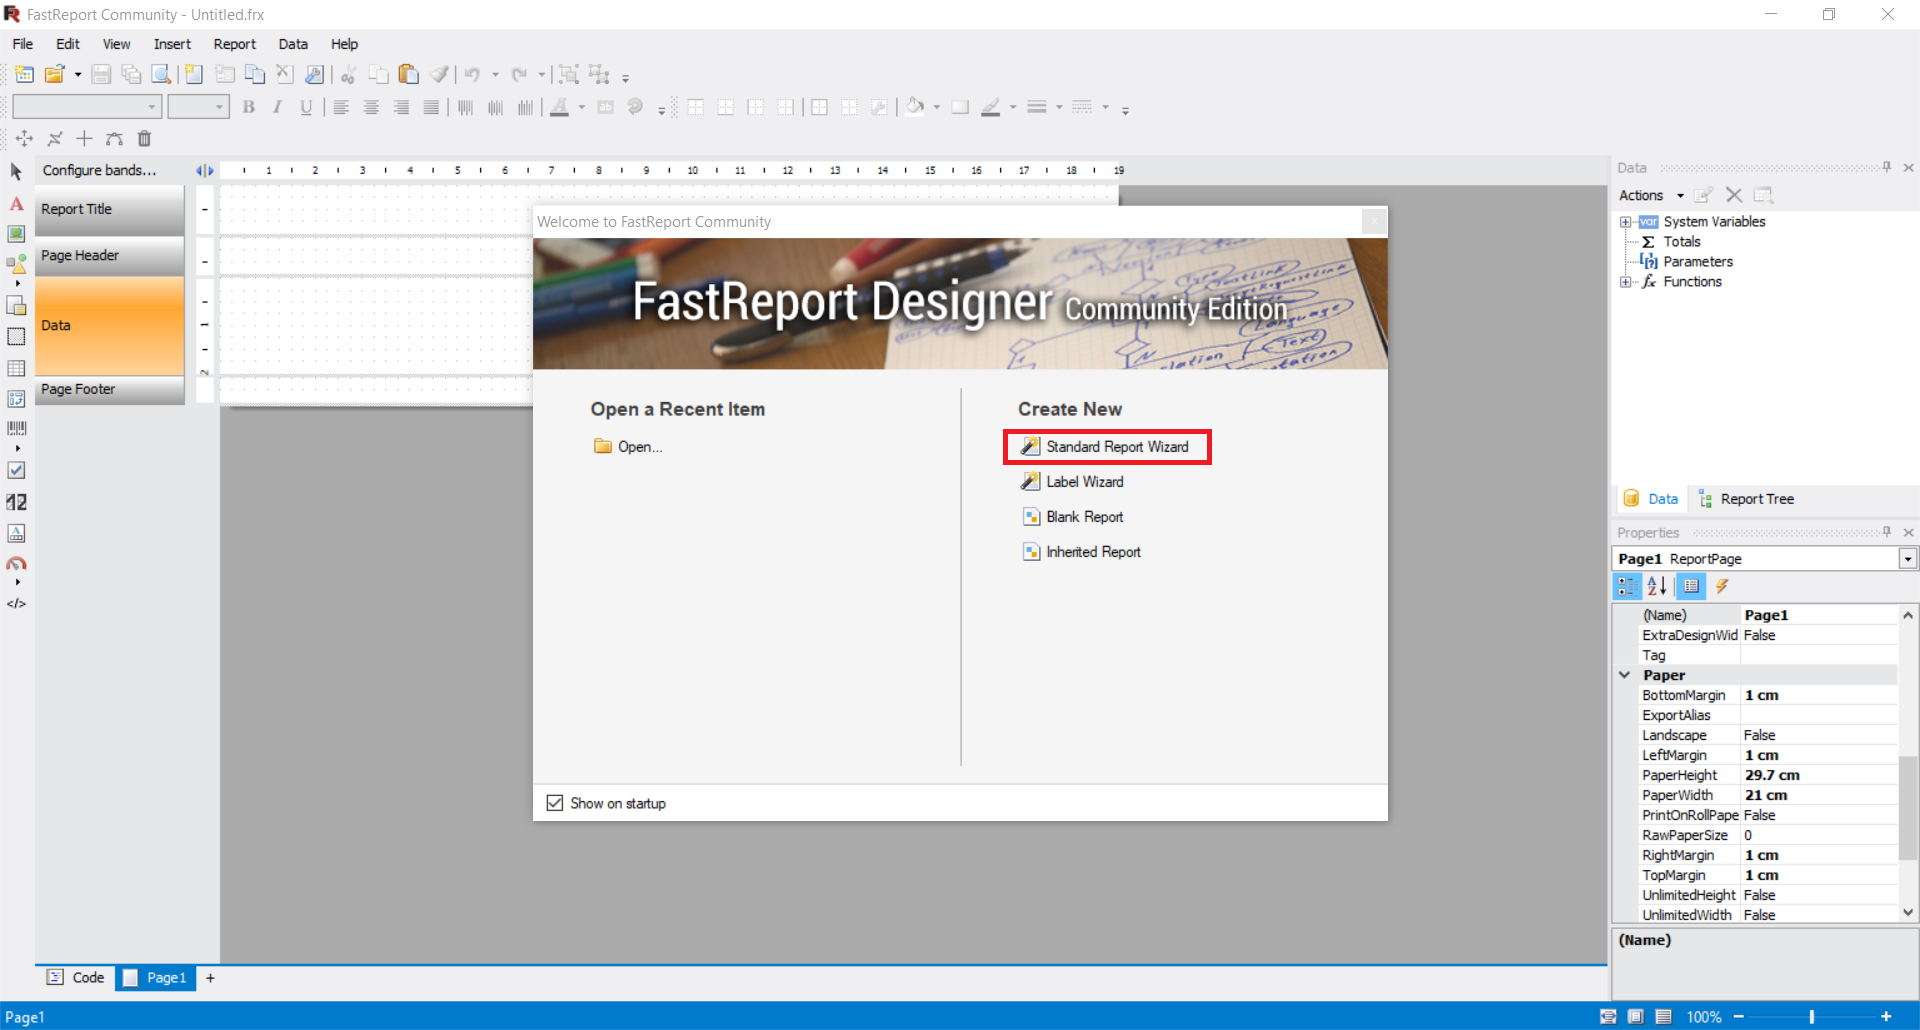
I am using ASP.NET Core 5.0 MVC application for this demo. And I am using the NorthWind database. I am displaying the Categories table in View with the help of Fast Report component. So to use FastReport, you need the FastReport Designer - I am using the Community Edition. They are offering an online edition as well - which is paid. Open FastReport Designer executable, and select the Standard Report Wizard under Create New option.
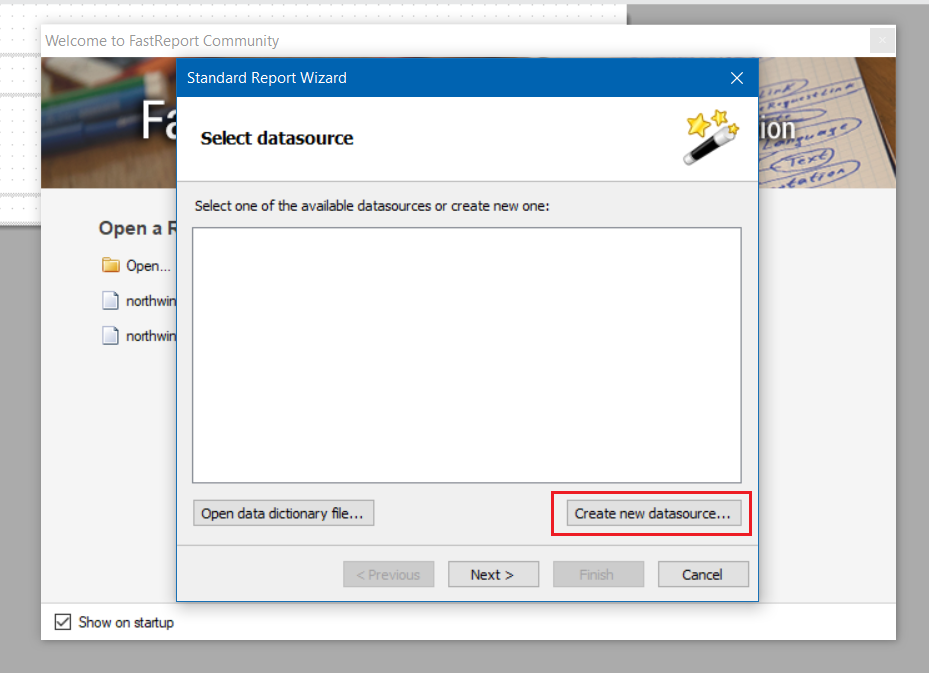
Then click on Create new datasource button in the Standard Report Wizard, which help you to configure a data source for the report.
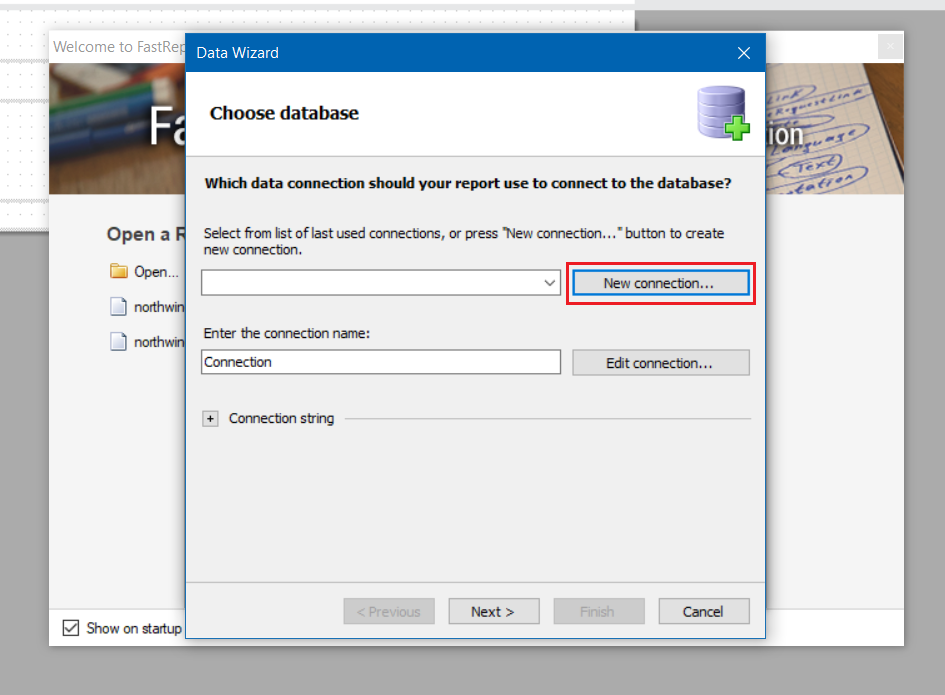
From that screen, click on New Connection button - which will help you to connect to a Data source.
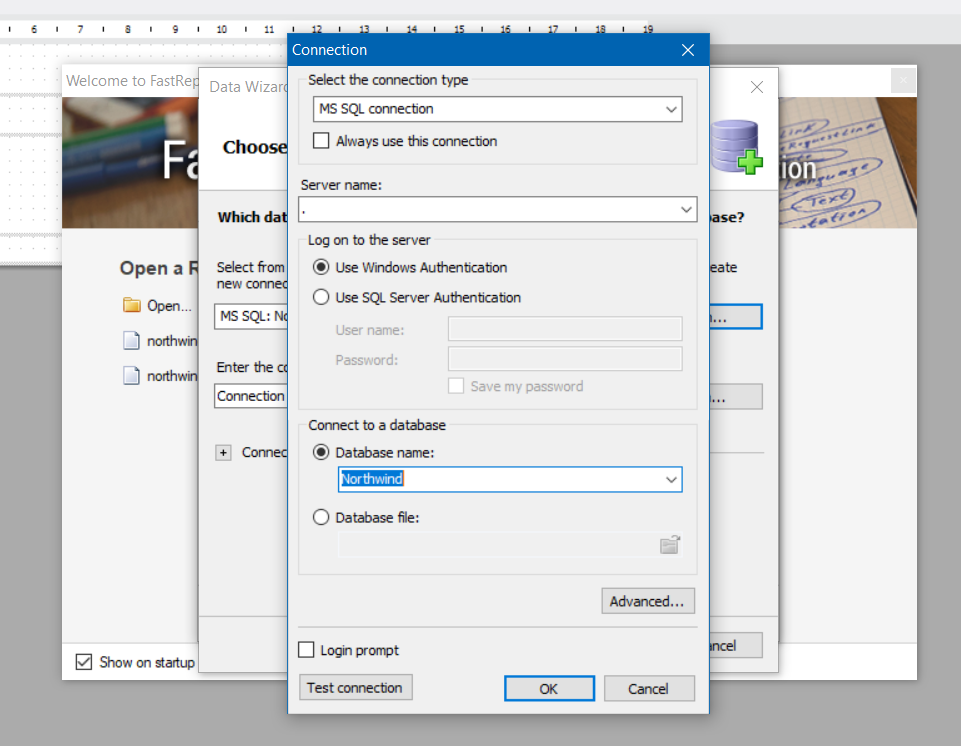
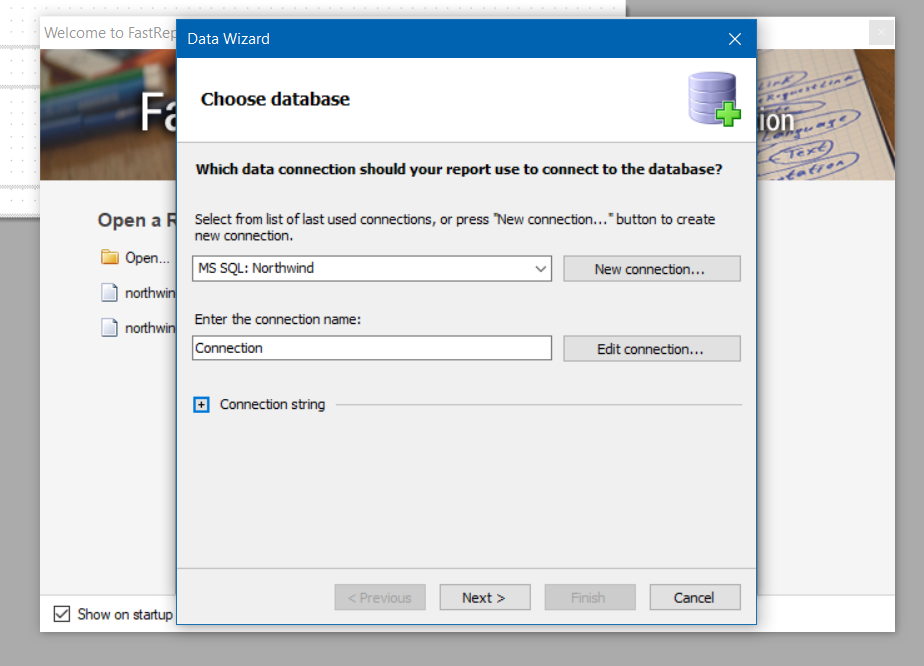
In the Connection dialog, choose the option MS SQL Connection, the dialog will expand - you can configure you SQL Server connection here. Since I am connecting to my local SQL Server I provided the SQL Server name as . and it in Windows Authentication mode I choose that option, and finally the Database - which is Northwind. You can do the Test Connection and Click Ok to complete the MS SQL Connection.
Once you click OK, the Connection name will be populated in the screen - it depends on the database you are connecting. You can click on Edit Connection button if you want to modify anything - like changing authentication mode or switching to a different database.
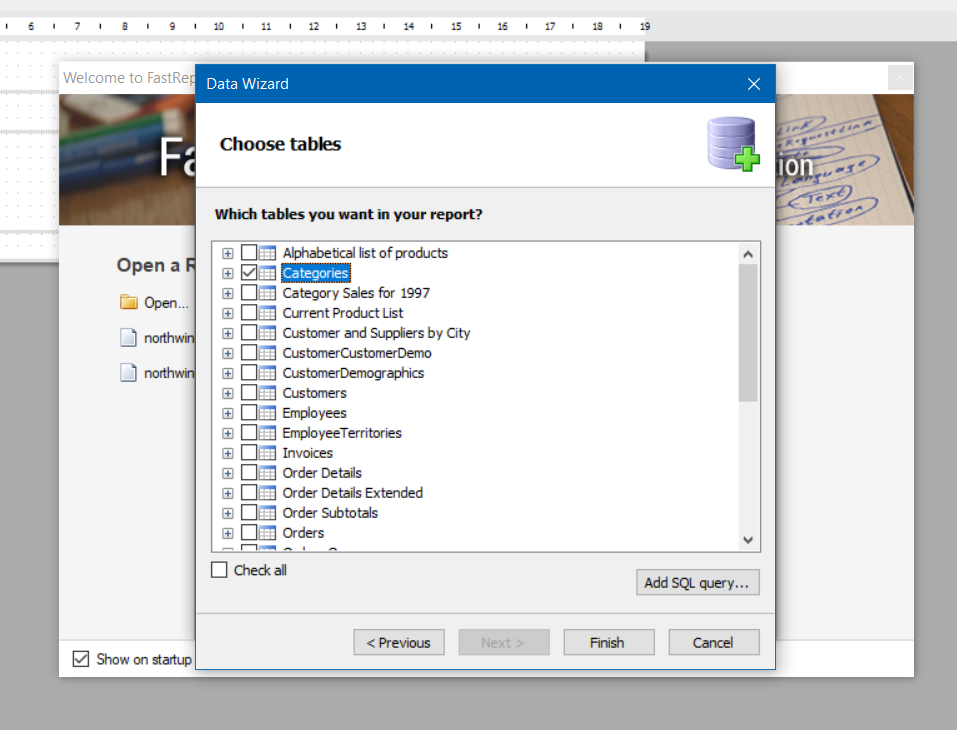
Click on the Next button to move to the next screen - in that screen you will be able to see all the tables in the database. Select the categories table and click on Finish.
Now you have completed the creation of the Data Source. Once you finish the Data Wizard - you will be able to see the Categories table populated on the Select Data Source dialog.

Click Next and choose the fields you like to display in the report. I am choosing all the fields. You can choose it depend on your needs.

Next you can choose fields to group, I am not doing it in the demo, click on Next, and in this screen you can choose the Layout and Orientation. I choose the Portrait orientation and Columnar as Layout. And in the next screen you can choose the Report Style, I choose the Blue style. And click on Finish. This will complete the Standard Report Wizard. And you will be able to see the Report Designer.
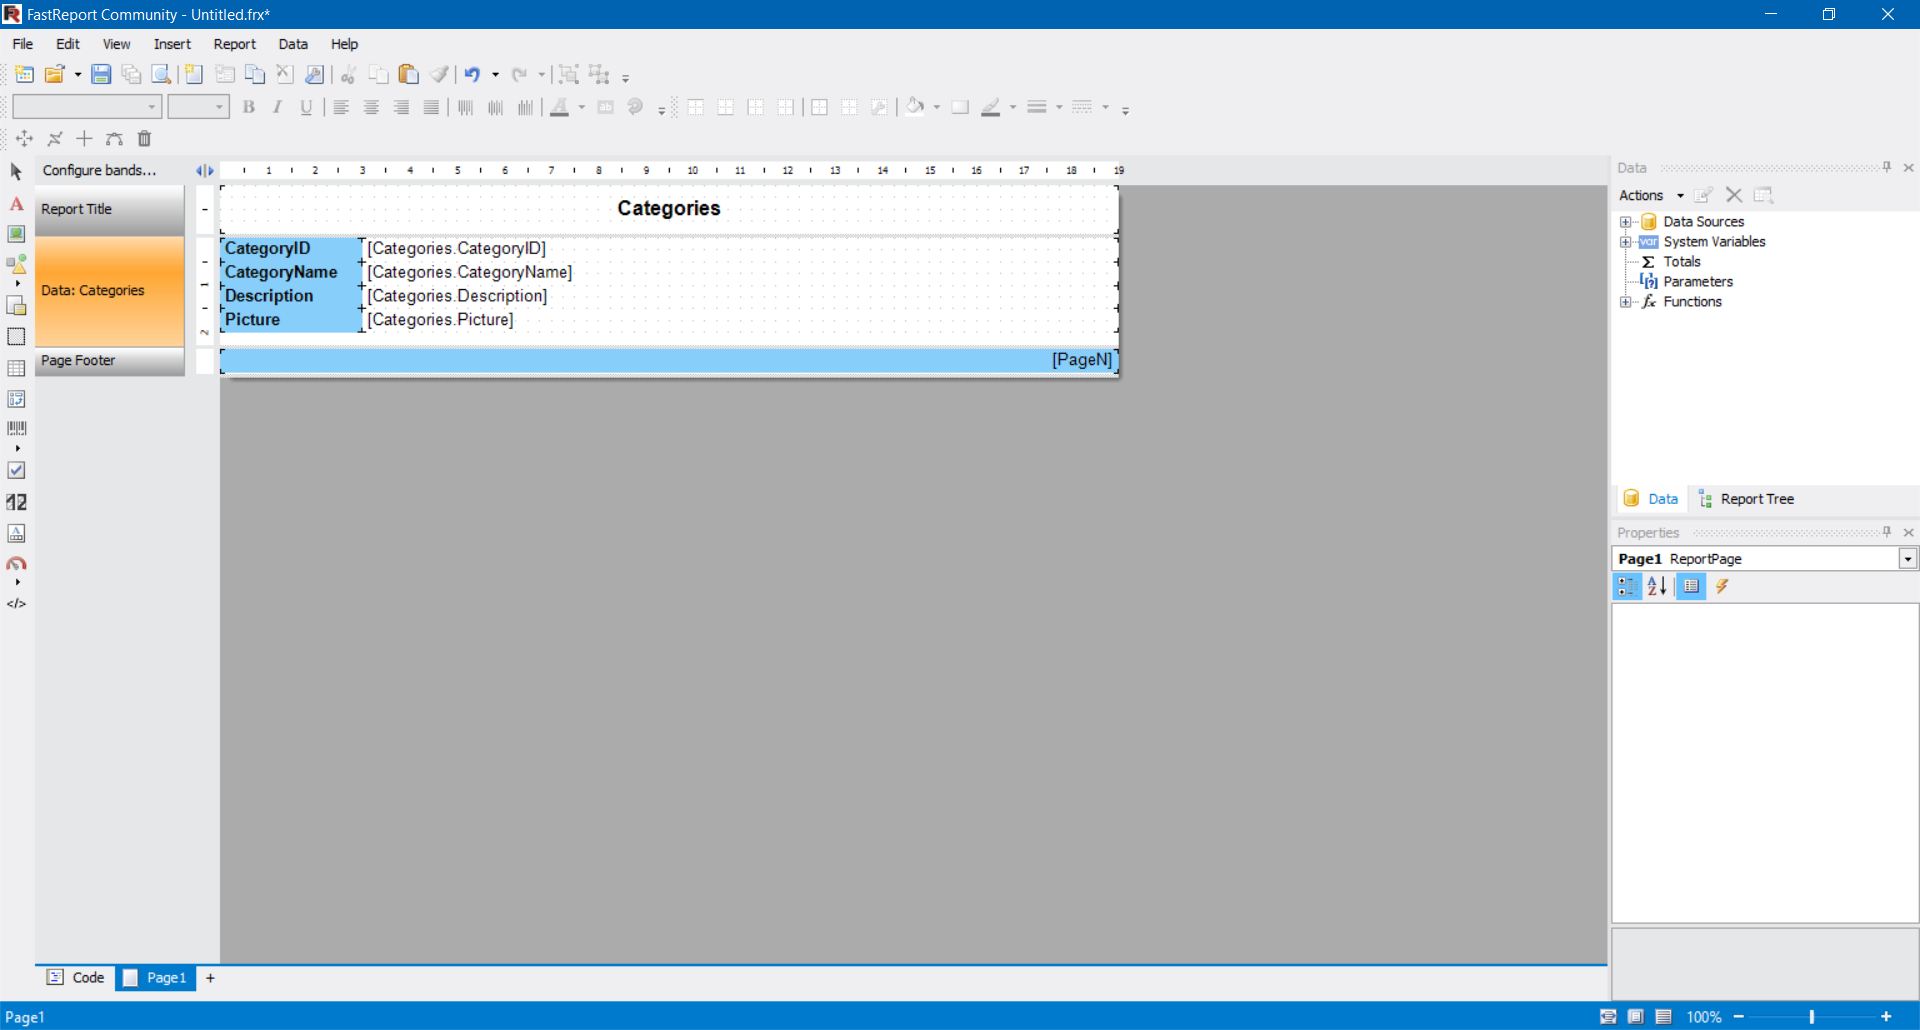
You can click on File > Preview or Ctrl + P to see the Preview - this will show the report in preview mode with categories.
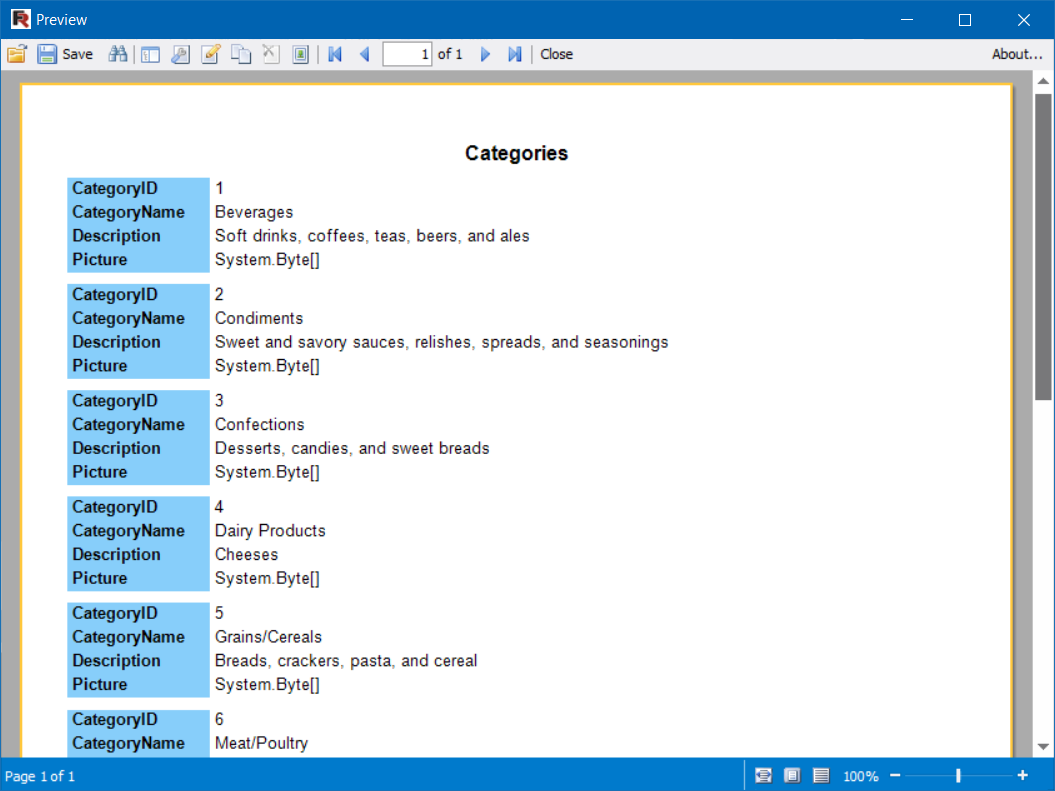
If notice, the Picture field is displayed as System.Byte[] in the preview screen it is because in the designer it is a text field. You can drag a Picture Control from the toolbar and replace the picture textbox with that and configure the Picture box field as Picture.

Now if you run the Preview you will be able to see the Images instead of System.Byte[]. So you have successfully created a report in the designer. For using it, you need to save the report. I am saving it as northwind-categories.frx.
Lets integrate the report to ASP.NET Core MVC. To do this, I created an ASP.NET Core MVC project and added the following packages - FastReport.OpenSource, FastReport.OpenSource.Data.MsSql, and FastReport.OpenSource.Web. And for connecting to SQL Server and scaffolding database context and model classes I am using EF Core packages as well. Here is the update project file.
<Project Sdk="Microsoft.NET.Sdk.Web">

  <PropertyGroup>
    <TargetFramework>net5.0</TargetFramework>
  </PropertyGroup>

  <ItemGroup>
<PackageReference Include="FastReport.OpenSource" Version="2021.1.7" />
<PackageReference Include="FastReport.OpenSource.Data.MsSql" Version="2021.1.7" />
<PackageReference Include="FastReport.OpenSource.Web" Version="2021.1.7" />
    <PackageReference Include="Microsoft.EntityFrameworkCore.Design" Version="5.0.2">
      <IncludeAssets>runtime; build; native; contentfiles; analyzers; buildtransitive</IncludeAssets>
      <PrivateAssets>all</PrivateAssets>
    </PackageReference>
    <PackageReference Include="Microsoft.EntityFrameworkCore.SqlServer" Version="5.0.2" />
  </ItemGroup>

</Project>
Next using EF Core dotnet tool I scaffolded Northwind database - database context and model classes - you can find more details on how to do this on this blog post. Next I copied the report file to reports folder in the application root. And modified the Startup class - Configure method to use FastReport, like this.
public void Configure(IApplicationBuilder app, IWebHostEnvironment env)
{
    if (env.IsDevelopment())
    {
        app.UseDeveloperExceptionPage();
    }
    else
    {
        app.UseExceptionHandler("/Home/Error");
        app.UseHsts();
    }
    app.UseHttpsRedirection();
    app.UseFastReport();
    app.UseStaticFiles();
    app.UseRouting();
    app.UseAuthorization();
    app.UseEndpoints(endpoints =>
    {
        endpoints.MapControllerRoute(
            name: "default",
            pattern: "{controller=Home}/{action=Index}/{id?}");
    });
}
Also I modified the ConfigureServices method to configure the Database Connection to SQL Server for Fast Report.
public void ConfigureServices(IServiceCollection services)
{
    FastReport.Utils.RegisteredObjects.AddConnection(typeof(MsSqlDataConnection));
    services.AddDbContext<NorthwindContext>(options =>
        options.UseSqlServer(Configuration.GetConnectionString("NorthWindConnection")));
    services.AddControllersWithViews();
}
And I added the following code in an action method which will display the Category report in the MVC View.
public IActionResult Report()
{
    var webReport = new WebReport();
    var mssqlDataConnection = new MsSqlDataConnection();
    mssqlDataConnection.ConnectionString = _configuration.GetConnectionString("NorthWindConnection");
    webReport.Report.Dictionary.Connections.Add(mssqlDataConnection);
    webReport.Report.Load(Path.Combine(_hostEnvironment.ContentRootPath, "reports", "northwind-categories.frx"));
    var categories = GetTable<Category>(_northwindContext.Categories, "Categories");
    webReport.Report.RegisterData(categories, "Categories");
    return View(webReport);
}
The GetTable method is a static method which helps me to convert an IEnumerable to DataTable using Reflection. In this method, I also added code to fix the image display issue.
static DataTable GetTable<TEntity>(IEnumerable<TEntity> table, string name) where TEntity : class
{
    var offset = 78;
    DataTable result = new DataTable(name);
    PropertyInfo[] infos = typeof(TEntity).GetProperties();
    foreach (PropertyInfo info in infos)
    {
        if (info.PropertyType.IsGenericType
        && info.PropertyType.GetGenericTypeDefinition() == typeof(Nullable<>))
        {
            result.Columns.Add(new DataColumn(info.Name, Nullable.GetUnderlyingType(info.PropertyType)));
        }
        else
        {
            result.Columns.Add(new DataColumn(info.Name, info.PropertyType));
        }
    }
    foreach (var el in table)
    {
        DataRow row = result.NewRow();
        foreach (PropertyInfo info in infos)
        {
            if (info.PropertyType.IsGenericType &&
                info.PropertyType.GetGenericTypeDefinition() == typeof(Nullable<>))
            {
                object t = info.GetValue(el);
                if (t == null)
                {
                    t = Activator.CreateInstance(Nullable.GetUnderlyingType(info.PropertyType));
                }

                row[info.Name] = t;
            }
            else
            {
                if (info.PropertyType == typeof(byte[]))
                {
                    //Fix for Image issue.
                    var imageData = (byte[])info.GetValue(el);
                    var bytes = new byte[imageData.Length - offset];
                    Array.Copy(imageData, offset, bytes, 0, bytes.Length);
                    row[info.Name] = bytes;
                }
                else
                {
                    row[info.Name] = info.GetValue(el);
                }
            }
        }
        result.Rows.Add(row);
    }

    return result;
}
And here is the View code.
@model FastReport.Web.WebReport
@{
    ViewData["Title"] = "Categories - Report";
}

@await Model.Render()
And here is the report displaying on ASP.NET Core MVC View.
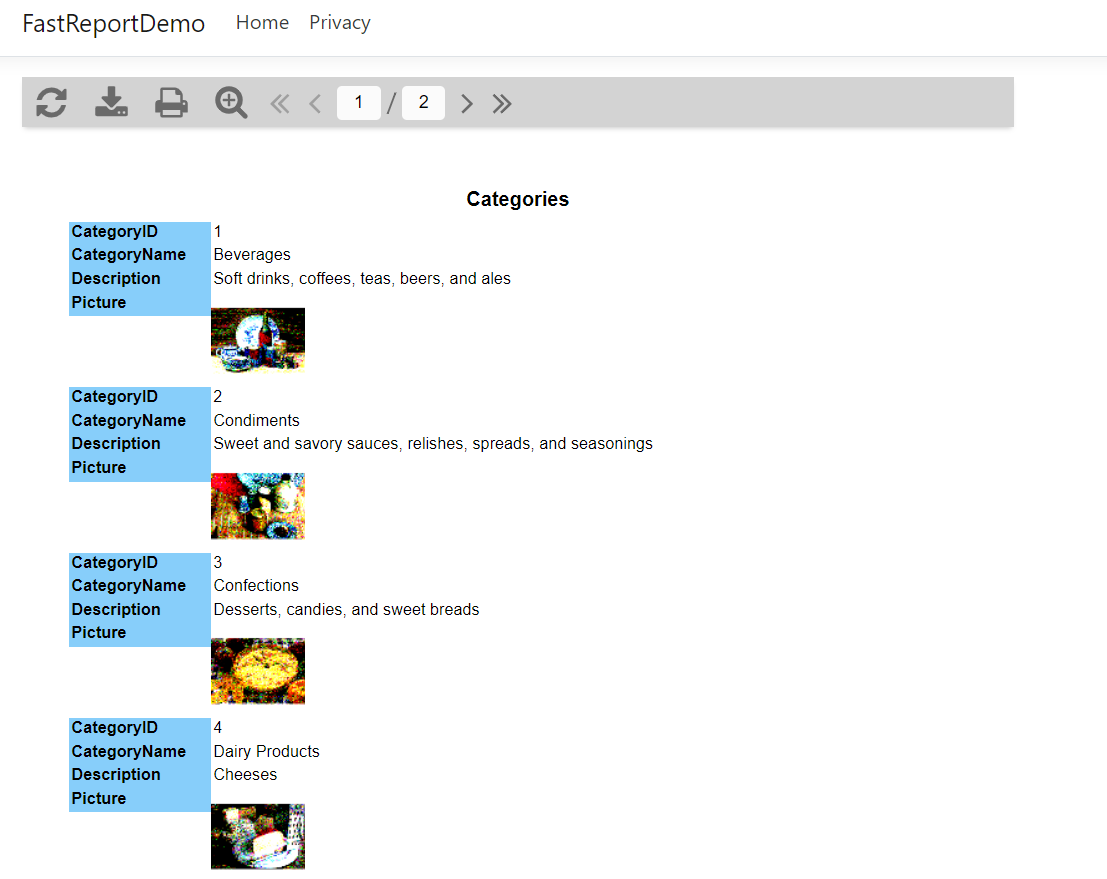
This way you can display the FastReport in ASP.NET Core MVC. You can configure which all button should be displayed in the toolbar. And you can play around the content source - instead of pushing the Categories collection, you can run query and push the output as a data source. You can also explore the FastReport Designer and design complex reports. You can download the FastReport Designer from here. And you can find more details about the FastReport open source blog posts here
You can find source code for this article in GitHub.
Happy Programming :)
Copyright © 2024 Anuraj. Blog content licensed under the Creative Commons CC BY 2.5 | Unless otherwise stated or granted, code samples licensed under the MIT license. This is a personal blog. The opinions expressed here represent my own and not those of my employer. Powered by Jekyll. Hosted with ❤ by GitHub