Implementing localization in ASP.NET Core
May 08, 2017 by Anuraj
ASP.NET Core Localization
This post is about implementing localization in ASP.NET Core. Localization is the process of adapting a globalized app, which you have already processed for localizability, to a particular culture/locale. Localization is one of the best practise in web application development.
Similar to earlier versions of ASP.NET, ASP.NET Core also supports resource file based localization. You can create various resource files (*.resx) based on the supported languages and configure ASP.NET Core to load resources based on the various parameters, like query string, cookies, headers etc.
First you need to create resource files for the languages you want to support and the naming should be based on the classes or views you want to localize. For example, if you want to localize all the strings in HomeController class in US English and UK English, you need to create resource files with the name HomeController.en-US.resx and HomeController.en-UK.resx. There is some other file name patterns as well. For controllers, I am following this practise. You can do it from Add > New Item and select the Resource file template.
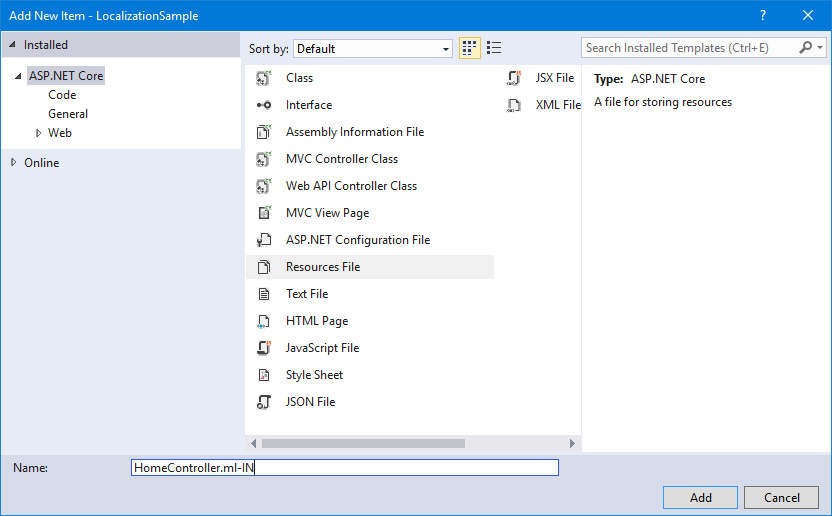
You can create the file name as ControllerName.languagecode-countrycode.resx, for this post I am creating resource file in Hindi language.
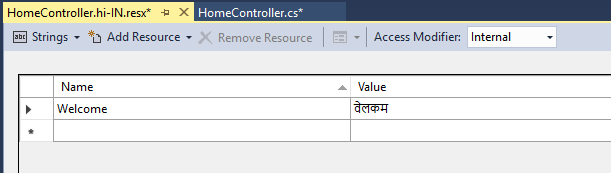
You can use the Name key to identify the string and value will your localized string. Next you need to configure ASP.NET Core to load the resources and inject it to the controllers using the in built DI engine. To do this you need to modify Startup class, ConfigureServices() and Configure() methods.
public void ConfigureServices(IServiceCollection services)
{
    services.AddLocalization(options => options.ResourcesPath = "Resources");
    services.AddMvc();
}
And here is the Configure method.
public void Configure(IApplicationBuilder app)
{
    var supportedCultures = new List<CultureInfo>
    {
        new CultureInfo("en-US"),
        new CultureInfo("ml-IN"),
        new CultureInfo("hi-IN")
    };

    var options = new RequestLocalizationOptions
    {
        DefaultRequestCulture = new RequestCulture("en-US"),
        SupportedCultures = supportedCultures,
        SupportedUICultures = supportedCultures,
    };

    app.UseRequestLocalization(options);
    app.UseStaticFiles();

    app.UseMvcWithDefaultRoute();
}
In the ConfigureServices() method, you are adding the Localization middleware and configuring the location to load the resource files. And in the Configure() method, the supported resources are added and enabling the request localization. You can get the instance of IStringLocalizer<HomeController> class inside your controller. And you can read the localized strings by providing the key.
public class HomeController : Controller
{
    private readonly IStringLocalizer<HomeController> _stringLocalizer;
    public HomeController(IStringLocalizer<HomeController> stringLocalizer)
    {
        _stringLocalizer = stringLocalizer;
    }
    public IActionResult Index()
    {
        ViewData["Welcome"] = _stringLocalizer["Welcome"];
        return View();
    }
}
In the view, I am using @ViewData["Welcome"] code to display the localized resource string.
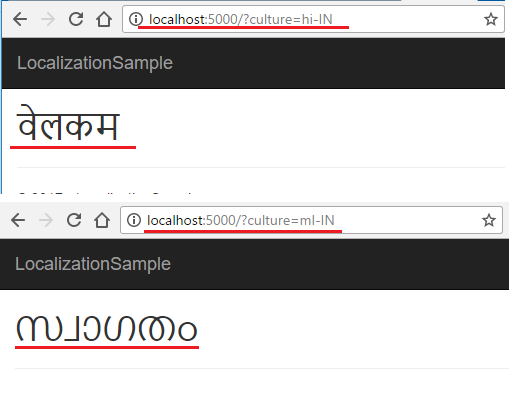
You can test using by passing culture as query string, like for Hindi, you should pass culture=hi-in.
Here is the screenshot of the app running on my machine.
Useful resources
Happy Programming :)
Copyright © 2024 Anuraj. Blog content licensed under the Creative Commons CC BY 2.5 | Unless otherwise stated or granted, code samples licensed under the MIT license. This is a personal blog. The opinions expressed here represent my own and not those of my employer. Powered by Jekyll. Hosted with ❤ by GitHub