Load testing Web API using Apache JMeter
September 05, 2013 by Anuraj
.Net .Net 4.0 ASP.Net Web API
Load testing is the process of putting demand on a system or device and measuring its response. Load testing is performed to determine a system’s behavior under both normal and anticipated peak load conditions. It helps to identify the maximum operating capacity of an application as well as any bottlenecks and determine which element is causing degradation. This post is about Load testing the ASP.Net Web API using Apache JMeter. The Apache JMeter desktop application is open source software, a 100% pure Java application designed to load test functional behavior and measure performance. You can download JMeter from here.
You can start the JMeter by double clicking on the ApacheJMeter.jar file, from the bin directory.
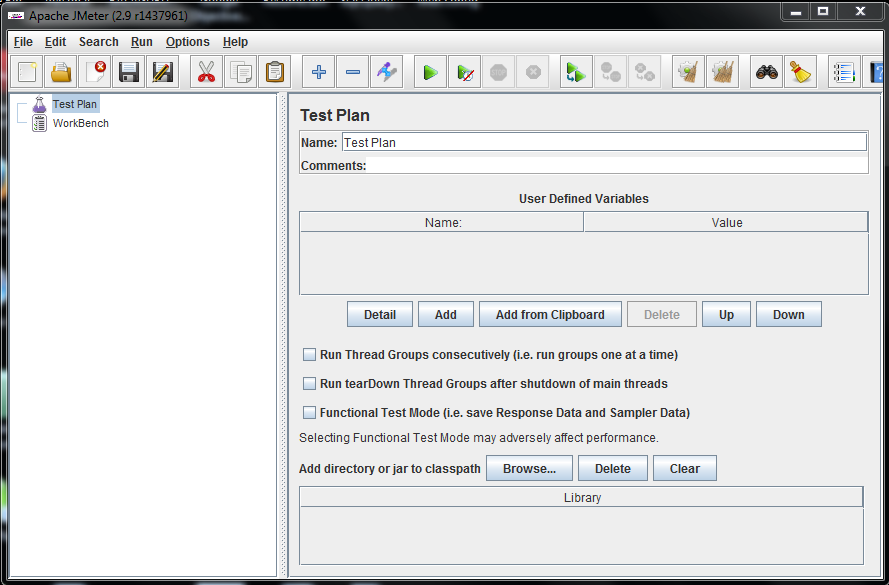
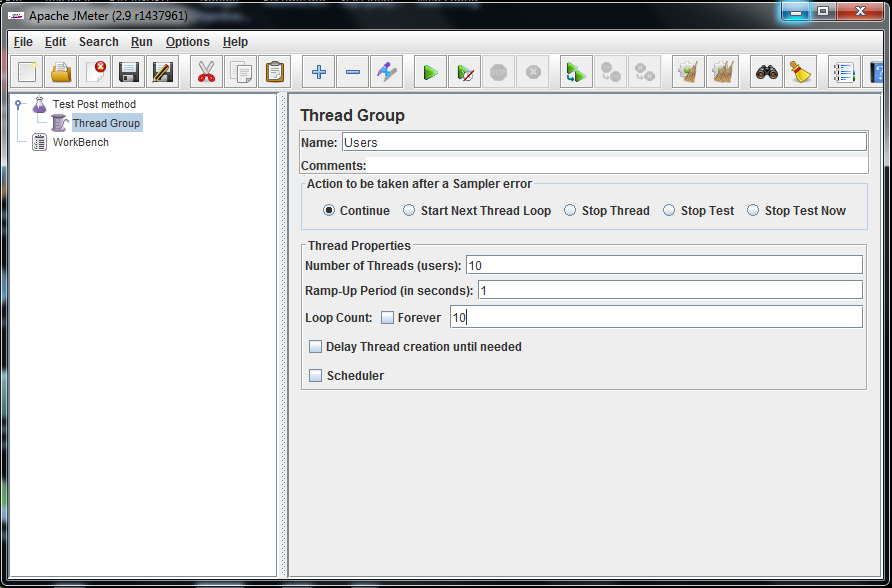
The first step you want to do with every JMeter Test Plan is to add a Thread Group element. The Thread Group tells JMeter the number of users you want to simulate, how often the users should send requests, and the how many requests they should send.
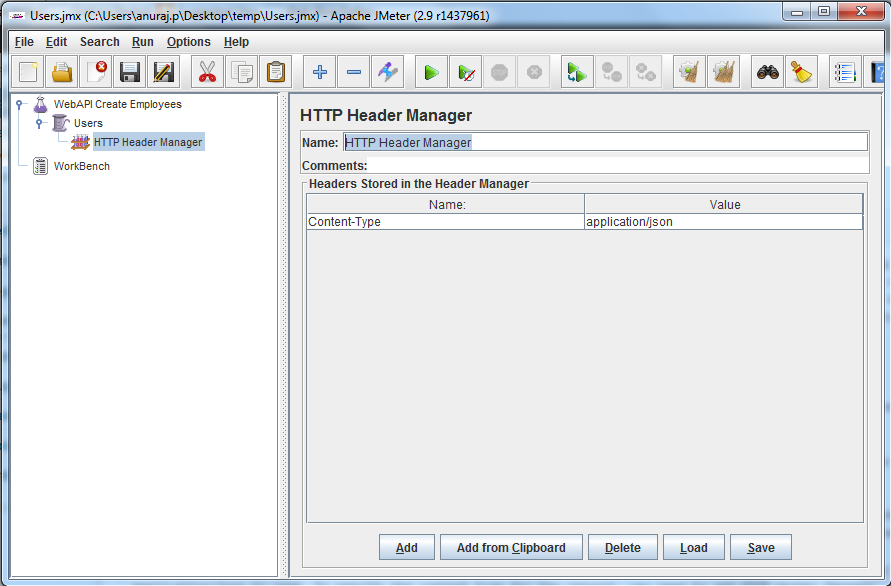
Next you need to setup the content type for the requests, the content type should be either application/json or application/xml. In this post application/json is used. To specify the content type for the request, you need to add HTTP Header Manager. To add the HTTP Header Manager, simply select the Thread Group , and choose Add > Config Element > HTTP Header Manager from the right-click pop-up menu. Add a new attribute; set name to “Content-Type” and value to “application/json”
Now you need to setup the HTTP Request. Start by adding the first HTTP Request to the JMeter Users element (Add > Sampler > HTTP Request). Then, select the HTTP Request element in the tree and edit the following properties.
- Server name or IP - change it to localhost
- Port Number : 52187 (If you are hosted the Web API in IIS you don’t need to specify it).
- Method : POST
- Path : /api/employee (api/{controller}
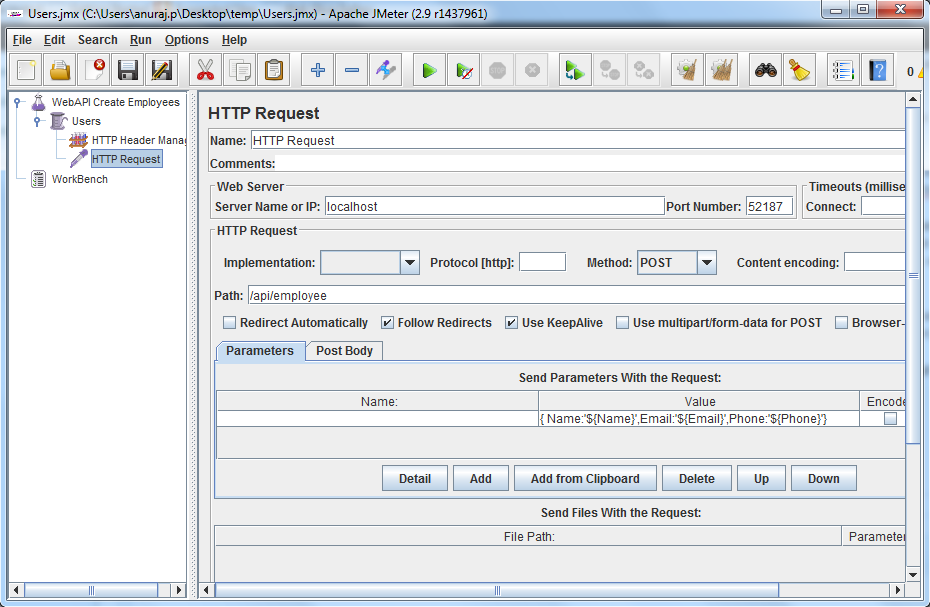
Add a parameter with empty name attribute, with the JSON data you want to post.
You can “CSV Data Set Config” component to populate values from CSV file. You can add “CSV Data Set Config” component, by right clicking on the Thread Group, select Config Element, and select CSV Data Set Config.
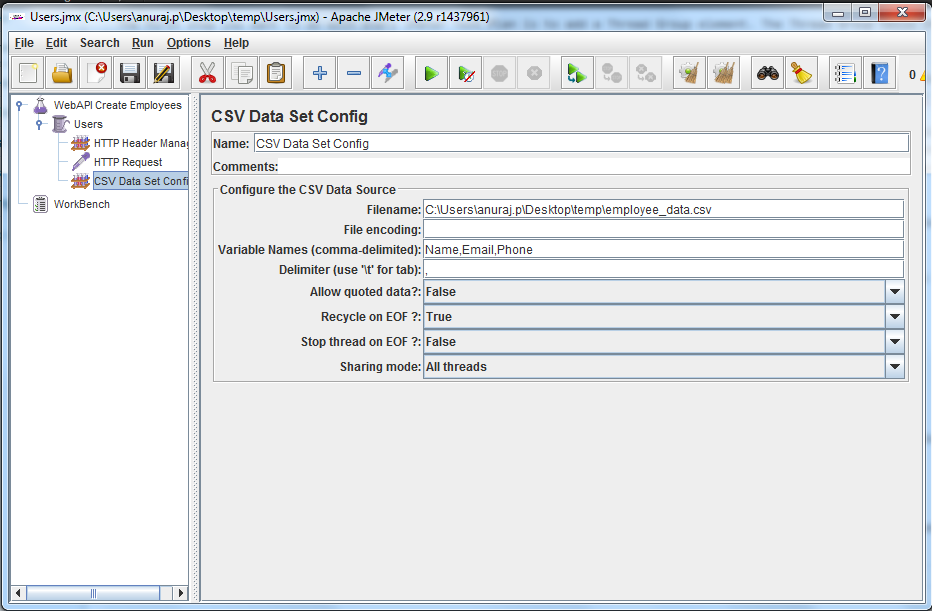
Modify the Filename and Variable names. The variable names can be used in the post attribute, like this.
{ Name:’${Name}’,Email:’${Email}’,Phone:’${Phone}’}
Here is the sample value of the CSV file.
Name1,name1@server.com,1000001 Name2,name2@server.com,1000002 Name3,name3@server.com,1000003 Name4,name4@server.com,1000004
The final element you need to add to your Test Plan is a Listener . This element is responsible for storing all of the results of your HTTP requests in a file and presenting a visual model of the data. Select the JMeter Users element and add a Graph Results listener (Add > Listener > Graph Results). Next, you need to specify a directory and filename of the output file. You can either type it into the filename field, or select the Browse button and browse to a directory and then enter a filename.
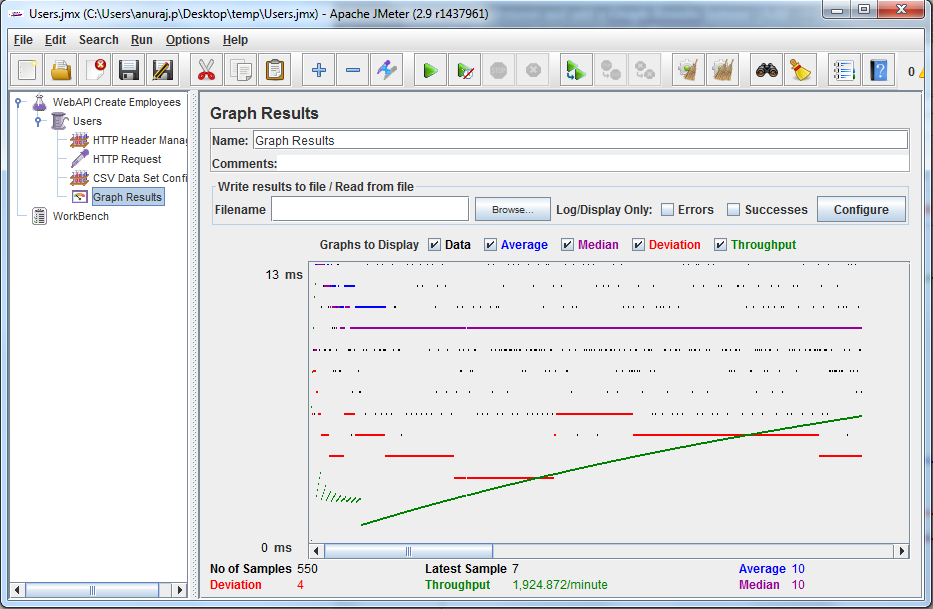
The Graph Results listener generates a simple graph that plots all sample times. Along the bottom of the graph, the current sample (black), the current average of all samples(blue), the current standard deviation (red), and the current throughput rate (green) are displayed in milliseconds. The throughput number represents the actual number of requests/minute the server handled. This calculation includes any delays you added to your test and JMeter’s own internal processing time. The advantage of doing the calculation like this is that this number represents something real - your server in fact handled that many requests per minute, and you can increase the number of threads and/or decrease the delays to discover your server’s maximum throughput. Whereas if you made calculations that factored out delays and JMeter’s processing, it would be unclear what you could conclude from that number.
Happy Programming. Thank you Leksmi for JMeter introduction session.
Copyright © 2024 Anuraj. Blog content licensed under the Creative Commons CC BY 2.5 | Unless otherwise stated or granted, code samples licensed under the MIT license. This is a personal blog. The opinions expressed here represent my own and not those of my employer. Powered by Jekyll. Hosted with ❤ by GitHub