Monitor Azure WebJobs status with Azure Application Insights
February 08, 2021 by Anuraj
Azure ApplicationInsights Monitoring
This article shows you how to monitor Azure WebJobs using Azure Application Insights. WebJobs is a feature of Azure App Service that enables you to run a program or script in the same instance as a web app, API app, or mobile app. There is no additional cost to use WebJobs. If you’re using Azure WebJobs monitoring WebJobs is little hard. You might need to login into Kudu and need to check the status. Recently I had to implement a solution which helps me to monitor Azure WebJobs. Basically by monitoring Web Jobs I wanted to verify whether the service is able to complete the operation successfully or it is still running or it is failed. In this post I am using Azure Application Insights and Kudu REST API to monitor the availability of the Web Jobs. You will be using the Availability feature of Application Insights with the help of MultiStep tests.
So first you need to create a MultiStep test. You can do it with Visual Studio Enterprise edition. You need to create a Web Performance and Load Test Project. Once it is created, it will create a webtest file. You can right click on the node and choose the Add Request option. In this you need to provide the Kudu endpoint of the Web Job. You can configure the URL property with the Kudu endpoint URL. This is the URL format - https://your_app_service.scm.azurewebsites.net/api/triggeredwebjobs/your_web_job_name. You need to replace the app service name and web job name you created. This is an authenticated endpoint using Basic Authentication. So you need to add a Header. You can again right click on the Request and choose the option Add Header. This will add a Header option, you need to select the Authorization for the Name property and Value you need to configure the token. To get the token download the Publish profile from App Service. It is an XML file. You need to find the values parameters - userName and userPWD. And execute the following powershell code.
$userName = "`$app-service-webjobs-demo"
$userPWD = "HkKy9zfyb1S9ueZx2kJPgjqPGDJ0KqmdWFgT5fHE2CKjj5legfaLLjz9jboo"
$authHeader = "Basic {0}" -f [Convert]::ToBase64String([Text.Encoding]::ASCII.GetBytes(("{0}:{1}" -f $userName, $userPWD)))
Write-Host $authHeader
If you notice, you will be able to find one extra character ( ` ) in the username variable. It is required to escape the $ symbol in powershell. Once you execute this code with the variables from your publishing profile you will get a token. Use this token in the Header parameter value.
Next you need to create a validation rule in the Request - this will check the response and verify the Web Job status. In the Add Validation Rule dialog you need to choose the Find Text rule. And on the properties, put Success as the value for the Find Text.
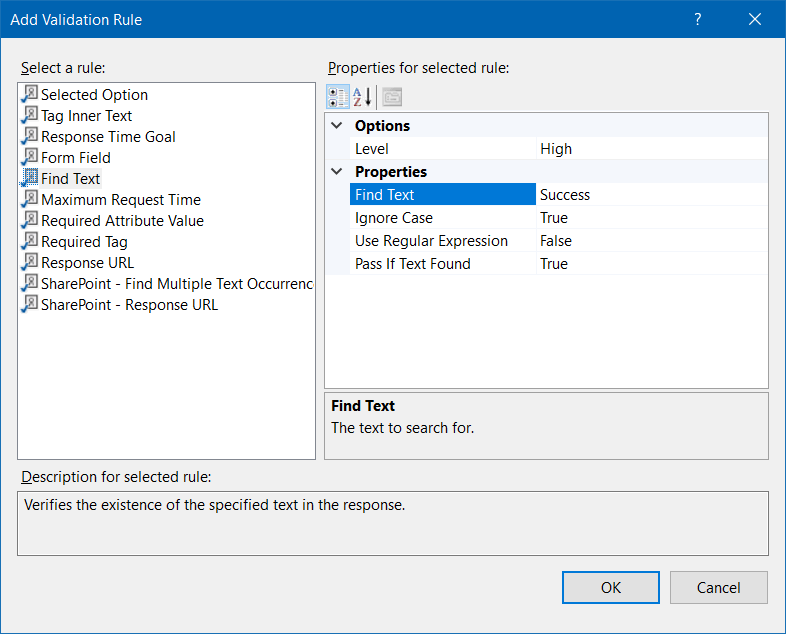
Click OK to save the changes. Now you ready with the test. Save the test and execute it. If your Web Job is executed properly the Test will pass - if WebJob is failed or running the test will fail. As mentioned earlier the WebTest file is an XML file. Here is the one I have created. You can use the same one and modify the parameters and use it.
<?xml version="1.0" encoding="utf-8"?>
<WebTest Name="WebTest1" Id="b41e7ab8-2478-4ae5-8eb7-cc9eaf15e583" Owner="" Priority="2147483647" Enabled="True" CssProjectStructure="" CssIteration="" Timeout="0" WorkItemIds="" xmlns="http://microsoft.com/schemas/VisualStudio/TeamTest/2010" Description="" CredentialUserName="" CredentialPassword="" PreAuthenticate="True" Proxy="default" StopOnError="False" RecordedResultFile="" ResultsLocale="">
  <Items>
    <Request Method="GET" Guid="ce98e408-a154-4859-84b5-f6e0aa0e8511" Version="1.1" Url="https://your-web-app.scm.azurewebsites.net/api/triggeredwebjobs/your-webjob" ThinkTime="0" Timeout="300" ParseDependentRequests="True" FollowRedirects="True" RecordResult="True" Cache="False" ResponseTimeGoal="0" Encoding="utf-8" ExpectedHttpStatusCode="0" ExpectedResponseUrl="" ReportingName="" IgnoreHttpStatusCode="False">
      <Headers>
        <Header Name="Authorization" Value="Basic your-auth-header" />
      </Headers>
      <ValidationRules>
        <ValidationRule Classname="Microsoft.VisualStudio.TestTools.WebTesting.Rules.ValidationRuleFindText, Microsoft.VisualStudio.QualityTools.WebTestFramework, Version=10.0.0.0, Culture=neutral, PublicKeyToken=b03f5f7f11d50a3a" DisplayName="Find Text" Description="Verifies the existence of the specified text in the response." Level="High" ExectuionOrder="BeforeDependents">
          <RuleParameters>
            <RuleParameter Name="FindText" Value="Success" />
            <RuleParameter Name="IgnoreCase" Value="True" />
            <RuleParameter Name="UseRegularExpression" Value="False" />
            <RuleParameter Name="PassIfTextFound" Value="True" />
          </RuleParameters>
        </ValidationRule>
      </ValidationRules>
    </Request>
  </Items>
</WebTest>
Now you have completed the setup, next you need to upload this file into the Application Insights. To do this select your Application Insights resource, click on the Availability menu, and from there click on Add test.
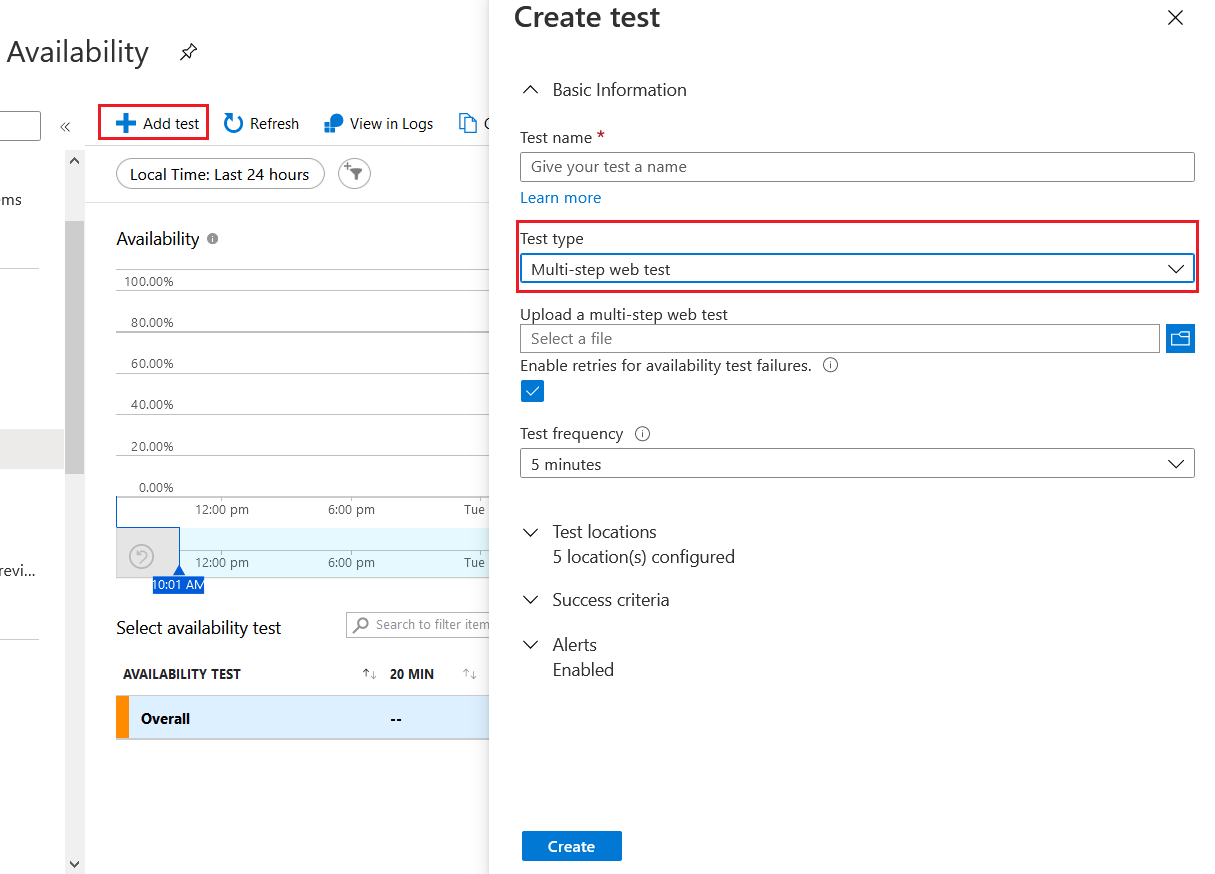
In the Create Test screen you need to provide a name for the test, choose Multi-step web test for the Test Type, and upload the test file. You can configure the Test Frequency based on your requirement. If the Job is taking some time configure the frequency based on that. Other values you can accept the default ones and click on Create.
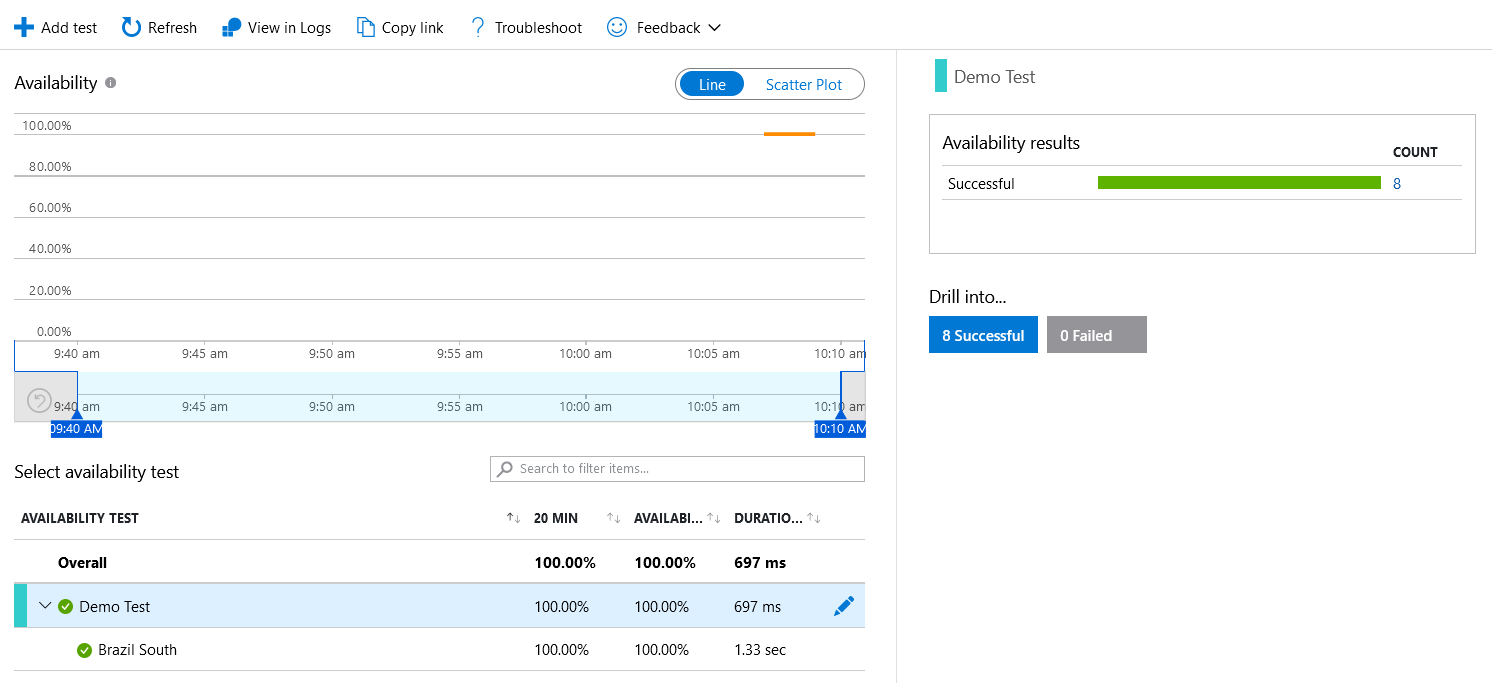
Once you create a test, it will start executing on the specified intervals. And will display results like this.
To configure alerts on the Failure, you can click on the Alerts menu in the Application Insights resource. Since the alerts are configured as part of the availability test creation, one alert rule will be configured automatically.
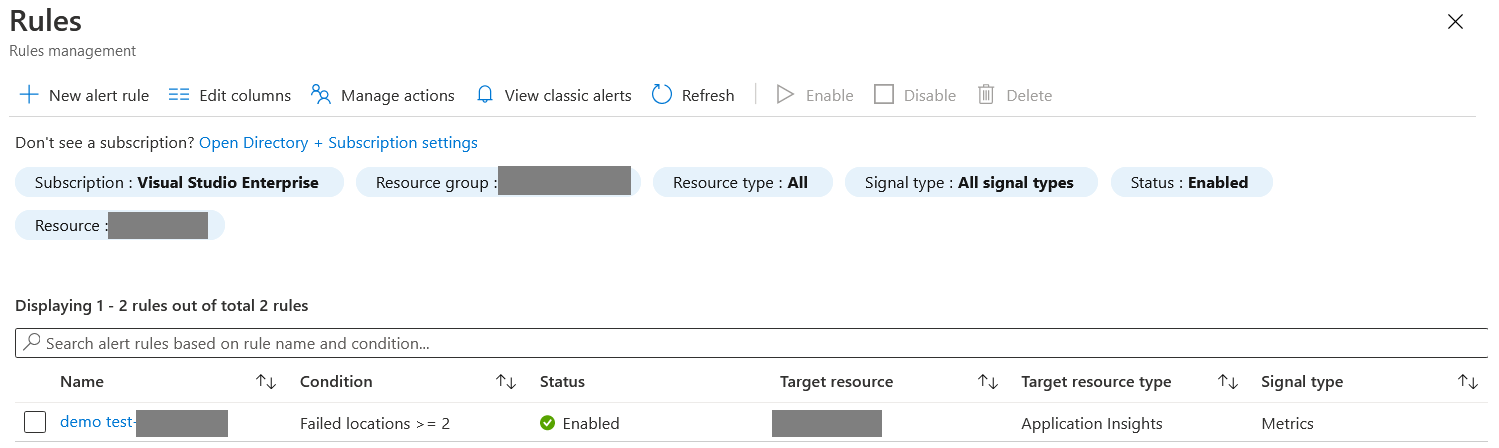
So if the test is getting failed in two geographic locations out of five locations, this alert will be triggered. And you can configure email notifications or SMS notifications based on this.
This way you will be able to monitor Azure App Service WebJobs using Application Insights. Since Microsoft is depreciating the Load Test and Performance Test project it is better to use Azure Functions to monitor. I will try to do a blog post on this approach in future.
Happy Programming :)
Copyright © 2024 Anuraj. Blog content licensed under the Creative Commons CC BY 2.5 | Unless otherwise stated or granted, code samples licensed under the MIT license. This is a personal blog. The opinions expressed here represent my own and not those of my employer. Powered by Jekyll. Hosted with ❤ by GitHub