Resizing Images using Azure Functions
April 05, 2019 by Anuraj
ASP.NET Core Azure Serverless
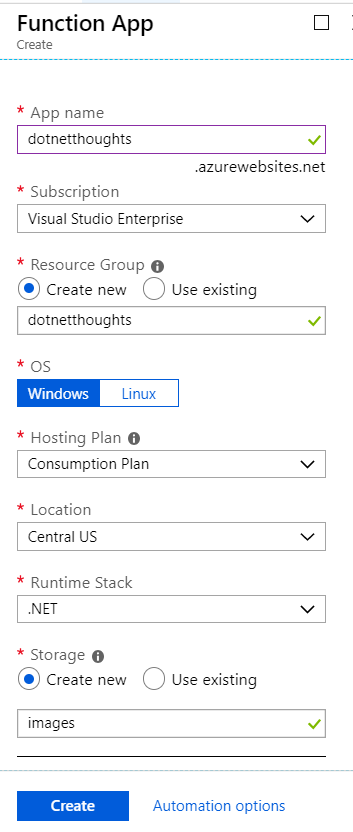
This post is about how to resize images uploaded to a blob storage using Azure functions. In my current project, system used to resize the image while uploading the image to blob storage. This approach got two major drawbacks - the process will take some time and the resize is implemented using System.Drawing - which is not recommended to use in Server side applications. By implementing a function - which triggers while someone uploads a photo to blob storage - using ImageSharp - resize the image. Since the code is very minimal I am using the Azure portal to build the Azure Function. In the portal, click New and Search for Functions, select Function App. And you need to provide a name, resource group and storage.
Once it is successful, click one Create New button or you can do it via Getting Started option. As mentioned earlier, I am choosing the In-portal option. Click on continue. Now you need to choose a function template. By default it will display on WebHook + API and Timer options, click on the More templates, and click on Finish and view templates option. In the next screen search for blob and select the Azure Blob Storage trigger option.

If you’re creating functions first time, it will prompt to install Storage extension. Click on the Install button to continue.

This might take sometime to install, once installation is completed, click on continue button. It will display the new function window, where you need to specify the function name, blob path which function need to monitor and storage account connection - by default it will pick up any storage account configured in your portal.
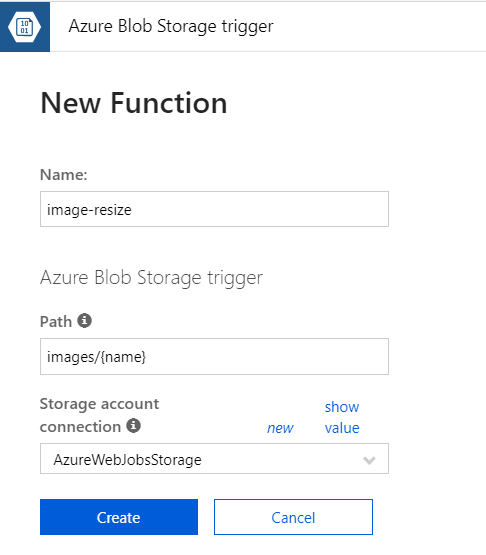
I have changed the container name from sampleworkitems to images. And click on create button - which will create the function and redirect to the editor window. Now we have completed the configuration options. You can test it by creating a container in storage account with name images and uploading an image to the folder - which will trigger the function and it will display details like file name and size in the Logs window.
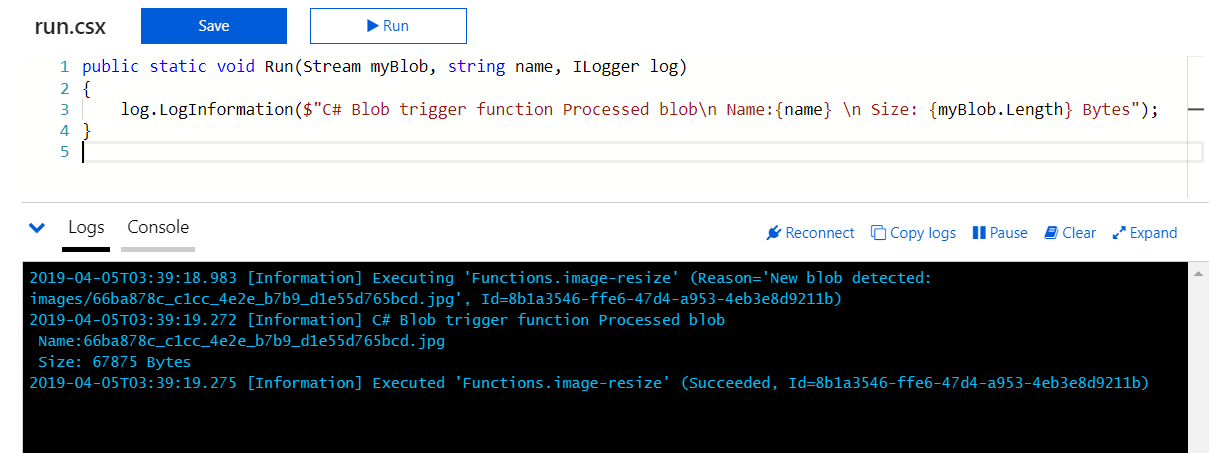
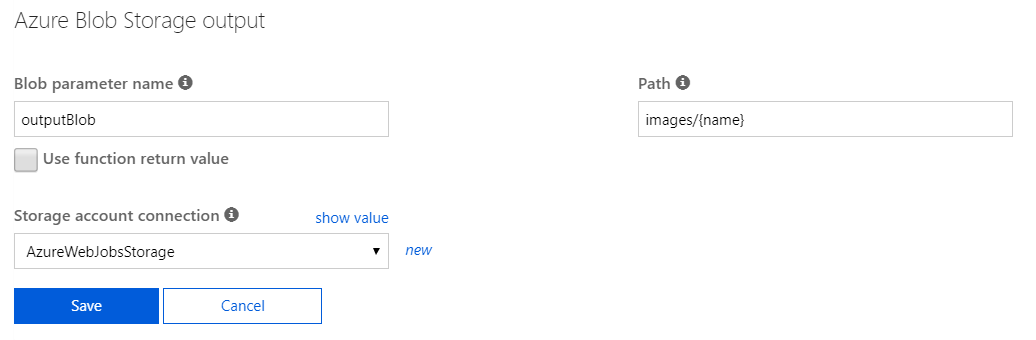
In the run.csx file, there is a static run method, which takes one Stream, name of the file and finally logger instance. I want to resize the image and save it back to the blob. So you require one input stream and one output stream. You can do this by adding one output binding. First click on the integrate menu and change the blog parameter name from myBlob to InputBlob and click on Save. Next click on the +New Output button, again select Azure Blob Storage. Click on the Select button. In the next screen, change the path to images/{name}, same as inputblob. Other values keep as it is.
Click on save. And modify the run method like this.
public static void Run(Stream inputblob, string name, ILogger log, Stream outputBlob)
{
    log.LogInformation($"C# Blob trigger function Processed blob\n Name:{name} \n Size: {inputblob.Length} Bytes");
}
Next to use NuGet packages in functions, you need to import it. To do this, create file called function.proj. And adding following code.
<Project Sdk="Microsoft.NET.Sdk">
    <PropertyGroup>
        <TargetFramework>netstandard2.0</TargetFramework>
    </PropertyGroup>
    <ItemGroup>
        <PackageReference Include="SixLabors.ImageSharp" Version="1.0.0-beta0006" />
    </ItemGroup>
</Project>
Once you save this file, function runtime will start restoring the packages and it will install the ImageSharp package to the function. Next we will modify the code to resize the image, like this.
using SixLabors.ImageSharp;
using SixLabors.ImageSharp.Formats.Jpeg;
using SixLabors.ImageSharp.PixelFormats;
using SixLabors.ImageSharp.Processing;
using SixLabors.Primitives;

public static void Run(Stream inputblob, string name, ILogger log, Stream outputBlob)
{
    log.LogInformation($"C# Blob trigger function Processed blob\n Name:{name} \n Size: {inputblob.Length} Bytes");
    using (Image<Rgba32> image = Image.Load(inputblob))
    {
        image.Mutate(x => x
                .Resize(new ResizeOptions
                {
                    Mode = ResizeMode.BoxPad,
                    Size = new Size(1200, 627)
                }).BackgroundColor(new Rgba32(0,0,0)));

        image.Save(outputBlob);
    }
}
The code is quite simple. I am loading the image from inputblob, resizing it to 1200x625 size and setting a black background colour. And finally saving it back to the same container. Now we are done. You can test with the test option in the right side of the function portal - provide the container name and one uploaded file name and click on the test button. This will execute the code and provides the response on the console window.
Happy Programming :)
Copyright © 2024 Anuraj. Blog content licensed under the Creative Commons CC BY 2.5 | Unless otherwise stated or granted, code samples licensed under the MIT license. This is a personal blog. The opinions expressed here represent my own and not those of my employer. Powered by Jekyll. Hosted with ❤ by GitHub