Simple Static Websites using Azure Blob service
April 01, 2017 by Anuraj
Azure Static Websites
This post is about hosting a static website on Azure Blob service. To enable online presence, most of the small business will setup a Wordpress blog. A fully functional WordPress site is great, however most websites are pretty static and don’t really need all the bells and whistles that come with it. In this post I am talking about an alternative solution which helps you to host your static websites in Azure and leaverage CDN and bandwidth capabilities of Azure with less cost.
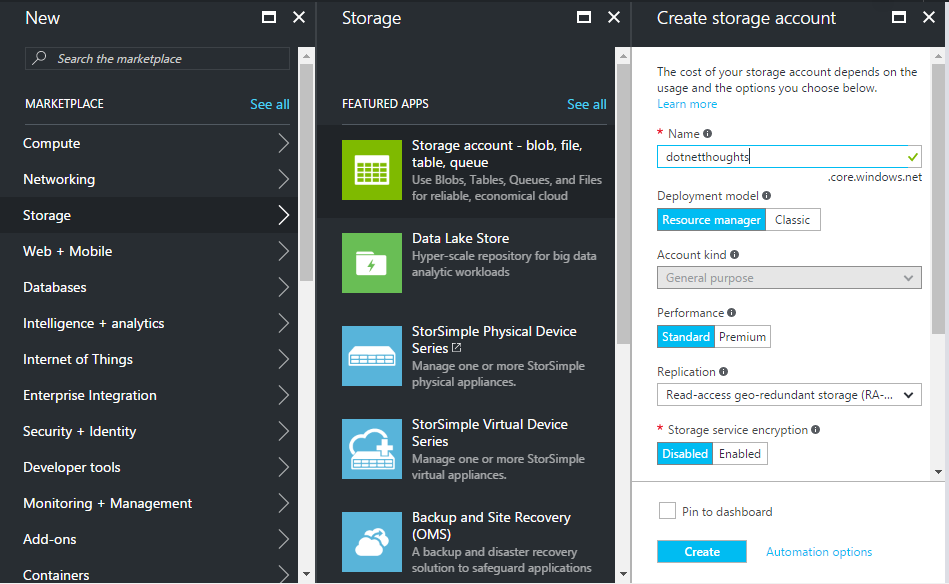
First you need to create a blob storage account and then a container which you’ll use to store all of the static content. You can do this from Azure portal. You need to select Storage > Storage Account - Blob, file, Table, Queue > Create a Storage Account.
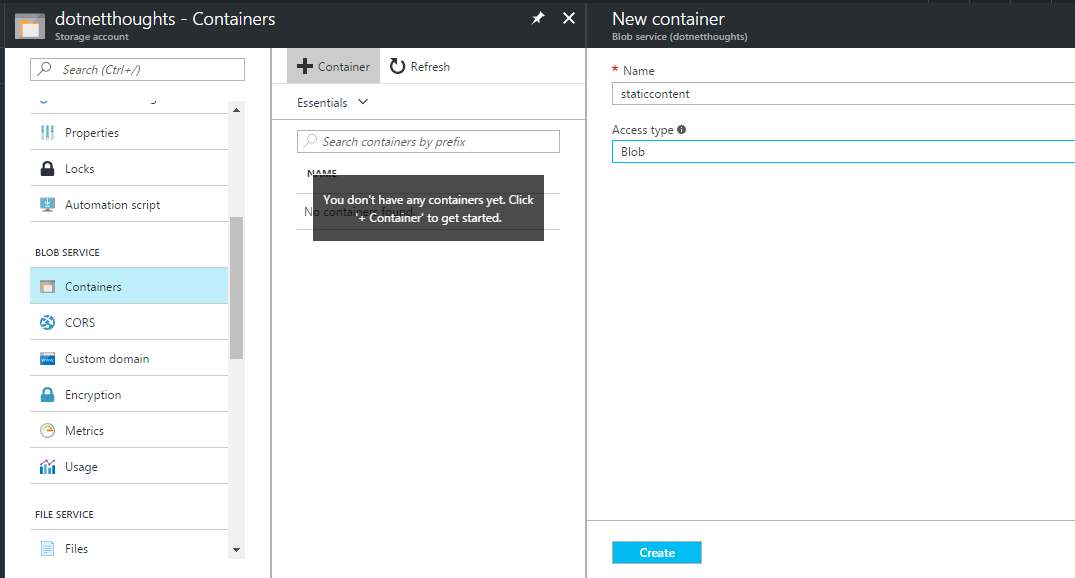
Once you created a storage account, you need to create a container, you can create container from Containers menu under Blob Service. You need to provide a name and change the access type to Blob.
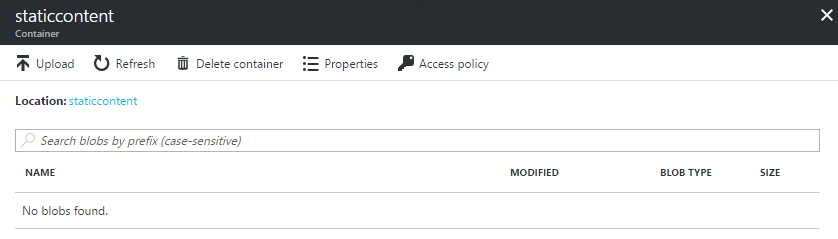
After creating the container, you can directly upload the contents using Upload option or you can use Azure Storage Explorer utility.
Once you uploaded file, you can click on the file to get the URL and you can browse it. Here is the example of HTML file I uploaded.
One thing you might notice that I am specifying the file name in the URL, it is mandatory, without filename it won’t serve the page. Blob storage also support custom domains. You can configure it from custom domain option.
Configure a custom domain for accessing blob data in your Azure storage account, like www.contoso.com. There are two methods you can use to set up a custom domain.
- Create a CNAME record with your DNS provider that points from your domain (like www.contoso.com) to dotnetthoughts.blob.core.windows.net. This method is simpler, but results in a brief downtime while Azure verifies the domain registration.
- Create a CNAME record with your DNS provider that points from the “asverify” subdomain (like asverify.www.contoso.com) to asverify.dotnetthoughts.blob.core.windows.net. After this step completes, you can create a CNAME record that points to dotnetthoughts.blob.core.windows.net. This method does not incur any downtime. To use this method, select the “Use indirect CNAME validation” checkbox.
Happy Programming :)
Copyright © 2024 Anuraj. Blog content licensed under the Creative Commons CC BY 2.5 | Unless otherwise stated or granted, code samples licensed under the MIT license. This is a personal blog. The opinions expressed here represent my own and not those of my employer. Powered by Jekyll. Hosted with ❤ by GitHub