Working with SSL Certificate in Azure App Service
February 04, 2021 by Anuraj
Azure AppService
This article shows you how to work with SSL certificates in Azure App Service. Last year I wrote a blog post on how to use Azure App Service managed certificates. If you’re using App service managed certificates, you don’t need to worry about the expiry, it will get renewed automatically by Azure. If you’re using custom domain names for Azure App service you will be able to configure SSL certificates to the custom domain name. To create custom TLS/SSL bindings for your App Service app, your App Service plan must be in the Basic, Standard, Premium, or Isolated tier.
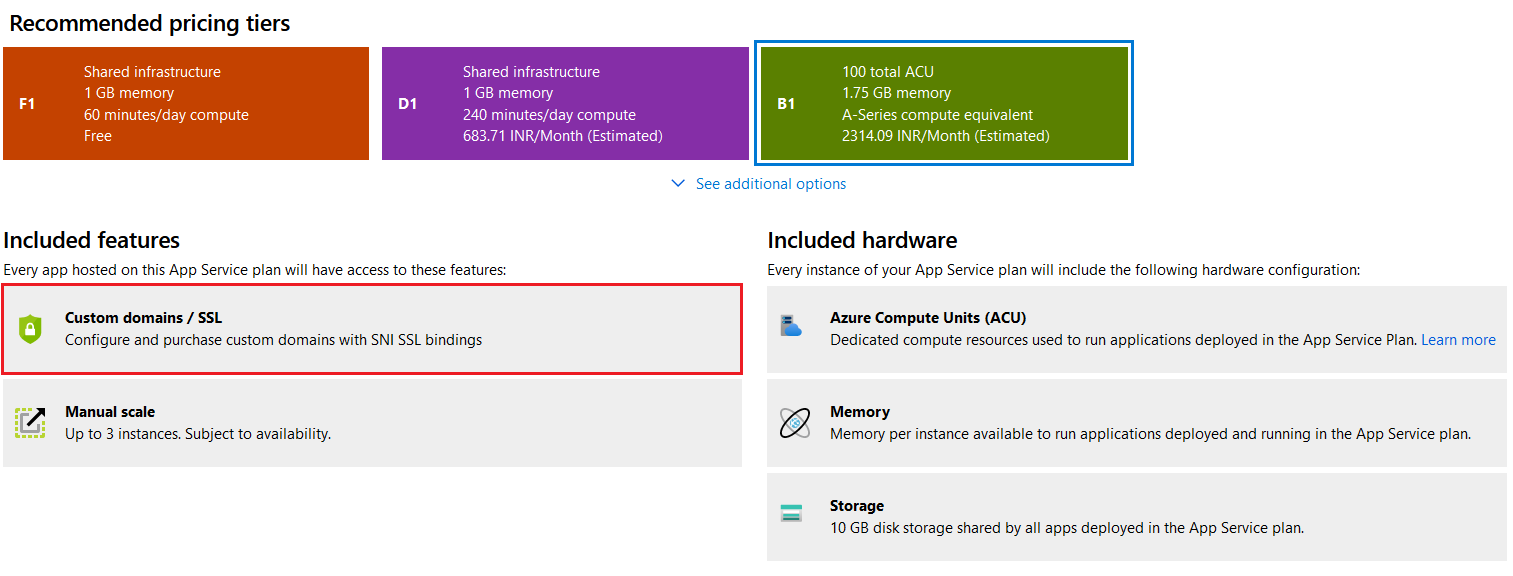
I am using Basic tier for this demo. To configure the custom domain name, you can click on the custom domains menu and click on Add Custom domain. Based on the domain name, you may need to modify your DNS settings in your domain provider. If it is a root domain, you may need to add A NAME records and for subdomains you may need to add CNAME records. Recently Azure App Service introduced a TXT record - for custom domain verification, so along with A or CNAME records you need to add a TXT record as well.
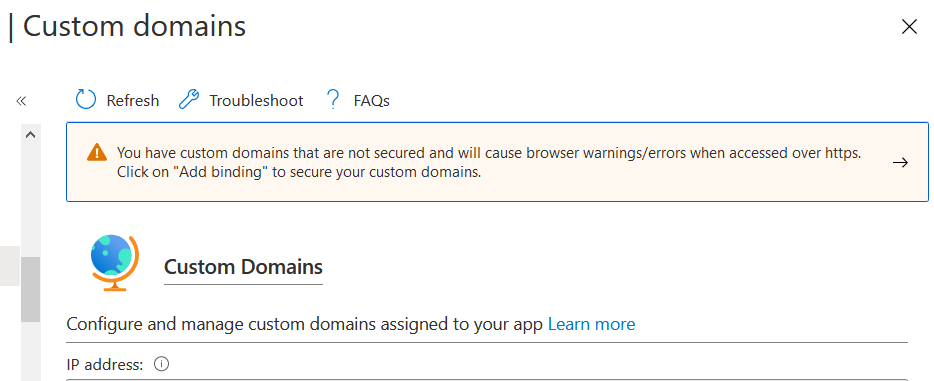
Once you successfully configured the domain name - App Service will start showing a warning - You have custom domains that are not secured and will cause browser warnings/errors when accessed over https. Click on "Add binding" to secure your custom domains.. To fix this warning you should configure SSL binding to your app service.
To configure SSL binding you need an SSL certificate. You can get SSL certificate from most of the domain providers. To get an SSL certificate, first you need to create a certificate request or CSR. You can create a CSR using IIS. Open IIS, Select the Server Certificates option. And click on Create Certificate Request option.
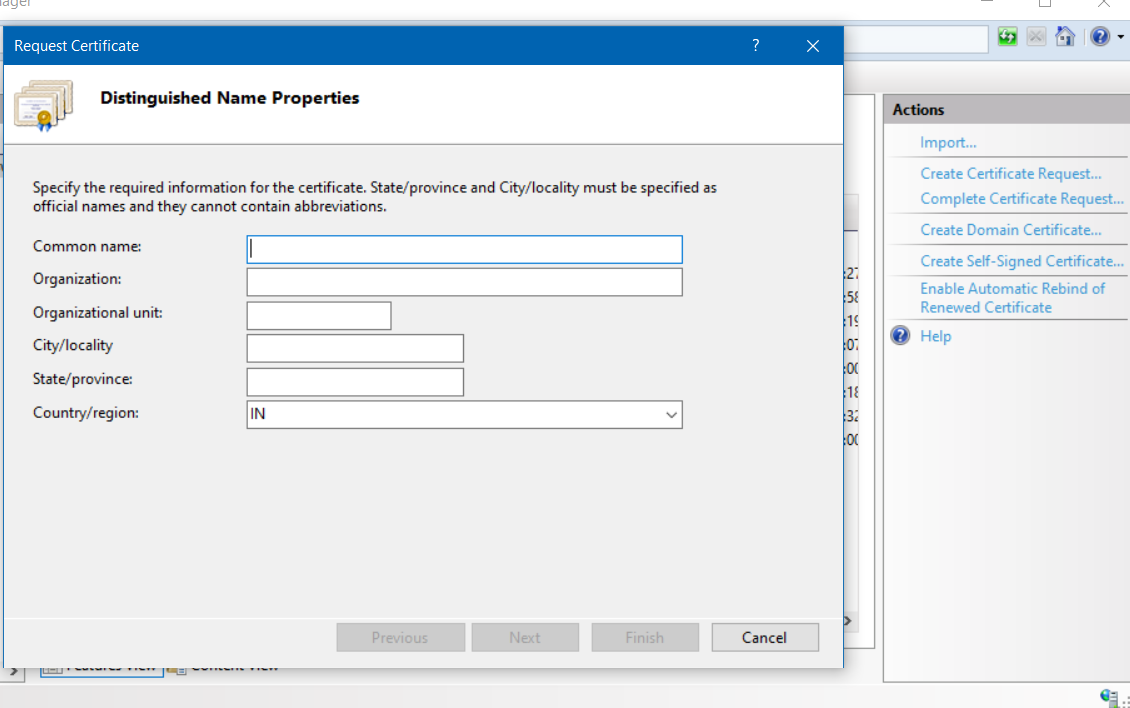
On this step you need to provide the following details
| Field | Description |
|---|---|
| Common name | Name for the certificate. |
| Organization | Name of the organization for which the certificate is used. |
| Organizational unit | ame of the department or division in the organization in which the certificate is used. |
| City/locality | Unabbreviated name of the city or locality where your organization or organizational unit is located. |
| State/province | Unabbreviated name of the state/province where your organizational unit is located. |
| Country/region | Name of the country or region where your organization or organizational unit is located. |
On the next screen you need to choose the Cryptographic Service Provider properties.

You can choose either Microsoft RSA SChannel Cryptographic Provider or Microsoft DH SChannel Cryptographic Provider. The default provider is Microsoft RSA SChannel Cryptographic Provider. And choose a bit length that the provider you selected uses. By default, the RSA SChannel provider uses a bit length of 1024, and the DH SChannel provider uses a bit length of 512. A longer bit length increases the level of encryption. But it can impact the performance because it requires the transmission of additional bits. I am using 2048 as Bit length since my SSL provider requires 2048 as minimum.
And in the next screen you will be able to save the CSR to a text file. In SSL provider you can upload this txt file and get the SSL certificate. Once it is generated, you can download the certificate from the provider. And open IIS, Select Server Certificates option. And click on the Complete Certificate Request option.
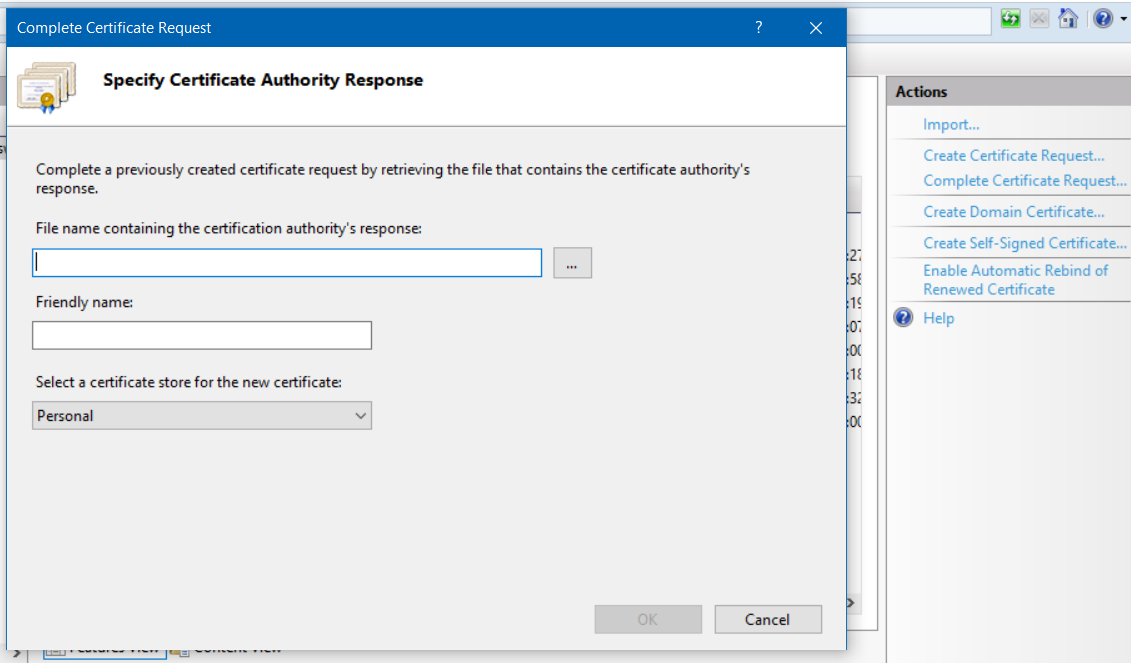
In this screen you need to provide the file - crt / cer file from the SSL provider, Friendly name - which helps you to identify certificate in IIS Server Certificates. And Certificate store - where this certificate is stored in the machine. Then Click OK. If you are running the Complete Certificate Request in the same machine where you generated the CSR, the certificate will be displayed in the Server Certificates in IIS.
Now you have created an SSL certificate, but to use this certificate in Azure App Services, you need to export this as PFX files. To do that, right click on the certificate and choose the Export option. In the export screen you need to configure the file name and provide a Password - this password is used in Azure App Service while importing it.
Once exported, open the TLS/SSL settings option from Azure App Service blade. Select the Private Key Certificate option. And Upload Certificate option.
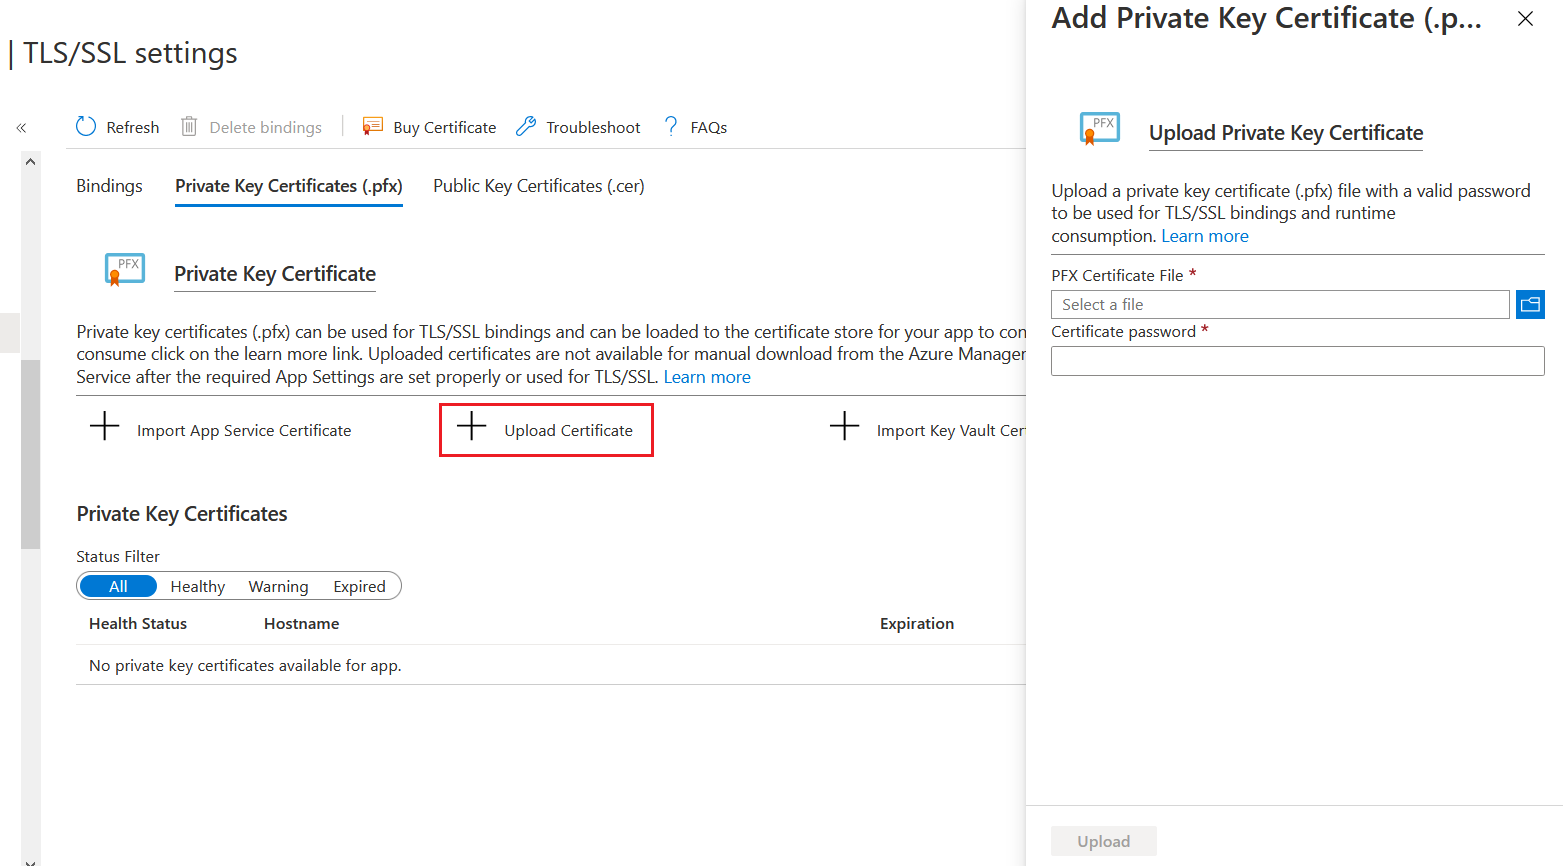
In the Upload screen, choose the PFX file you exported and provide the password. It will imported to the resource group. If you’re uploading a wild card certificate, you can access this certificate in other app services or any service which supports a SSL file. Now to configure the App Service with the SSL file, select the Bindings menu, and click on the Add TLS/SSL Binding option.
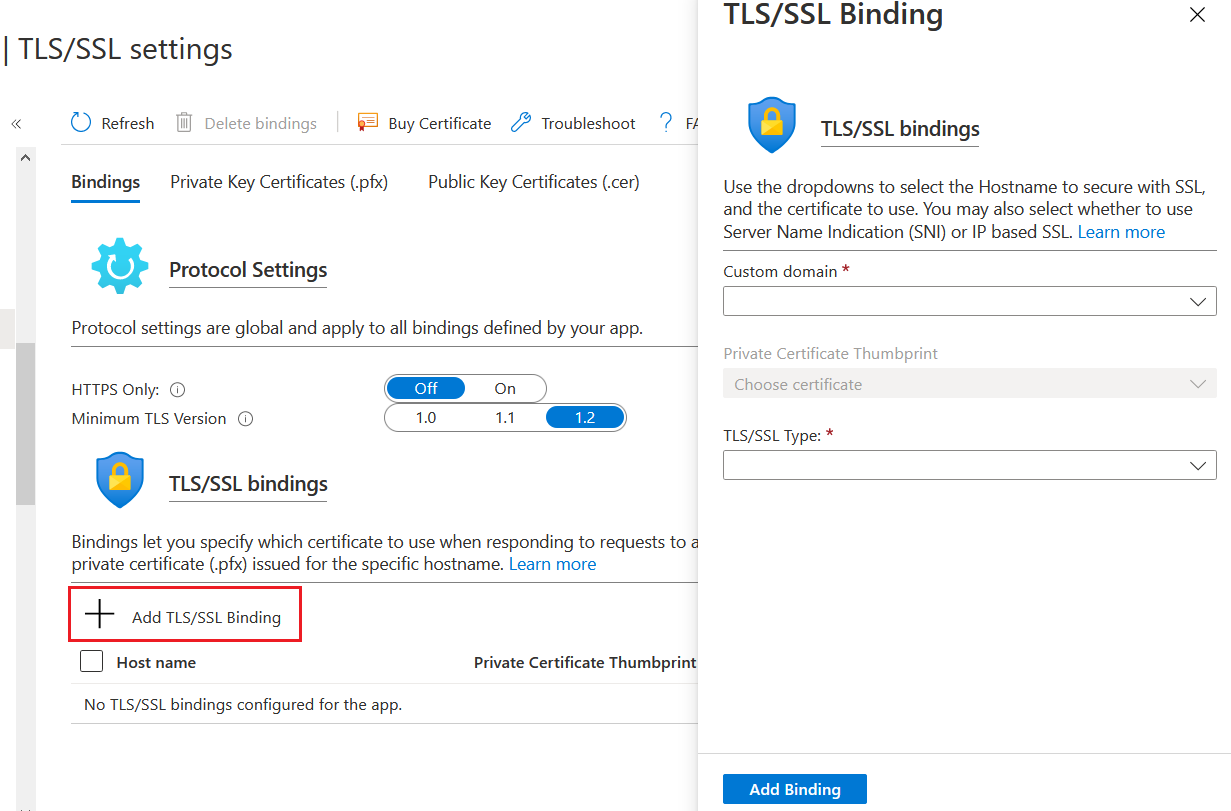
In this screen you need to choose the domain - it is the custom domain you configured, select the uploaded certificate and choose SNI SSL as the TLS/SSL type. And click on Add Binding. And now if you check your custom domains blade you will be able to see the warning is gone.
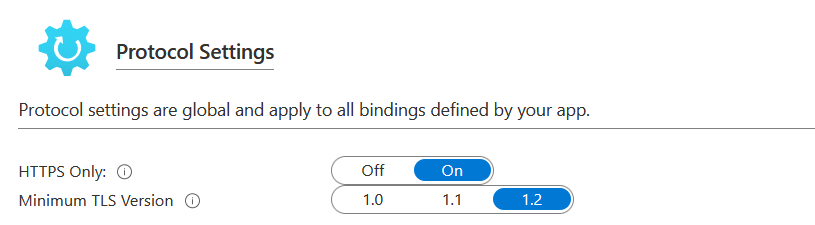
It is recommended to turn on the HTTPS Only option. So that your app service always running on secure mode only. If you browse your app with a http it will automatically redirected to https. And configure your Minimum TLS Version to 1.2 - which is the recommended TLS level by industry standards, such as PCI DSS. Once you configure your TLS version, your app all connections with lower TLS versions.
This way you can create SSL certificate requests, create and use SSL certificate in Azure App Service. Once it is expired, you can execute the same procedure and use the latest certificate.
Reference Links
- Use a TLS/SSL certificate in your code in Azure App Service
- Add a TLS/SSL certificate in Azure App Service
- Secure a custom DNS name with a TLS/SSL binding in Azure App Service
Happy Programming :)
Copyright © 2024 Anuraj. Blog content licensed under the Creative Commons CC BY 2.5 | Unless otherwise stated or granted, code samples licensed under the MIT license. This is a personal blog. The opinions expressed here represent my own and not those of my employer. Powered by Jekyll. Hosted with ❤ by GitHub